To create a spiral:
- Click Wireframe tab > Create panel > Ellipse > Spiral.
- Position the cursor and click to enter the point of origin for the spiral.
- Use the
Spiral dialog to specify the dimensions for the spiral curve:
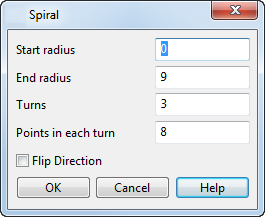
- Enter the Start radius.
- Enter the End radius.
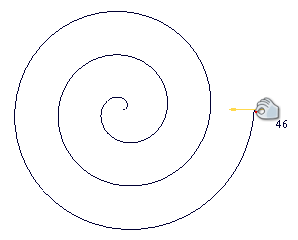
Note: Alternatively, use the drag handles to increase or decrease the radii. The value is displayed alongside the cursor as the handles are dragged. The dialog is updated with the new value:
- Enter the number of Turns to be created on the spiral.
- Enter the number of Points in each turn to indicate the number of points to be created on each turn of the spiral.
Increasing the number of points per turn increases the accuracy of the curve that is produced.
- Click
OK to create the spiral.
Spiral creation mode remains open.
- Create more Spiral objects as required.
- To exit Spiral creation mode, click
 on the Quick Access toolbar.
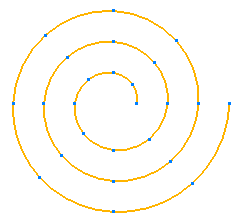
The points on the spiral are then displayed:
- To use curve editing options, select the spiral to display the Curve Tools tab.