The following example shows you how to nest parts containing text items, how to change nesting boundaries, and the impact this can have on text items contained within those boundaries. The part to be nested in this example consists of a polygon within an arc. It also contains a text item within the arc's boundary.
To nest the part and change the nesting boundaries:
- Click Edit tab> Transform panel > Nesting to display the Nesting dialog.
- Select the sheet item in the graphical window.
- Click the Add as organised sheets
 button to register the item as a sheet.
 - Select the three items that make up the part.
- Click the Add as a single part
 button to register the items as a part.
 - Click More options.
- Enter 10 as the Maximum quantity to be nested.
- Click Apply to nest the parts.
The parts are nested, including the text items which are rotated in line with the parts:
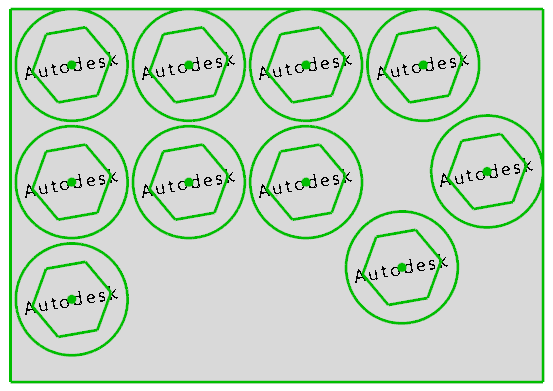 Note: Rotate text label with part is selected by default. Deselect this option if you do not want your text item to rotate in line with the part.
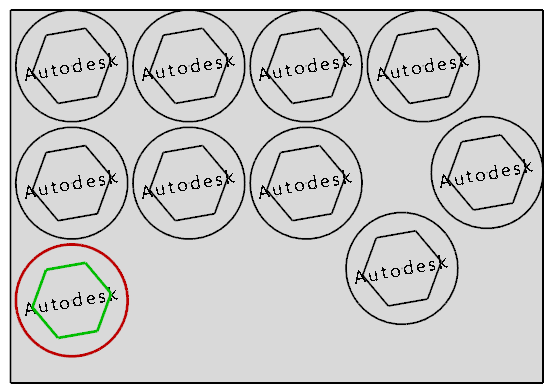
 - With the part selected, click the Choose the boundaries to use for nesting
 button. The Nesting toolbar is displayed.
 - Click the outer boundary formed by the arc. The boundary turns red, indicating that it will not be used when nesting:
- Click
 on the Nesting toolbar to accept the changes to the boundary and close the toolbar.
 - Click Apply on the Nesting dialog to re-nest the parts.
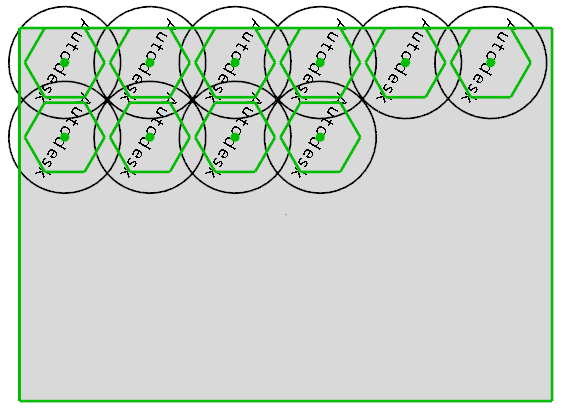
The parts are rearranged to use the inner polygon as the boundary. The arc and text label are also moved, but are no longer considered in the nesting, and overlap the edge of the sheet.