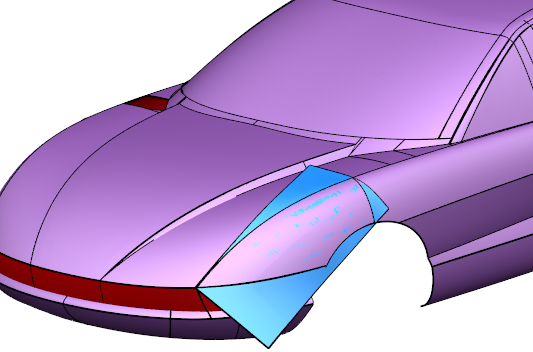
The Shrink-wrap option enables you to generate a non-primitive surface and automatically trim it to fit a mesh.
To generate a shrink-wrap surface:
- Select the mesh.
- In the Mesh Tools tab > Selection panel, choose a triangle selection method.
- Select the triangles you want to shrink-wrap:
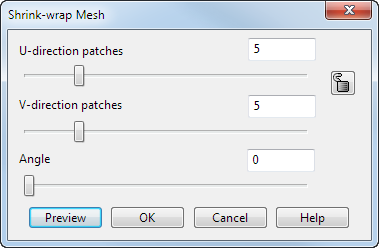
- Click Mesh Tools tab > Create panel > Shrink-wrap. The
Shrink-wrap Mesh dialog is displayed:
- In the
Shrink-wrap Mesh dialog:
- Enter values in the U-direction patches and
V-direction patches boxes to specify how many control points must be used to generate the surface curves in 2D space. To use the same number of control points in both directions, click
 .
.
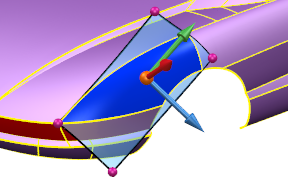
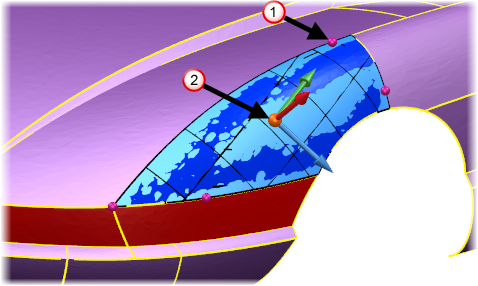
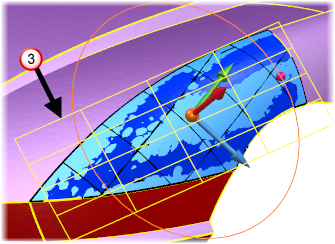
- Enter an Angle or use the slider to manually orientate the shrink-wrap surface.
As you drag the slider, the surface rotates around the active workplane. For example:
-
Before alignment
After alignment
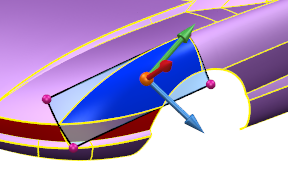
You can also click and drag the graphic handles
 to rotate the surface around the temporary workplane
 .
.
A preview
 is displayed that shows the lateral and longitudinal directions for the re-aligned surface.
- Click Preview to preview the surface.
- Click OK to create the surface and close the dialog.
Note: For trivial meshes with simple curvature, fewer control points are needed. For non-trivial meshes with complex curvature, more control points are needed. - Enter values in the U-direction patches and
V-direction patches boxes to specify how many control points must be used to generate the surface curves in 2D space. To use the same number of control points in both directions, click
|
Before alignment
|
After alignment
|
You can also click and drag the graphic handles
to rotate the surface around the temporary workplane
.
A preview
is displayed that shows the lateral and longitudinal directions for the re-aligned surface.
Click Preview to preview the surface.
Click OK to create the surface and close the dialog.
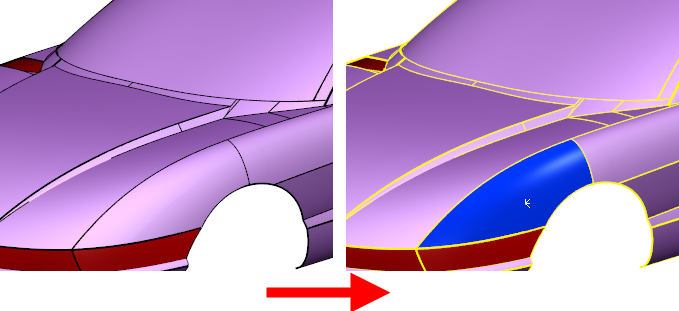
- Click
OK
to create the surface: