To create the solid core using wireframe, define the cross-section of the new solid and an offset. The core is automatically generated and fitted into the relevant feature on the model.
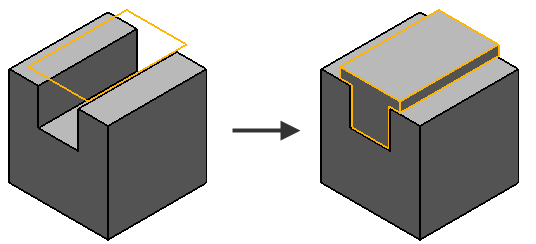
The cross-section of the new solid is defined by a closed and planar wireframe object.
To create a solid core from wireframe:
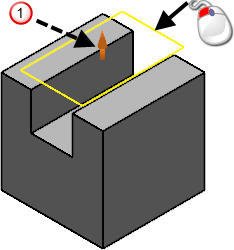
- Make sure that the solid is either active or selected.
- Select a closed and planar wireframe object.
The direction of extraction is shown by the instrumentation
 .
.
- Click Solid tab > Create panel > Core from Wireframe.
- Use the options on the
Solid Core dialog to create a solid core:
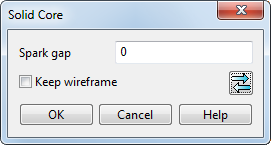
- Spark gap — This is the distance between the core and the cavity. Usually, this is zero because any offsetting can be done more easily by using a negative thickness when machining.

- Keep wireframe — When selected, the original wireframe object is kept in the model.
 — Click this button to reverse the extrusion direction. This is the same as clicking on the wireframe instrumentation on the model.
Tip: If you specify an offset, ensure the original solid has no faults; select the solid and click Solid Tools tab > Fix panel > Solid Doctor to fix faults in the solid. - Spark gap — This is the distance between the core and the cavity. Usually, this is zero because any offsetting can be done more easily by using a negative thickness when machining.
- Click OK to create the core and close the dialog.