Use this dialog to edit arcs. If you are editing a fillet arc, the results of the edits affect the two lines.
Change the arc selection whilst the dialog is displayed by clicking a different arc. Edit the newly selected arc in the normal way.
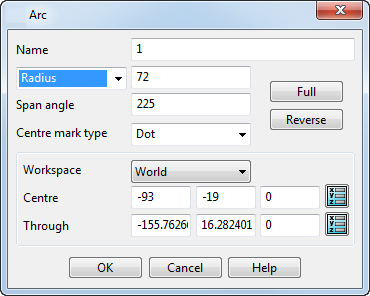
Name — Displays the current name of the selected arc. Type in a new name if required.
Radius/diameter — Shows the radius/diameter of the selected arc and allows you to edit the value.
Span Angle — Shows the span of the arc sector in degrees and allows you to edit the value.
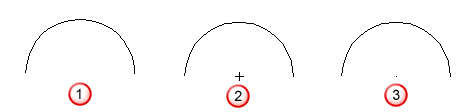
Centre mark type — Select an option in the list to specify how an arc centre is displayed: hidden
 , cross
 , or dot
 .
.
Full — Converts a partial arc into a full arc.
Reverse — Reverses the arc so that the start coordinates become the end coordinates and the end coordinates the start.
Workspace — Select the workspace (world or active) in which to edit the arc from the drop-down list.
Centre — Shows the centre coordinates of the arc. To edit the values, enter the
X Y Z
coordinates or click the
Position
 button to open the
Position dialog where you can use position entry tools.
button to open the
Position dialog where you can use position entry tools.
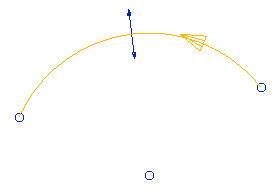
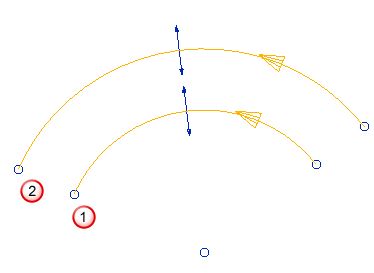
Through — Specifies a point through which the arc must pass. The arc is edited depending on the through point chosen; this is shown below.
- Select an arc to edit.
- Click the
Position
button and select a point for the arc to pass through:
The edited arc
passes through the point entered and the tangents of the end points remain the same as the original arc
.
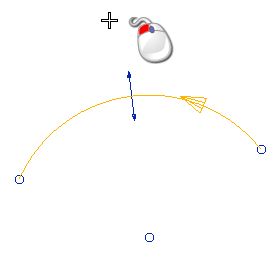
If you select a through point that falls outside of the end point tangencies
 of the original arc
, the arc is reversed:
of the original arc
, the arc is reversed:
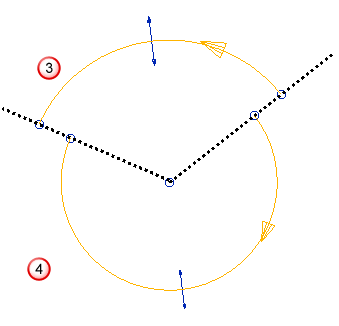
The tangents at the end points remain the same for the original arc and the edited arc.