You can edit a single, existing cut feature, or simultaneously edit multiple cuts.
To edit a single solid cut:
- Enter editing mode in one of the following ways:
- Double-click the
Cut feature
 icon in the Tree Window, or the cut feature on the model, to display the
Solid Cut dialog with the edit options available.
icon in the Tree Window, or the cut feature on the model, to display the
Solid Cut dialog with the edit options available.
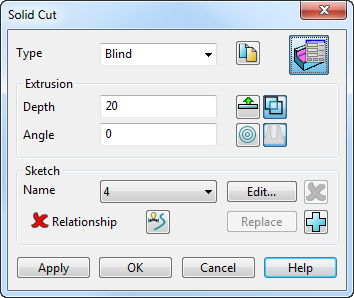
- Click Solid tab > Feature panel > Cut to display the
Solid Cut dialog. Click
 and select the cut to make the edit options available:
- Double-click the
Cut feature
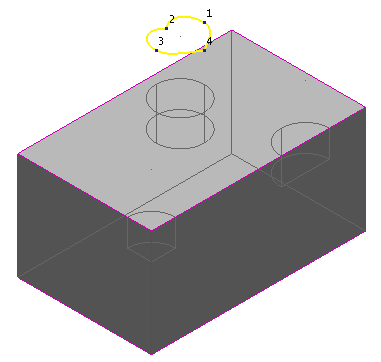
- Select the wireframe of the existing cut by clicking on it or selecting it from the
Name list. The extruded solid of the selected wireframe is highlighted.

- Edit
the wireframe as required:
- Click the
Edit
button to make the Curve Tools tab available. The label on the
Edit
button changes to
Finish. The extruded solid for the selected wireframe is no longer visible.

- Edit the wireframe either graphically or using the commands on the tab.
- When you have finished editing the wireframe, click the
Finish button.

- Click
Apply
to recreate the cut on the solid using the edited wireframe.

- Click the
Edit
button to make the Curve Tools tab available. The label on the
Edit
button changes to
Finish. The extruded solid for the selected wireframe is no longer visible.
- If required,
Replace the selected wireframe of a cut with another piece of wireframe:
- Select the wireframe of the cut to be replaced.

- Select the replacement wireframe
 . The
Replace button becomes available
. The
Replace button becomes available
 .
.
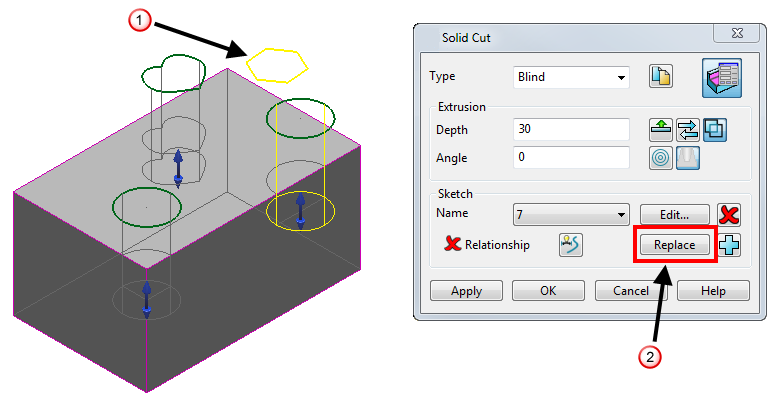
- Click the
Replace button. An extruded solid is created from the replacement wireframe and the extruded solid of the replaced wireframe is deleted. The wireframe of the replaced extruded solid is now visible.

- Click
Apply
to recreate the cut using the replacement wireframe. The wireframe of the replaced extruded solid is left in the model.

- Select the wireframe of the cut to be replaced.
Note: You can edit the wireframe using the mirror, move, rotate, offset and scale commands on the Edit tab.