The Move option allows you to move a group of objects or copy multiples of them by a specified offset.
To move objects:
- Select the objects.
- Click Edit tab > Transform panel > Move to display the
Move toolbar:

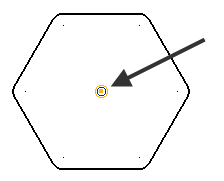
In the graphics window, the move origin marker is placed at the centre of the selection of objects.
The move-origin is used to move the objects. When you move the objects, the origin is moved to the new position and the objects are moved such that they are placed relative to the origin.
If you are moving a single object and you select it at one of its key points, then the move origin is at the key point.
- You can move the marker to change the move origin using one of the following techniques:
- drag the marker to a new position
- click
Move origin
 and click anywhere in the graphics window or enter a new position using the
Status bar.
and click anywhere in the graphics window or enter a new position using the
Status bar.
- drag the marker to a new position
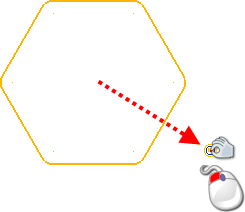
- Use one of the following methods to move the objects:
- Click
 to define the movement of the objects using workplane axes. This is the default mode.
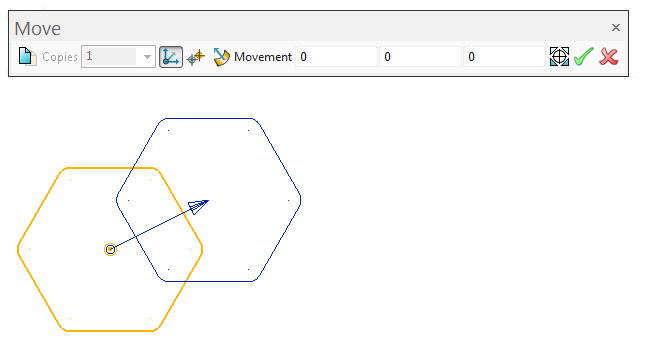
Either enter values for X, Y and Z or graphically click a point to define the movement. As you enter the coordinates, a preview of the transformed items is displayed. Drag the instrumentation to make further modifications before applying the change.
- Click
 to define the movement of the objects using two points:

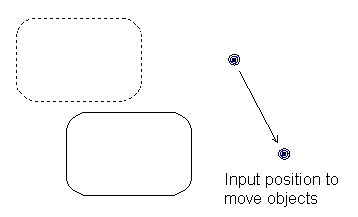
In the graphical window, click to input the first point specifying the direction of movement, indicated by an arrow. Instrumentation dynamically previews the direction of movement as you move your cursor.
Click to input the second point defining the direction of movement. As described above, a preview of the transformed items is displayed.
Enter a value or drag the instrumentation along the defined direction to update the movement distance.
- Click
 to define the movement of the objects using a normal to selected geometry:

In the graphical window, click on the desired object. The move direction will be the normal to the geometry at that point, indicated by an arrow.
Enter a value or drag the instrumentation to define the movement distance.
Note: The last selected mode for defining object movement is remembered within a PowerShape session.The toolbar stays open for further Move operations.
- Click
- Select new objects to operate on using box selection, or the standard Ctrl+Click and Shift+Click operations.
- Click
Apply
 to apply the preview, or click
Cancel
to apply the preview, or click
Cancel
 to cancel the operation.
To copy objects and move the copies by a specified offset:
- Click the
Keep original
 button and enter the number of copies you want in the
Copies box.
button and enter the number of copies you want in the
Copies box.
- Define the movement using one of the options described above.
If you are just moving the objects, they are moved relative to the move origin:
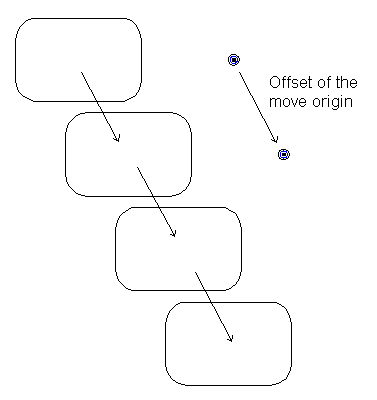
If you are creating multiple copies, the offset of the move origin defines the offset of the copies from each other: