Place a wall that is joined to a mid-end face in another wall. When you drag either of the joined walls, the join is maintained, and the other wall lengthens or shortens accordingly.
- Open a plan view in which the mid-end face is visible.
Tip: If only the ends of the wall with the mid-end face are visible, you may need to adjust the cut plane height. For more information, see About the view range.
- Click Architecture tab
 Build panelWall drop-down
 (Wall: Architectural) and select the desired wall type from the Type Selector.
- Move the cursor over the mid-end face until an endpoint displays, and then click to specify the new wall start point.
- Move the cursor in the desired direction.
- Click to specify the new wall’s endpoint. The join between the walls cleans up as shown.

When you drag either of the joined walls, the wall join moves with it.
Note: When you edit the elevation profile of a wall with a mid-end face that is joined to another wall, the vertical line representing the mid-end face is aligned to the center line of the joined wall, not the actual face of the wall. When you cancel edit mode, the join cleans up and the vertical line moves to coincide with the face of the joined wall.
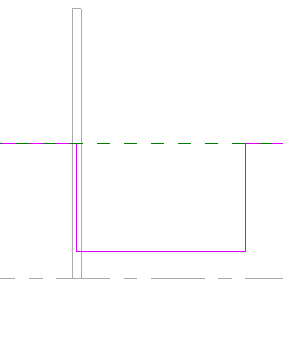
Sketch line indicating mid-end face displays in the middle of the joined wall in edit mode