When you create a stair, railings are added automatically. You can modify stair railings at any time after their creation.
- Select a railing.
If you are working in a plan view, it may be helpful to use the Tab key to select the railing.
Tip: Modifying railings in a 3D view allows for easier selection and better view of your changes. - Modify instance properties of the railing as needed on the Properties palette, or click
 Edit Type to access its type properties.
- To modify the sketch line of the railing, click Modify | Railings tab
 Mode panel
 Edit Path.
The railing line is selected, as follows.
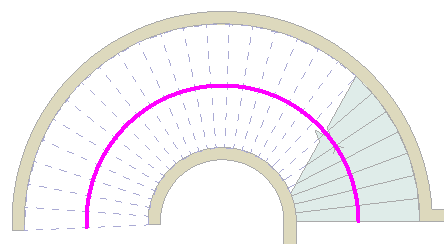
- Edit the selected line as desired.
You are in sketch mode, so you can modify the shape of the line to suit your design. The railing line can consist of connected straight and arced segments, but it cannot form a closed loop. You can resize it by dragging the blue controls. See Controls and Shape Handles and About Splitting Elements. You can move the railing line to a new location, such as the center of the staircase. You cannot draw multiple railings in the same sketch session. For each railing that you sketch, you must finish the sketch before you can draw another railing. You can use the Split tool on the model view of a railing. The Split action will automatically create 2 separate railing sketches.

Modified stairs with center railing