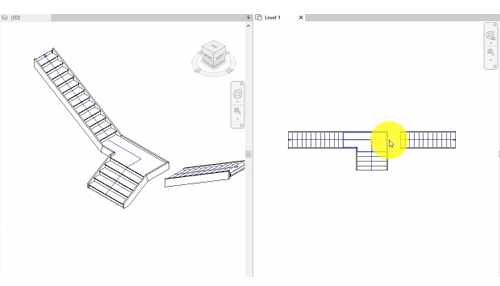
Add a stair in a T-shape with a custom shaped landing.
This video demonstrates the following:
- Place stair runs.
- Reverse the stair direction.
- Convert the landing to sketch.
- Modify the landing sketch.
Transcript
You can create a custom T-shaped stair by starting with a simple 2-run component stair. On the Circulation panel, click Stair.
Draw 2 straight runs to reach the next level. A landing is created automatically to connect the runs.
Select a run to display the run instance properties. On the Properties palette, change the Location Line from Center to Right, and increase the Actual Run Width value. By changing the Location Line, you control the direction in which the run width expands.
Now, drag the arrow control on the wide run leg to make the run shorter. The steps re-balance between the two runs to maintain the elevation.
Use the Flip tool to reverse the stair up/down direction because you want the wide run to be the lower run.
Use the Mirror - Draw Axis tool on the Modify panel to make a copy of the narrow run and reverse its position. Draw a path down the center of the wide run to specify the mirror axis.
Delete the side support on the right edge of the landing because the second run will attach at this location.
To modify the shape of the landing and connect the third run, select the landing, and on the Tools panel, click Convert.
After converting the landing to a sketch-based component, you can click Edit Sketch, and then edit the boundary lines and stair path. Sketch mode is a 2D editing mode.
Click Finish to complete the stair.