A wall’s Location Line property specifies which of its vertical planes is used to position the wall in relation to the path you sketch or otherwise specify in the drawing area.
When laying out compound walls that join, you can place them precisely with respect to a particular material layer of interest, such as the concrete masonry units.
 Video: Setting the Wall Location Line
Regardless of the wall type, you can select any of the following planes, either on the Options Bar (before placing the wall) or on the Properties palette (before or after):
- Wall Centerline (default)
- Core Centerline
- Finish Face: Exterior
- Finish Face: Interior
- Core Face: Exterior
- Core Face: Interior
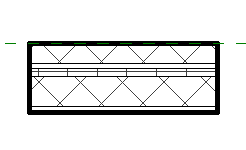
In the following example, with the Location Line value specified as Finish Face : Exterior, the cursor is placed on a dashed reference line, and the wall is drawn from left to right.
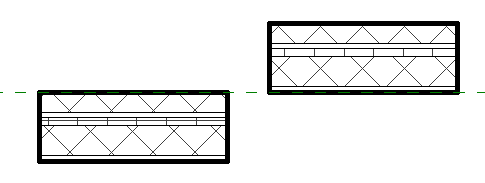
If you change the Location Line value to Finish Face : Interior, and draw another segment along the reference line in the same direction, the new segment is placed above the reference line.
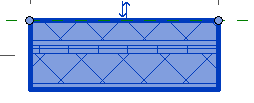
When you select a single wall segment, the blue dots (Drag Wall End controls) indicate its location line.
After a wall is placed, its location line persists, even if you modify the structure of its type or change to a different type. Changing the value of the Location Line property for an existing wall does not change the wall’s position. However, when you use the
Spacebar or on-screen flip controls
![]() to switch the interior/exterior orientation of a wall, the location line is the axis around which the wall flips. So if you change the Location Line value and then change the orientation, it may change the wall position as well.
to switch the interior/exterior orientation of a wall, the location line is the axis around which the wall flips. So if you change the Location Line value and then change the orientation, it may change the wall position as well.
Note that the position of the blue dots does not change until you deselect and reselect the wall.