This procedure describes a general method for creating a chandelier.
You can also use this procedure to create a lighting fixture family that has multiple light sources, and for which you do not want to schedule the light sources or control their lighting parameters individually. The specific steps required will vary, depending on your needs and design intent.

To create a chandelier
- Create the host chandelier family:
- Create the geometry (hardware) for the chandelier.

- Create reference planes that can be used to position the candles in place and lock them to the chandelier.
- Create the geometry (hardware) for the chandelier.
- For the host chandelier family, define parameters:
- Click Create tab
 Properties panelFamily Category and Parameters.
 - In the Family Category and Parameters dialog, under Family Parameters, select Light Source.
- Clear Shared.
- Click OK.
- Click Create tab
- In the host chandelier family, create one candle (light source):
- Create geometry for the candle.
- Put the candle in the desired position on the chandelier, and lock it in place.
- Define the geometry of the light source.
- Define its parameters.
- In the drawing area, move the light source symbol to align it with the candle as appropriate, and lock it in place.
- Create a lighting fixture family to represent a candle of the chandelier. Note: You will nest this family into the host chandelier family, and place multiple instances of this family (that is, multiple candles) in the chandelier. So this family should represent a single light source or candle.
- In this family, create the geometry of the candle. If desired, you can copy and paste the candle geometry that you created in the host chandelier family. Note: In the sample chandelier shown previously, the candle does not have any geometry. Instead, it defines the light source only.
- Define family parameters: Click Create tabProperties panelFamily Category and Parameters. Under Family Parameters, select Light Source, clear Shared, and click OK.
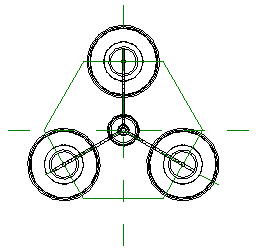
- Define the geometry of the light source.

Geometry of the light source for the chandelier candle
- Define parameters for the light source.
- Save the light source family.
In the following steps, this family is referred to as the candle family.
- In this family, create the geometry of the candle. If desired, you can copy and paste the candle geometry that you created in the host chandelier family.
- Load the candle family into the host chandelier family.
- Place one or more instances of the candle family into the host chandelier family:
- Open the host chandelier family in the Family Editor.
- Click Create tabModel panel
 (Component).
 - Select the light source family from the Type Selector.
- Click in the drawing area to place instances of the light source (candles) in the chandelier.
Use the reference planes to position the candles correctly.
- Lock the candles to the reference planes.

- Link the Initial Intensity parameter of the candle family to the Initial Intensity parameter of the host chandelier family.
When you link these parameters and add a chandelier to a building model, in the project you can adjust the Initial Intensity parameter (or other linked parameters) for the chandelier as a whole. You cannot change the Initial Intensity of individual candles in a chandelier.
- In the host chandelier family, select one of the candles from the candle family.
- Click Modify | <Elements> tabProperties panel
 (Type Properties).
 The Type Properties dialog displays a column with an equal sign in the column heading
 . A gray button displays in this column for each type parameter that you can link to other parameters.
 - Click the gray button in the column for the Initial Intensity parameter (or any other parameter that you want to be able to change for the chandelier in a project).

- In the Associate Family Parameter dialog, select Initial Intensity (or the parameter that corresponds to the type parameter that you selected), and click OK.
- Save changes to the host chandelier family.
Now you can place instances of the chandelier family in the building model.