In this exercise, you add annotations to a plan view of the building model.
|
Before you begin, download the GSG_12_notes.rvt file. Download this zip file (if you have not already downloaded the exercise files for the tutorials.)
Objectives
- Add text annotations to the building model.
- Modify the text location and format.
 Watch the video
Add Notes
- Open project GSG_12_notes.rvt.
- Verify that the 01 - Store Floor floor plan is open.
- Click Annotate tab
 Text panel
 (Text).
- On the Leader panel, click
 (Two Segments).
- In the Type Selector, verify that 2.5 mm Arial text type is selected. If this size is not selected, click the drop-down arrow in the Type Selector, and select 2.5 mm Arial from the list.
- Add a note to the east main space of the building:
- Click in the main floor area of the plan.
- Move the cursor up and to the right, and click to place the first segment.
- Move the cursor horizontally to the right to place the second segment.
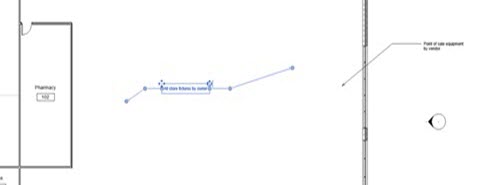
- Enter the text: All store fixtures by owner, and click outside the text field.
- Using the same method, to the front area of the building, positioning this note outside the east wall:
- Point of sale equipment by vendor

- Click outside the text field and press Esc twice.
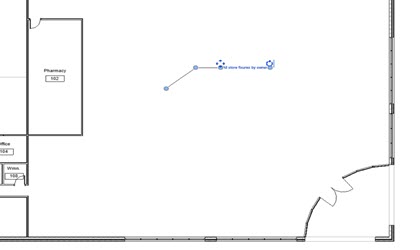
- Select the note for the point of sale equipment, drag the right control to the left to size the note box and wrap the text.
- Click and drag the move control
 to reposition the text, and press Esc twice.
- Select the note for the store fixtures.
- On the Leader panel, click
 (Add Right Side Straight Leader).
- In the drawing area, click the endpoint for the new leader and drag it so that it points to the north curtain wall.