Use shape editing tools to manipulate the surface of a flat (non-sloped) floor, roof, or toposolid by defining high and low points for drainage.
What is Shape Editing?
Shape editing tools are used to manipulate the surface of a flat (non-sloped) floor or roof by defining high and low points for drainage. Shape editing tools are also used to create toposolid elements representing site features in models. You can set how elevations are measured during shape editing in the contextual ribbon.
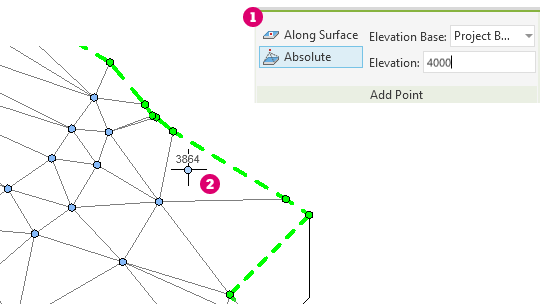
 Elevations are displayed near the cursor during editing
 , making it easier to edit accurately.
Why should you use it?
Use shape editing tools to slope constant thickness elements or the top surface of an element with a variable thickness layer, to model the following:
- A constant thickness floor or roof supported by sloped non-planar framing.
- A variable thickness material used to slope the surface of a horizontal plane (for example, tapered insulation).
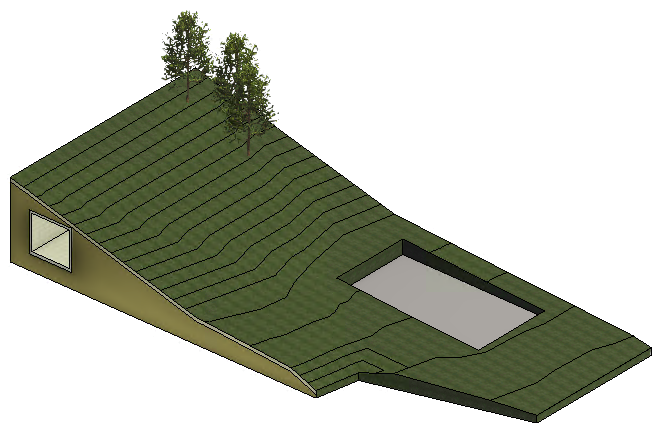
- A variable thickness material below the surface (all materials above will follow the shape of the variable material) as illustrated in this toposolid.
In order to enable shape editing tools, the following conditions must be met:
- Elements must be flat and on a horizontal plane.
- A roof cannot attach to another roof, and the roof cannot be a curtain roof. If either of these conditions is not met, you cannot use the slab shape edit buttons. If these conditions are violated later, by element editing, the slab shape edit will cause an error with a callback, allowing the user to reset the slab shape edit.
How do you use shape editing tools?
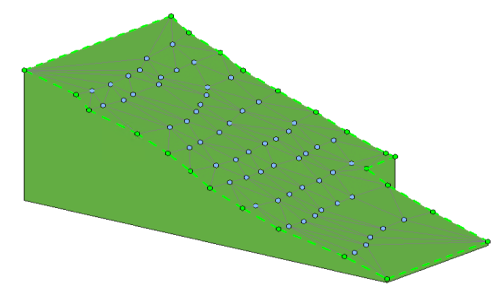
The shape editing tools allow you to transform a flat slab element, roof, floor, or toposolid into an element with a complex sloping surface. The surface can slope in multiple directions with different slope angles.
One application for a shape edited slab could be a roof on a large building. Use shape editing to add internal drains to the roof, built using sloped insulation. The shape editing tools display on the contextual tab. Use Pick Supports to split the roof element at the supporting beams. This also adjusts the position of the roof if the support and the roof are not aligned. You can click to add a split line to further divide the roof.
If the design intent is to have a flat portion of the slab while others are variable, adjust the structure of the roof type. In this example, the insulation layer is set to be variable. Now the bottom of the slab remains flat and the insulation layer, and all layers above it, are sloped.
When adding points during shape editing, use the Elevation Base setting to define the relative elevation of the point. You can choose to measure elevations from the current level, the project base point, the survey point, and the internal origin. You can determine whether the points are added at an absolute elevation from the selected datum, or offset a specified distance from the existing surface.