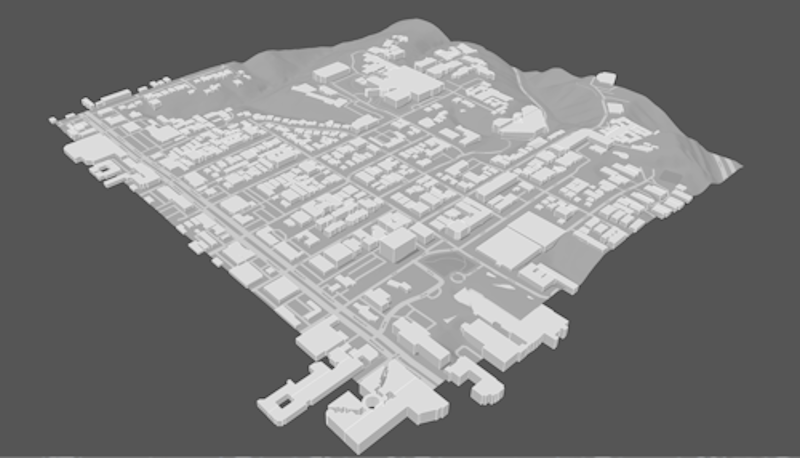
Forma to Revit workflow allows design teams to create proposals with georeferenced real world data.
Note From Autodesk
This Have You Tried topic comes to us from a member of our customer community.
Tino, a licensed architect, specialized in historical rehabilitation, equestrian design, and small residential projects. Transitioning to BIM Management in 2012, he brings over 30 years of Autodesk expertise, focusing on Revit since 2007. An Autodesk Certified Professional skilled in C#, Python, and Dynamo, he has worked as a Revit and Navisworks specialist at Autodesk and is now BIM Manager at CUBE3, contributing to the Forma pilot program. He is passionate about quality, innovation, and workflow optimization to enhance the client's vision.

In this topic Tino covers how you can use Autodesk Forma and Revit together to create a georeferenced model with context.
Learning Summary
- Create a new project in Forma using georeferenced real-world data.
- Import and manage the contextual data in your project.
- Send you project data to Revit for further desing and analysis.
Go to your Forma Hub to try his workflow.
Background
In the AECO industry we are often faced with the need to create proposals for projects with little information or backgrounds. This Forma to Revit workflow will allow design teams to quickly create proposals with real world data that are georeferenced and allow analysis of crucial elements that dictate its success.
Prerequisites
- Revit (versions 2022, 2023, 2024, and 2025 currently supported).
- Autodesk Forma (included in the AEC Collection).
- Revit add-in from the Extensions tab in Forma.
Part 1 - Creating a New Project In Forma
Watch the tutorial below produced by the Forma team.
- Log in to Forma and create a new project and new site with it.
- Type the site’s address.
- Specify the map area.
The map area will define the geographic boundaries for your project, where you can add objects and run analyses. To change the map area, you can either zoom in and out to adjust size or pan to adjust position. The maximum project size is approximately 2x2km (1.54 square miles).
- Order contextual data.
You will see an expanded view of this data provider if you click on a data source. Here, you can read relevant information about the data source, what kind of license the data is covered by, and the quality of the data.
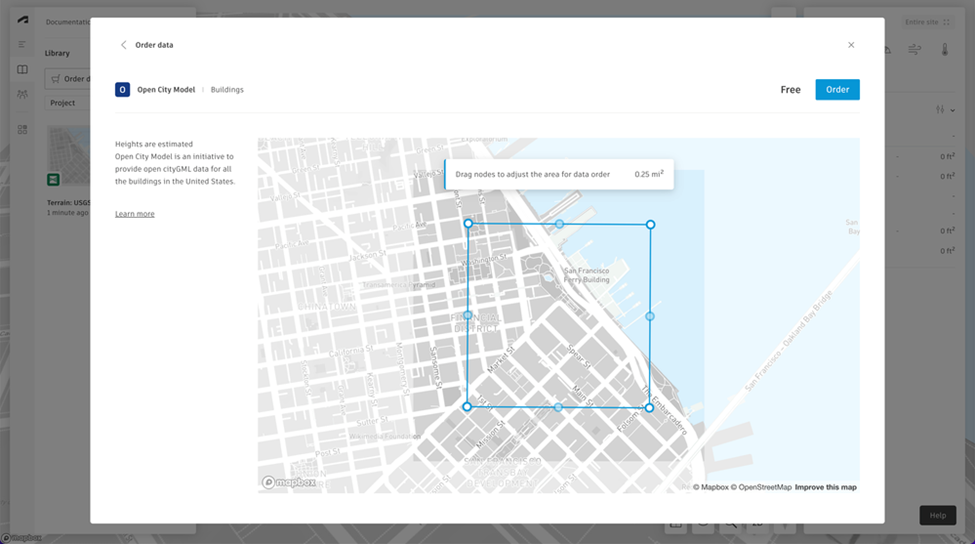
To order a data set, adjust the boundaries of the area you'd need data for by editing the blue polygon with nodes, as shown in the image below. In the top right corner, you can see the price of the data - some data sets are provided free of charge.
Click Order when you are satisfied with your selection.
- Add the ordered data to the project.
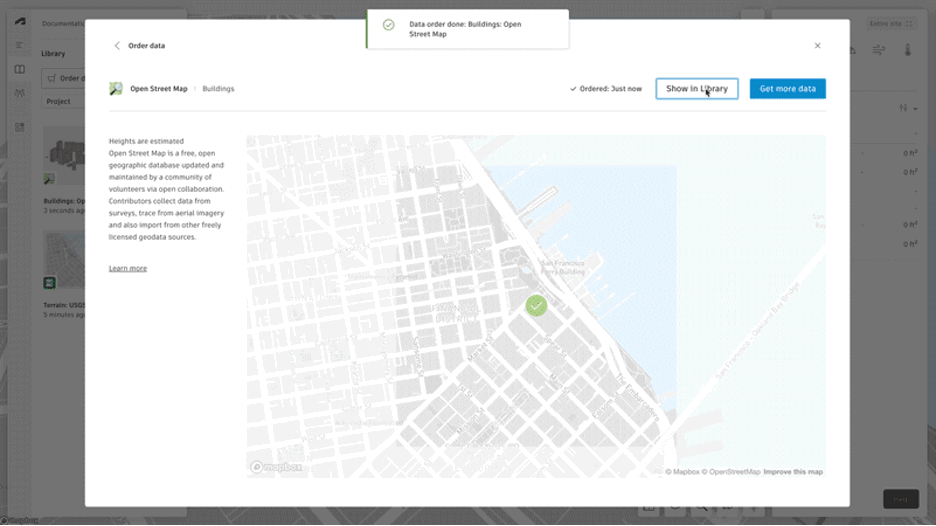
After seeing a success message, you can now add the data to your project. You can choose to order another data source or go to Library.
To run an analysis you must select a property boundary. Use the provided tools on the Limits toolbar to pick an existing boundary. You can Trace an existing shape or draw with the Freeform option.
Library is where the data is located after you have ordered. You can access Library from the sidebar by clicking on the book icon.
If you click on Preview when hovering on the data in Library, you get the option to place the data to the 3D scene. Here you can choose what parts of the data you want to add to the scene.
- Send to Revit.
In Forma, from the list of your proposals in the left-side panel, left-click on the 3-dot menu of the proposal you'd like to work on and choose “Send to Revit” from the menu.
Note: If you are bringing data back into Forma from Revit, but want to leave this proposal unchanged, first duplicate the Forma proposal, and send this new proposal to Revit.Both Classic and regular versions of the Add-in create a new Project Base Point in the Revit project matching the georeferenced system of the Forma project. If you already have a georeferenced local Revit project, we recommend syncing the Forma proposal into a new, empty Revit project and then linking the new project into the existing one.
Part 2 - Creating the Project in Revit
Watch the tutorial below produced by the Forma team.
- Create new project in Revit and apply any template you wish.
- Load From Forma.
Open Revit and create a new project. In the Massing and Site tab, find the Load Proposal button.

Choose your options for what kind of data you want to load into Revit.
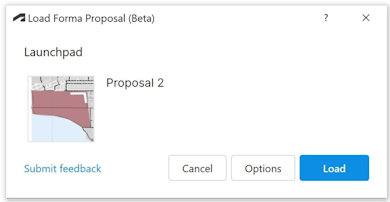
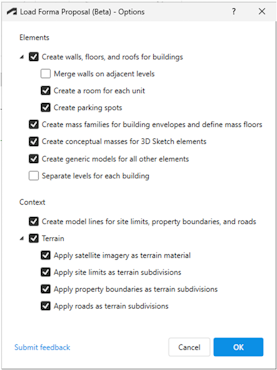 Note: Some items in the above Options dialog are only available in Revit 2024 and later.
 - Press OK, then Click Load.
After a few steps are completed you will have Revit things!
Location and Georeferencing
Forma geolocation will overwrite any location data in the Revit file. The Add-in will create a new Project Base Point in the Revit project matching the georeferenced system of the Forma project, using the UTM coordinate system.
For placement of Forma data in Revit, we use a couple of fallback approaches. For elevation, we use the lowest of the floors for buildings with floors. If there are no floors, then we use the bottom of the bounding box of the buildings. If there are no buildings, we use the bottom of the terrain. Horizontally, we use the same logic to find the center of the Forma proposal to align with the center of the Revit project. This logic is used regardless of what options are set in the Load Forma Proposal - Options dialog.
Conversions
| Forma Element | Can be Converted to Revit Elements |
| Line Buildings | Building Elements such as Walls, Floors, and Roofs or massing elements like Mass families with mass floors, or Generic models. |
| Basic Buildings | |
| Houses | Generic Models |
| Vegetation | Generic Models |
| Site Limits | Model Lines and/or Toposolid Subdivisions (2024+ only) |
| Zones | No Conversion |
| Constraints | Generic Models |
| Roads | Model Lines and/or Toposolid Subdivisions (2024+ only) |
| Railroads | No Conversion |
| Generic Volumes | Generic Models |
| Generic Surfaces | No Conversion |
| Generic Lines | No Conversion |
| 3D Sketch Elements in Building Layer | Conceptual Mass Instance or Generic Model |
| 3D Sketch Elements in Generic Layer | Conceptual Mass Instance or Generic Model |
| Ordered Buildings | Generic Models |
| Ordered Property Boundaries | Model Lines and/or Toposolid Subdivisions (2024+ only) |
| Parking (on building floors not from extensions) | Revit Parking families |
| 3D Elements from Imports or Extensions | Generic Models |
| 2D Elements from Imports or Extensions | No Conversion |
Using Existing Georeferenced Revit Data
If there is an existing Revit project that you don't want to overwrite with location data, but want to analyze the model in Forma, we recommend the following workflow. Create a new Revit project, Load the Forma Proposal into it, then Link and Bind the Revit file into it. You can now use the Update Proposal functionality to send specific Revit data to Forma, make changes to the Revit data, and iterate.
Existing Revit files often have far more data than is useful for Forma analysis, so we recommend using view filters to curate the data that is pertinent for Forma. Interior details, stairways, railings, and furniture will add unnecessary information to analysis, create heavy mesh geometry in Forma, and slow data synchronization.
Known Limitations
- The FormIt Converter for Revit Add-in that is delivered in Revit needs to still be available to convert 3D Sketch elements into Revit geometry.
- Load From Forma will overwrite existing Revit location data.
- If there are Design Options in the Revit File you're loading into you may need to "accept primary" in order for Update functionality to work in Forma Add-in 0.9.3.
- Although you can update Forma projects from Revit many times, multiple Loads from Forma to Revit are not supported.
- Update mechanism will only update an existing proposal, not create a new one.
- Updated meshes from Revit are not yet eligible to be edited in Forma with 3D Sketch tools.
- Revit edits to Terrain, Roads, and Site Limits are not updated to Forma.
- Linked Revit data is not Updated to Forma.
- Revit 2025 introduces a new smooth shading option for Toposolids. This improves the display of the satellite image on the Toposolid, but there is a difference in the handling of the placement of the image on the Toposolid face between the two modes. The Revit team is investigating this issue. With loading a Forma proposal in Revit 2025 with the latest version of the add-in, the satellite image will display properly in the smooth shading mode, but when smooth shading is disabled, the image will be offset from its proper location, and the image will be distorted where there are regions of large changes in elevation. A file loaded in Revit 2024 and brought forward to Revit 2025 will show similar errors. Revit documentation here.
Conclusion
The Forma to Revit workflow represents a significant advancement in BIM project initialization, offering architects and design teams a streamlined process for creating georeferenced projects with rich contextual data. This integration between Forma and Revit eliminates many of the traditional pain points associated with starting new projects, particularly when working with limited initial information.
- Rapid project setup with accurate geographic data.
- Seamless integration of real-world contextual information.
- Automated georeferencing capabilities.
- Support for iterative design processes through update functionality.
While there are some current limitations to be aware of, particularly around multiple loads and certain data updates, the workflow provides a robust foundation for architectural proposals and early-stage design work. By leveraging these tools, design teams can make more informed decisions earlier in the project lifecycle, ultimately leading to better-conceived and more contextually appropriate architectural solutions.
For architectural teams looking to optimize their project initialization process, this Forma to Revit workflow offers a powerful solution that combines efficiency with accuracy, making it an invaluable addition to the modern architectural design toolkit.
For more information about Forma, see https://www.autodesk.com/products/forma/overview.