You can connect conduit to electrical and mechanical equipment that has a connector available.
Conduit connectors can be individual or surface connectors. When you connect to a surface connector, you enter surface connection mode. In this mode, you can define the connection point for the surface connector by dragging it to a new position or by specifying temporary dimensions.
To add additional surface connectors, you must edit the family for the desired equipment. See Working with Connectors.
- Click Systems tab
 Electrical panel
 Conduit.
 - From the Type Selector, select the conduit type (with fittings or without) that you want to place.
- On the Options Bar, specify the diameter, offset, or bend radius.
- In the drawing area, draw conduit and move the cursor to the equipment to highlight the surface to connect to.
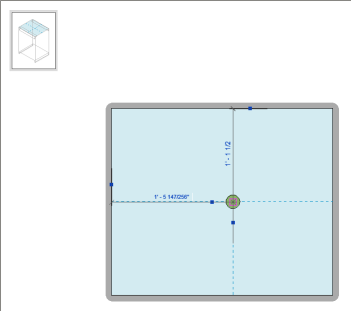
Revit enters surface connection mode. In this mode, you can move the position of the connector on the surface, complete the connection as is, or cancel the connection.
- To move the connector, drag the connector snap to the desired location, or enter temporary dimensions for the desired location.
- To complete the connection and exit surface connection mode, click Surface Connection tabSurface Connection panelFinish Connection.
You can connect conduit to equipment in plan view, elevation view, or 3D view.