Camera Editor Decoupling
The decoupling of the Camera Editor is complete, making it possible to access all properties via the Python API. Menus and quick access icons have been added, making it easier to locate options and access frequently used tools. Use the search, filtering, and collapse/expand controls to locate cameras and viewpoints in the Tree List. Split the Tree List into two views for easier sorting/grouping. Improved the loading and saving of tracks and viewpoints. Also, when working with tracks, the number of tracks selected in the Tree List determines the number of tracks displayed in the Track View. And lastly, properties can now be changed on multi-selection for cameras and viewpoints.
Search Bar and Filtering
Video captions: You can also use now the new filters for a faster and easier search.
The Search Bar and filtering provide live-search and filtering capabilities within the Camera Editor.

Entering one character hides all cameras with names that don't include that character. Search by name, using the Search Bar. Only single search terms are supported.
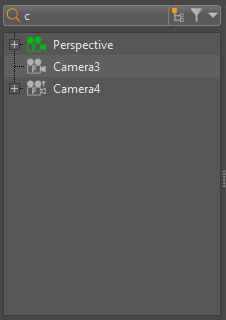
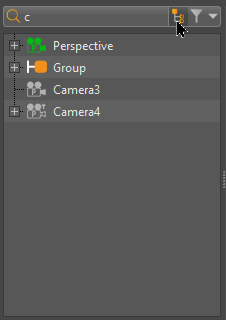
 Toggle Search Depth - Toggles between flat and recursive matching. When disabled, only top-level matches appear. When enabled, matches deeper in the hierarchy appear.
Original Flat Match Recursive Match 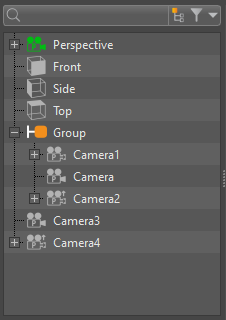
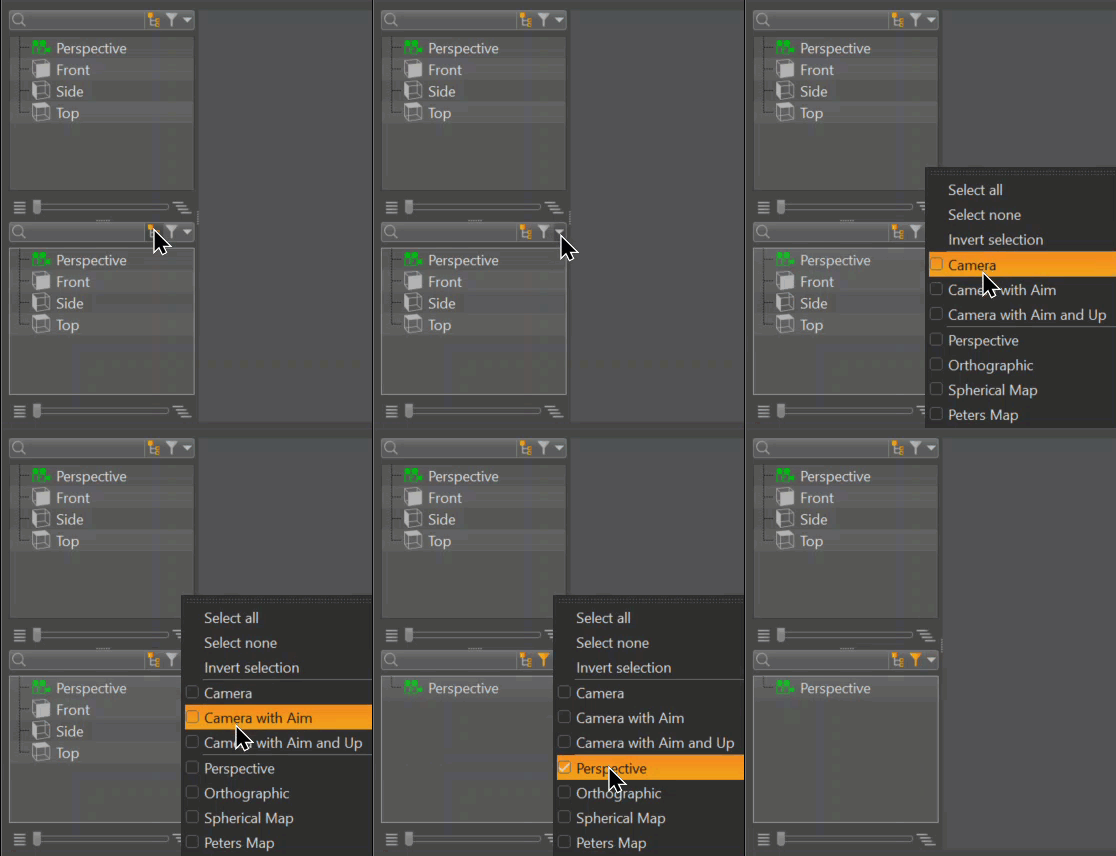
 Toggle Type Filter - Activated once a filter is performed. The cameras displayed are the result of this filter. It is automatically deactivated when the Select none filtering option is selected.
 Filter Selection menu - Use these options for configuring the filter settings. Use it, for example, to toggle between all cameras and only aim and up cameras.
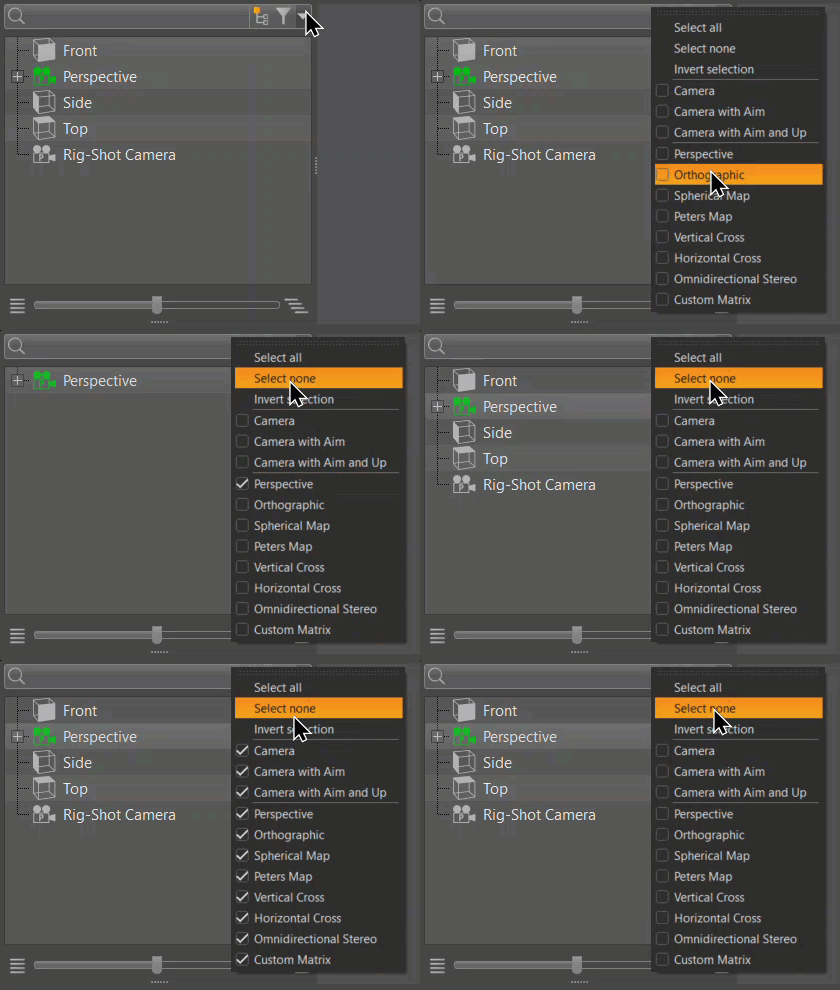
The Filter Selection menu contains all the ways you can filter cameras, from type to the following. Use these filtering options in conjunction with a search term to further define a search.
Select All - Displays all items, which is the default.
Select None - Clears the filtering selection, reloading all items in the tree list.
Invert Selection - Displays all previously unselected items only.
Camera - Displays only all cameras.
Camera with Aim - Displays only all cameras with an aim.
Camera with Aim and Up - Displays only all aim and up cameras.
The remaining options display only that specific viewpoint.
Tree List
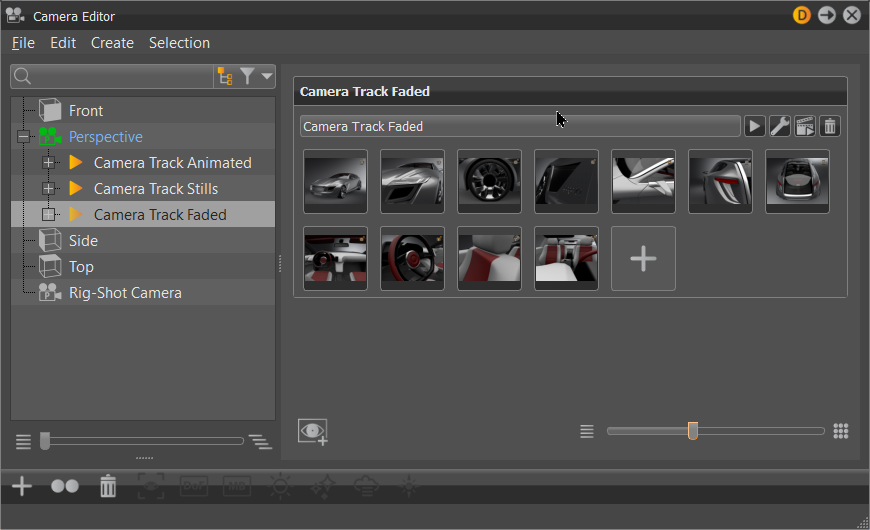
The Tree List on the left lists all scene-contained cameras, camera tracks, and viewpoints, which can be grouped.
![]()
When a camera track or viewpoint is selected, its parent node text is highlighed blue.
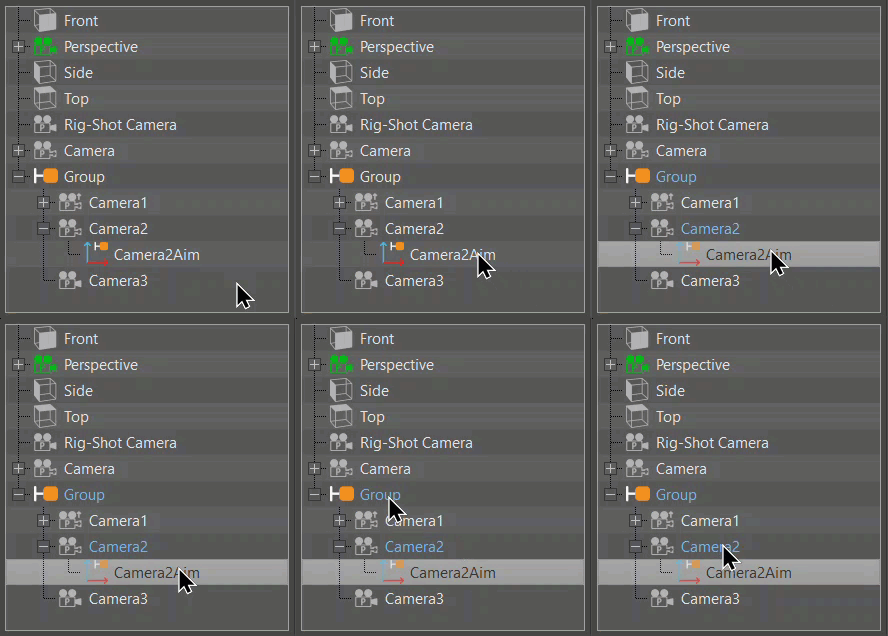
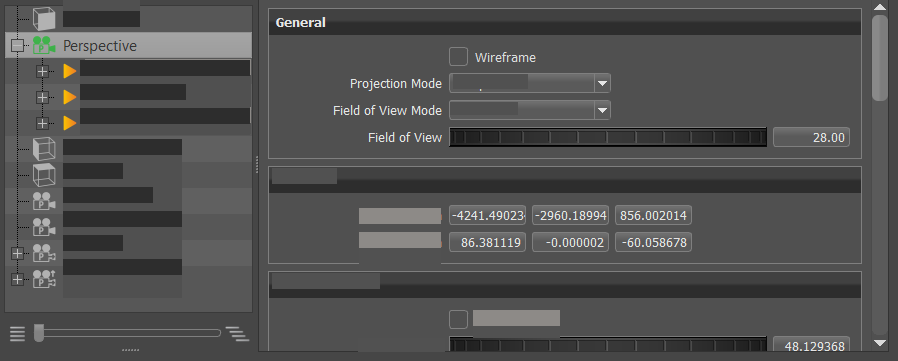
Double-clicking a camera activates and connects it to the Render Window. Clicking the camera loads its parameters.
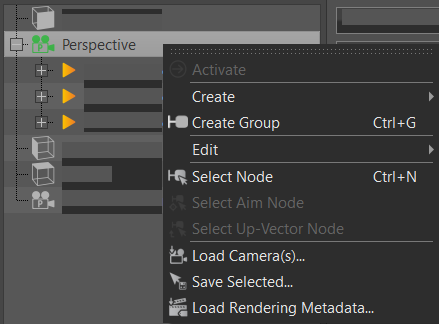
Right-clicking a camera accesses a context menu with options for creating, editing, activating, selecting, saving, and loading. For information on these options, see the Context Menu.
Tree List Controls
Video captions: And, close or expand the Tree View. Additionally, you can split the Tree View, which can be very helpful for navigating within a huge scene.
Drag the slider at the bottom of the tree or click its buttons to expand and collapse the Tree List.
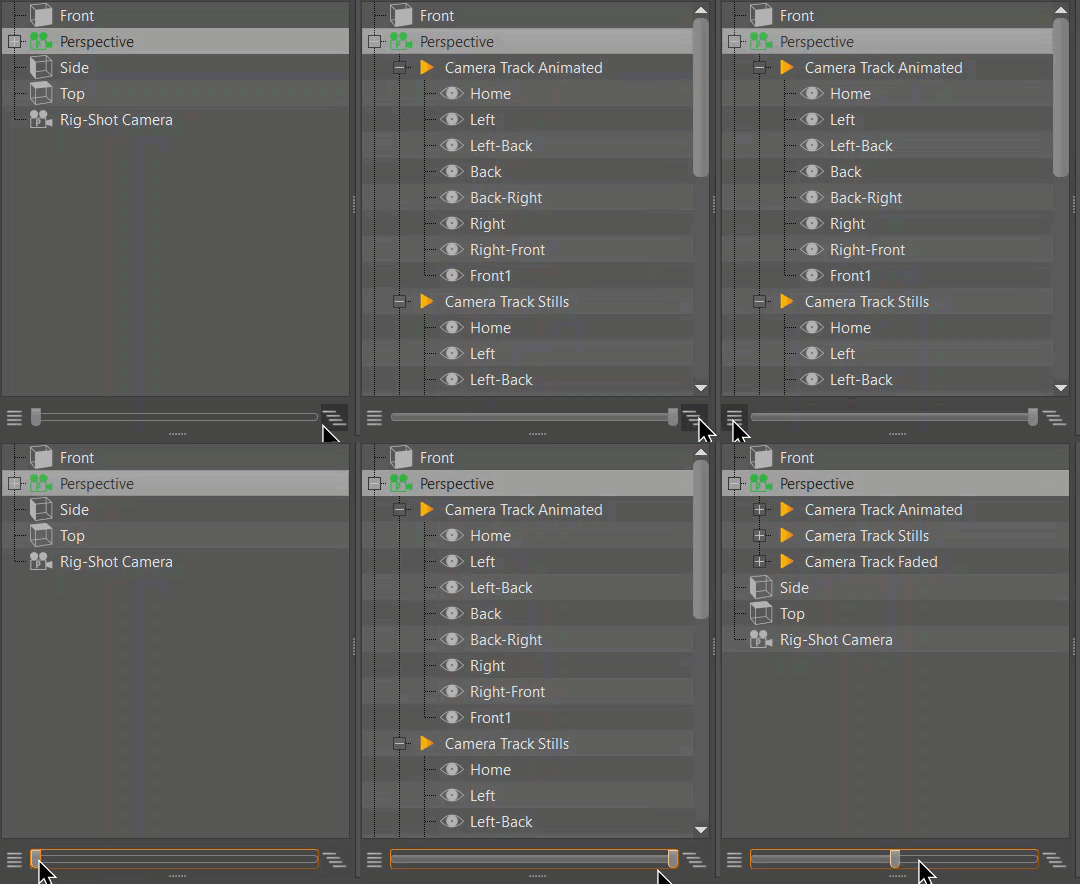
Click-drag  to expose a second tree list.
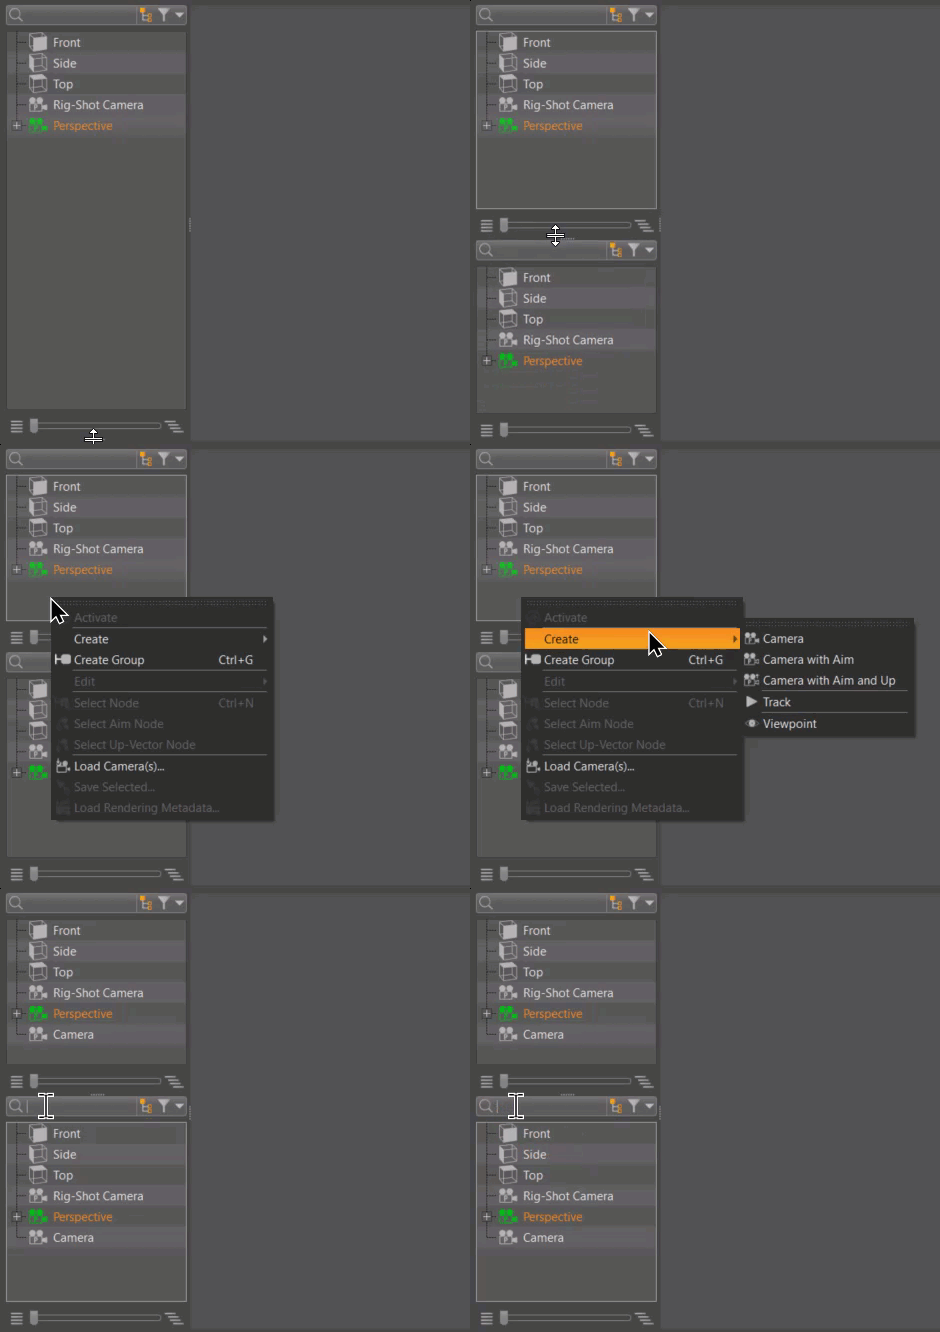
One tree list can display search and filter results, while the other is unaffected. Drag and drop cameras from one tree into the other.
Attribute Changes
These are the changes found in the Attributes:
In Camera Settings > Animation, the Animation option used for turntable animations was split into two options:
Turntable - Creates an animation that rotates the camera 360° counterclockwise around the perpendicular axis of the focused object. Double right-click an object to center the camera on that point and locate the center of the turntable. You can also use Zoom To to make the center of the turntable the same as the selected object. Aim cameras will use the rotation pivot of the aim node as the pivot of the turntable. Playback starts when Play is pressed. The duration of the 360° rotation can be set in Animation Duration.
Animation Duration - Sets the length in seconds of the animation playback. The shorter the duration, the faster the animation rotates.
In 2023.1 In 2023.2 

In Advanced > Collision Detection, the Algorithm attribute now has a label.
Track View
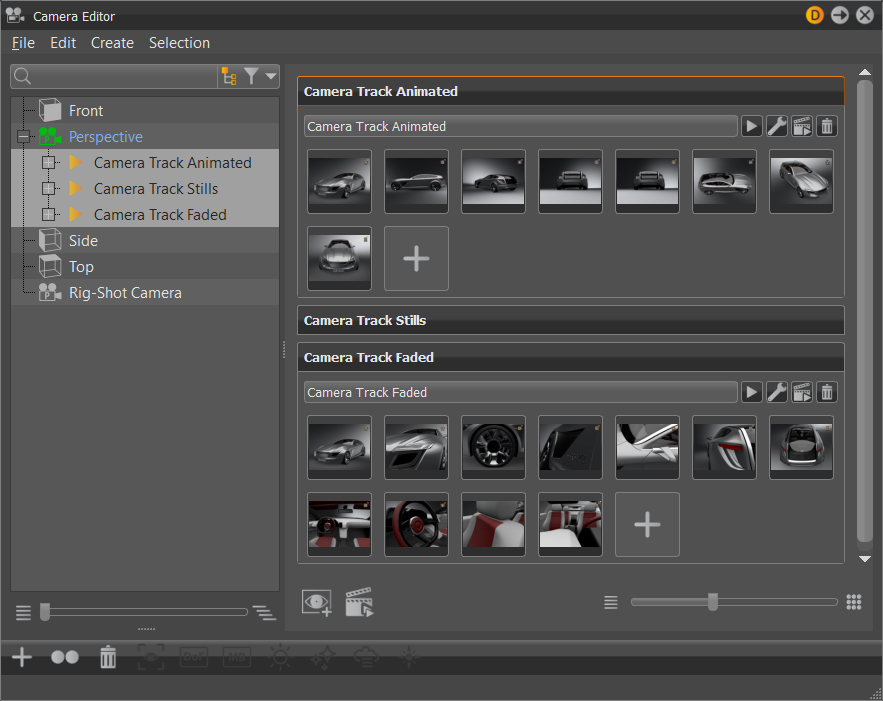
Video captions: Also, the Track View is now different and only the selected tracks will be visible. Additionally, you can update the preview thumbnails for a single track or for all tracks.
The following changes were made to the Track View:
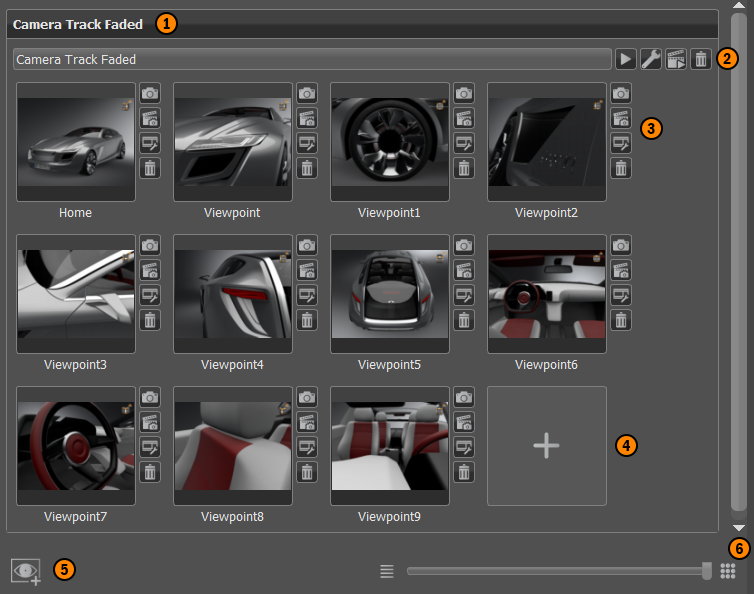
As of version 2023.2, the number of tracks selected in the Tree List determines the number of tracks displayed in the Track View.
Video captions: You can also do a multi-selection on cameras like you are already used to, within the Light or Material Editor, where different values will be marked in yellow, and you can change values for multiple cameras in one go.
Before 2023.2, all tracks where listed, regardless of tree list selection.
| One Track Selected | Multiple Tracks Selected |
|---|---|
 |
 |
To the
 Track Controls, we added
  , which re-renders all previews inside the track.
To the
 Viewpoint Controls, we changed the Recapture icon to
  .
.We also added these controls, which affect the specific viewpoint:
 Update Preview - Re-renders the viewpoint with the current scene settings.
 Show Animation Properties - Opens the Animation Properties dialog for setting the name, fade-in time, animation duration, pause time, override track settings, and hotkeys.
We also added these quick shortcuts:
 Add Track creates a new empty track in the Track View and Tree List.
 Update Previews (which is only available when multiple tracks are selected) re-renders and updates all previews for the selected tracks in the Tree List.
QuickActions Bar
![]()
The following icons were added to the QuickActions Bar. Note that the icon for Toggle Glow was updated.
 Set Current View - Updates selected viewpoint with the current position and orientation.
 Toggle Glare - Toggles the glare effect on or off.
 Toggle Glow - Toggles the glow effect on or off.
 Toggle Fog - Toggles the fog effect on or off.
 Toggle Lens Flare - Toggles the lens flare effect on or off.
 Activate - Activates the selected camera and connects it to the Render Window.
 Delete (Del) - Deletes the currently selected camera, viewpoint, or track.
 All - Pastes all attributes.
 Camera Attributes - Pastes the general camera attributes.
 Tonemapping - Pastes only the camera tonemapping attributes.
 Color Correction - Pastes only the camera color correction attributes.
 Blending - Pastes only the camera blending attributes.
 Reset View - Resets the view to its initial settings.
 Camera - Creates a camera with a perspective view. Perspective view is similar to the view of human eyes. Objects further away seem smaller than objects right in front.
 Camera with Aim - Creates a separate node for the camera and aim. Each node is selectable and can be moved in the Render Window.
 Camera with Aim and Up - Creates a separate node for the camera, aim, and up. Each node is selectable and can be moved in the Render Window.
 Track - Enables you to use the camera animation within the Clip Maker. To do so,
  Select Aim Node - Selects camera aim node in the Scenegraph.
 Select Up-Vector Node - Selects camera up-vector node in the Scenegraph.