Volumetric Rendering
We added volumetric rendering to 2024.2 to bring complex phenomena such as fog, dust, god-rays, clouds, smoke, and fire, to life for visually stunning effects. This feature enables better integration of your 3D model into environments, creates more realistic scenarios, and enhances the emotional impact of designs.
Video captions: I am also very excited to tell, that we can now work with volumes. That means you can now improve your visual quality of your scenes by adding volumetric effects in OpenGL and raytracing.
You can, for example, add clouds to your scene. This will look so much more realistic as they are 3D volumes, interacting with the scene much more naturally, than just a 2D effect.
You can also easily create a Scatter Volume, which is perfect for particles being in the air, like this foggy scene, for example.
Or you create light effect where you can see the cones of the light, like in this studio. The volumes rely heavily on lights; therefore, we implemented a new setting which tells how the light should affect the volumes.
For changing the appearance of the volumes, you need to change the settings of the assigned volume material. Like the color or density denisity.
As a first start, when working with VDB volumes, you can download some free examples from the internet, or use software like Maya, Houdini or EmberGen to create your effects, like the jet streams that I am creating here to use along with clouds in my scene.
But that’s not all. You also can import a complete sequence and use animated volume effects, which brings so much more life and emotions to the scene.
VRED uses volumetric rendering to simulate the interaction of light with the volume. By accurately calculating how light rays travel through the volume, you can generate stunning visual effects that mimic the behavior of light in real-world environments.
To create a volumetric rendering in VRED, you start by defining the volumetric data. This can be done by importing and dynamically streaming external OpenVDB and NanoVDB grids (see Creating a Volume) or by creating a volume from scratch in VRED. Voxels are used to store information about properties like density, color, and opacity, which determine how light interacts with the volume.
Once the volumetric data is set up, VRED employs volume raytracing, which traces the path of light rays through a volume, taking into account factors like absorption, scattering, and the emission of light within a medium. With this, VRED accurately simulates the behavior of light as it interacts with the volumetric data.
The result is a visually compelling rendering that showcases the intricate details and realistic lighting effects of the volumetric object. Whether it's the soft glow of sunlight filtering through clouds or the dynamic movement of smoke, VRED's volumetric rendering capabilities enable you to create captivating and life-like visualizations.
Volumes are supported in OpenGL, CPU raytracing, and GPU raytracing. Therefore, you can enhance your design presentations, virtual prototypes, or visual effects with stunning realism and immersive experiences, by leveraging volumetric rendering in Autodesk VRED.
In 2024.2, volume emissions don't currently work in Photon Tracing mode when CPU raytracing.
This feature enables better integration of your 3D model into environments, creates more realistic scenarios, and enhances the emotional impact of designs.
Volumes in the Scenegraph

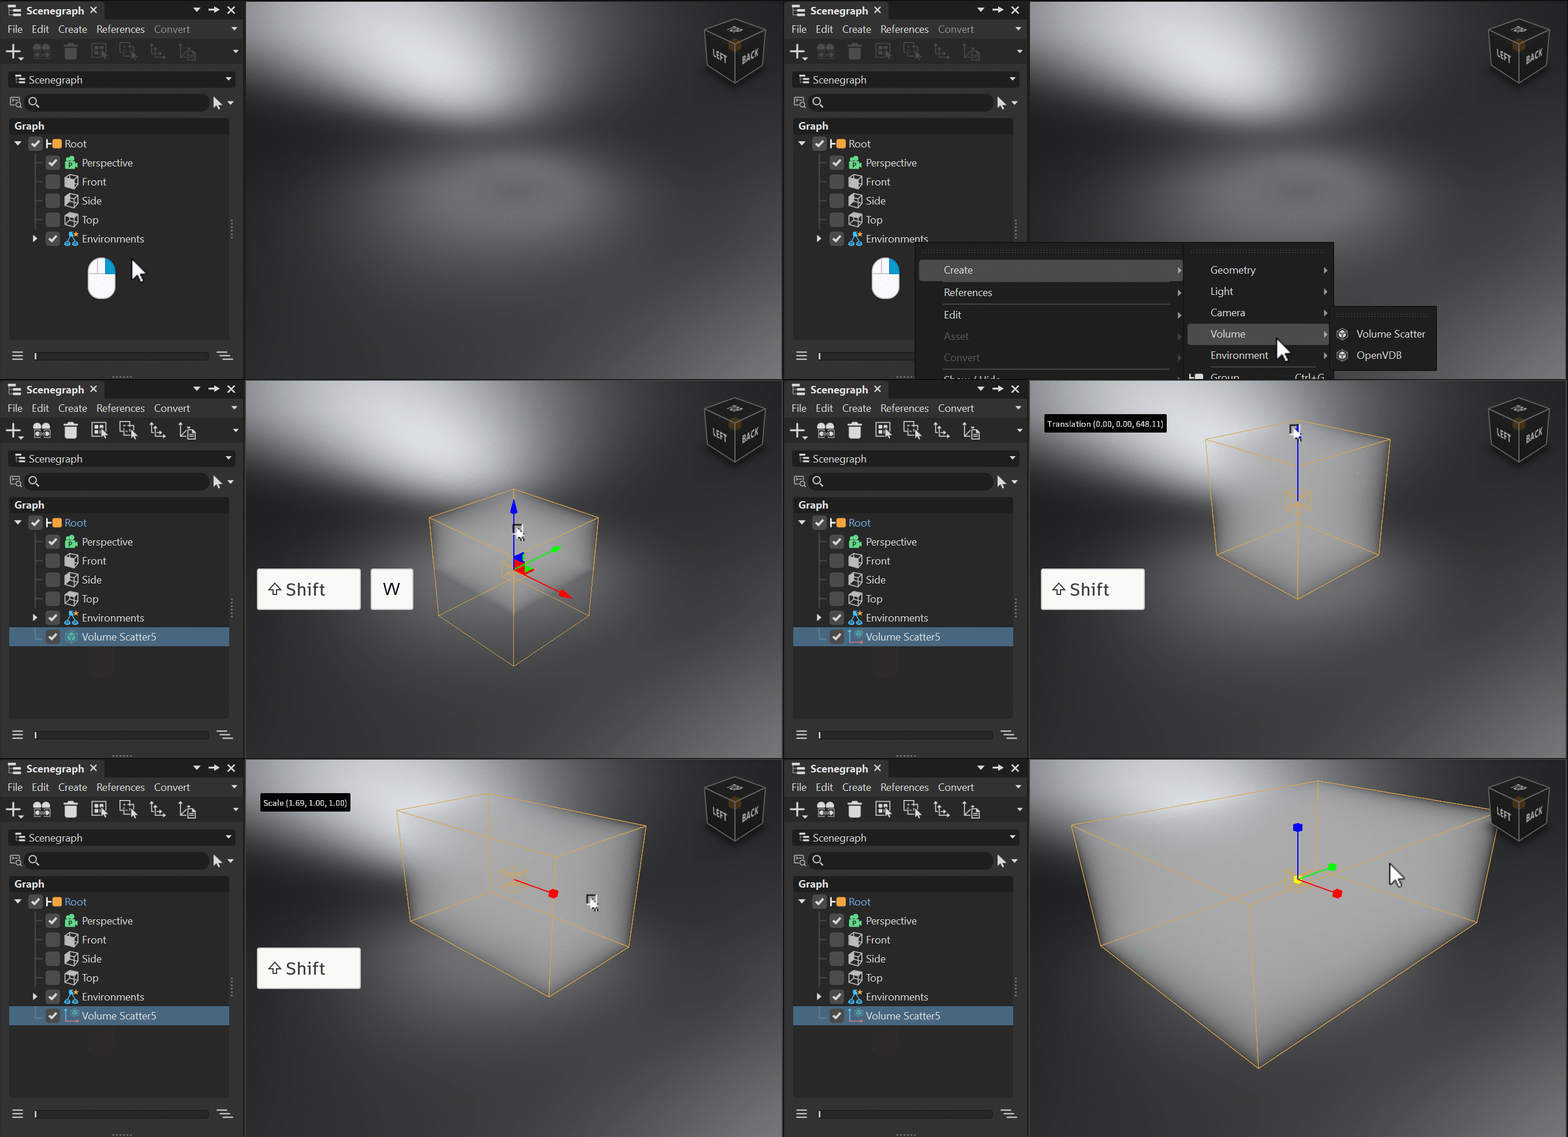
In the Scenegraph, when you select Create > Volume, either a volume scatter is created or an OpenVDB or NanoVDB is loaded, depending on your choice. For both, a warning appears indicating Depth Peeling Transparency is required for volume rendering in OpenGL. Clicking Enable will do this.
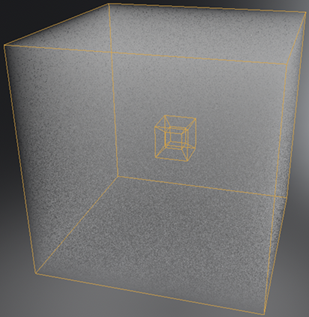
Volume Scatter - Adds a Volume Scatter node (
 ) to the Scenegraph and the following appears in the viewport.
Volume Scatter simulates the scattering of light within a volume. Use it to create homogenous and heterogenous (noise) atmospheric effects like fog, smoke, or dust. When applied to a volume object (VDB), the Volume Scatter attributes control how light interacts with the volume, affecting its appearance and visibility to create realistic visuals of light beams or crepuscular rays (god-rays). Adjust these attributes to control the density, color, and intensity of the scattered light within the volume. Use them to control the thickness or opacity of fog, or add a hazy atmosphere to a scene.
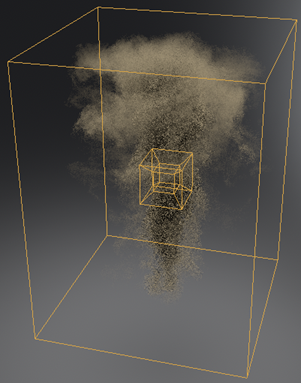
OpenVDB - Imports a specified VDB or NVDB file into VRED, where it can be dynamically streamed. A Volume Scatter node (
 ) is added to the Scenegraph and the following appears in the viewport.
VDB stands for "Volume DataBase" or "Voxel DataBase" and is used to represent volumetric data. VRED uses VDBs to represent volumetric data, such as smoke, fire, clouds, or other complex 3D structures. They provide a flexible and efficient way to store attributes like density, temperature, or velocity and manipulate volumetric data, for creating realistic and visually appealing effects. Use the Material Editor to customize these.
Volumes in the Material Editor
In the Material Editor, when you select Create > Create Material > Volume Scatter or OpenVDB, a material is created or loaded that can only be applied to volume nodes. The Volume Scatter material can be used to define basic homogeneous or heterogeneous (using procedural noise) volumetric effects. The OpenVDB material loads a VDB grid for the shading and rendering of more detailed volumetric data, such as smoke, clouds, or other volumetric effects. Density, scattering, absorption, and emission are properties that can be customized. See the Volume Materials section for further information.
When Use Sequences is enabled in the Material Editor, animation curves are automatically generated for OpenVDB sequences. See Animating Volume Materials for more details.
Volumes in the Light Editor
Volumes rely on a light source for interaction. All types of lights are compatible, except for the ray light. While using area lights and sampling against an HDR environment (which is enabled by default), you can produce good results. However, this can be computationally expensive and often lead to more noise, compared to using directional, point, spot, or spherical lights. Volumes support textured area lights.
To address artistic and performance considerations, we have introduced the Illuminate Volumes option, which can be used with all types of lights. Control whether a light source will affect volumetric objects in the scene. This provides greater flexibility and control over the lighting effects.
In the Light Editor, find the Illuminate Volumes option in the Properties section. Use it to determine whether or not a light source will affect volumetric objects in the scene. Choose from the following options:
On - Contributes to the lighting and shading of volumetric effects, such as fog, smoke, or other volumetric materials.
Off - Turns off light rays interacting with the volumetric data, resulting in no shadows, highlights, or overall lighting influence within the volume. This option can be useful when isolating the lighting of volumetric effects or when not wanting a specific light source to affect volumetric materials in the scene.
Only - Restricts the light's illumination to only affect volumetric objects in the scene, exclusively contributing to the lighting and shading of volumetric effects, such as fog, smoke, or other volumetric materials. The light's rays disregard other objects in the scene. This option allows for precise control over the lighting of volumetric effects, ensuring that the light source affects only the desired volumetric materials, while ignoring other geometry. It can be useful when you want to isolate the lighting of volumetric effects and avoid unintended influences on other objects in the scene.
Volumes in the Render Settings
To achieve a balance between quality and performance, it is possible to customize the step size for each Volume Material individually. This allows for fine-tuning and finding the optimal tradeoff between the two factors. The step size determines the distance to traverse each volume. From this, the number of steps through the volume is calculated. In most cases a value between 1-100 is sufficient. If the total number of steps required to traverse the volumes exceeds the Maximum Steps that can be set in the Render Settings > Raytracing> Volume Quality, the step size is adjusted accordingly. Increasing the Max Steps value improves the quality, but it also decreases performance and even can cause a driver crash.
Renderpass support Volumes can also be rendered to a separate pass in raytracing. A new entry called, "Volume Color", has been added to the Render Settings > Renderpasses dialog. In addition, you can also view the Volume channel in the 3D viewport. To utilize this feature in the viewport, ensure to activate CPU or GPU raytracing and the corresponding channel from the Visualization menu > Renderpasses Rendering > Combined/Material Channels > Volume Color.
Interacting with Volumes
Volume nodes (Volume Scatter and OpenVDB), as well as volume materials can be transformed. See the following: