InfoWorks WS Pro provides a number of spreadsheet-style grid windows listing objects in the network. There is a different grid for each type of object. These windows are divided into groups, each group containing grids for one class of object and related sub-objects.
Each column in the grid contains data for a particular field, with each row in the grid listing the values for a single object. Although the columns are different for each type of grid, the way in which the grid is viewed and edited is the same in each case.
The grid views do not always show all the data for an object. For example, tabular data about an object cannot be displayed. To view and edit all data for an object you can use the appropriate property sheet.
See Editing data in the network object grid views for more general information about grid editing.
The grid windows are divided into the following sets:
Network object grid views
Associated data grid views
These grids contain data associated with network objects. The data can be viewed in association with a network, or the grids can be opened independently of a network.
- Control grid
- Alternative Demand grid
Results grid views
These grids are available only when you have a completed simulation open for replay.
- Node Results grid
- Link Results grid
- Object Group results grid
Opening grid views
Network object grid views can be opened only when the network is already open. See Opening a network. The buttons will be disabled unless one of the views on the network is the current active window.
To open standard network object views,
click the appropriate grid toolbar button on the
Windows toolbar, or
choose a view from the Window  Grid windows sub-menu.
Use toolbar buttons that are based on this pattern
![]() to open the results grids. These are available only when you have a completed
simulation open for replay.
to open the results grids. These are available only when you have a completed
simulation open for replay.
Using grid views
Click the tabs at the bottom of the grid window to switch to different views within the grid.
Use the
 and
and
 buttons to scroll backwards and forwards through the tabs displayed at the bottom of the window (this does not change the currently active tab).
Use the
 and
and
 buttons to jump to the first/last tab on the view.

Grid View Tabs
The currently active tab is coloured white. The tabs for network objects (objects that are visible on the GeoPlan window) are coloured green. Tabs for sub-objects that define specific characteristics of network objects are coloured yellow.
Press Ctrl+Page Up and Ctrl+Page Down to switch between tabs by moving to the next tab on the left or to the next tab on the right respectively (this changes the currently active tab).
Displaying property sheets
Display the property sheet for a particular network object by double-clicking to the left of the row for that object. Alternatively, right-click the row and select Properties from the context menu.
Hiding empty tabs
You can hide empty tabs on the grid views to make it easier to navigate through the views that actually contain network objects. Right-click any grid view and choose Hide empty tabs (or Show empty tabs) from the context menu. This will show or hide all the empty tabs in the current window.
By default, empty tabs are shown when the network is checked out, and hidden if the network is read-only.
Customising grid layout and appearance
A number of options change the layout and appearance of the grid. You can save some layout changes, such as column ordering, and use these as the default layout when you open the grid type in future.
| Requirement | Procedure |
|---|---|
| Changing the font size | To make the grid easier to read you can adjust the font size. From the Grid menu, choose Font size Larger to make the text bigger, Font size Smaller to make the font smaller, or Font size Reset to normal to return to the standard size.
|
|
Adjusting the column width |
The pointer will change as shown when correctly positioned over the column divider. |
|
Changing the column order |
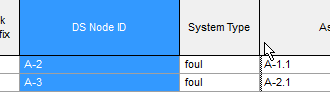
The picture shows a valid drop position for the selected DS Node ID column. If the position where you want to drop is invalid the
|
|
Freezing columns |
Columns can be frozen at the left side of the grid so that they are visible at all times. Select one or more columns and choose Freeze columns from the Grid menu. The columns are moved to the left side of the grid. When you scroll the grid sideways, the frozen columns do not move. To unfreeze all frozen columns, choose Unfreeze columns from the Grid menu. |
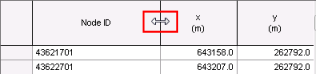 To change the width of a column, drag the divider line on the right of the column header.
 To change the column order, select a column and drag it to a new position. If the position is valid, the dividing line between columns where the dragged column will be inserted is displayed as a thick grey line.
 pointer will be displayed.
Saving and restoring the default layout
You can save and restore the grid layout for a particular grid type (all grids displaying this network object type), or restore the original default layout.
- To save the current layout as default for future grids of this type, choose Save as default layout from the Grid menu.
- To restore your saved default layout to the current grid and for future grids of this type, choose Load current default layout from the Grid menu.
- To restore the original default layout to the current grid and for future grids of this type, choose Restore original default layout from the Grid menu.
This operation saves column width and position, along with details of frozen columns, but does not remember about font size.
Autofiltering grid data
Data can be autofiltered in network grid window columns, allowing the display of rows of data based on the content of cells and conditions applied to them.
See the Autofiltering Grid Data topic for more information on how to autofilter column data in network object grid windows.
Creating grids that show only selected objects
- Select objects on the GeoPlan.
- Hold down the Ctrl key.
- Click the appropriate grid button on the Windows toolbar.
The grids will show only those objects that were selected when the grids were first opened. The displayed objects will not change if you subsequently change the selection.