Open, save and backup model files
The first time you launch Alias (or after doing a File > New), the main window shows an empty stage, which is the 3D space where you create your geometry.
The title bar displays the stage name:
![]()
When you build geometry and save, the model is saved into a .wire file format on disk.
When saved (or when you do a File > Open), the stage name is updated to the .wire file name, and both are displayed on the application title bar:
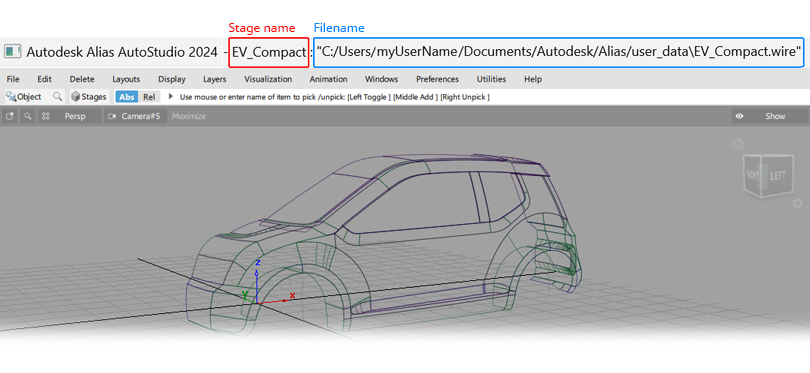
When working on one model at a time, the concept of a stage can be largely ignored, and the model on the screen is simply the model that you have opened or saved as a .wire file.
However, you will encounter stages when you use File > Open, so it is helpful to understand how they relate to your model files.
Using File > Open
When you use File > Open, you see the following dialog window:
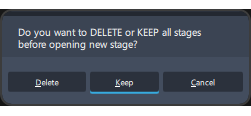
The most straightforward way to work with Alias is to work on one model at a time. Choose Delete to replace the model currently on screen with the one that you are opening.
If you select Keep when opening a new file, an additional stage is created, and added to your current model on screen, so you will have two (or more) stages. This is a popular way to work with different files simultaneously.
Only one stage can be worked on at one time. Select the active stage using Windows > Stage Editor or the stage shortcut on the promptline shown below:
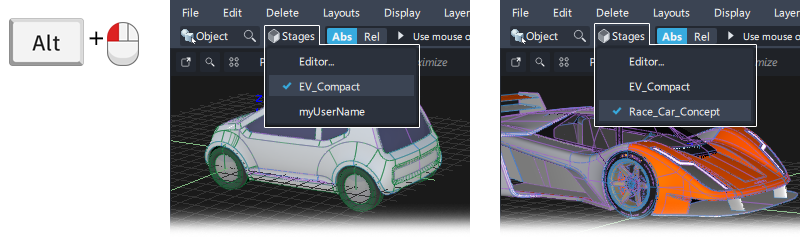
Use
Alt+ LMB to select the working stage exclusive of other stages.Use LMB to select the working stage from the list and keep the other stages visible (shown with green lines).
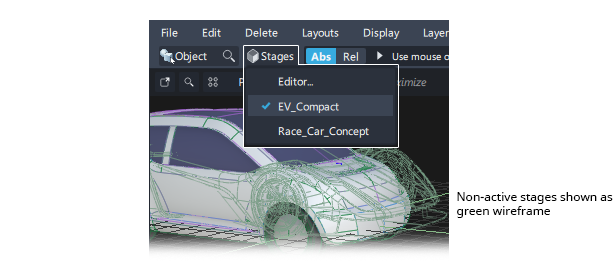
For more details on working with stages see Windows > Stage Editor.
Construction Options settings
Depending on the Construction Options settings in your current model and the one you are opening, you may also get the following question when opening a file:
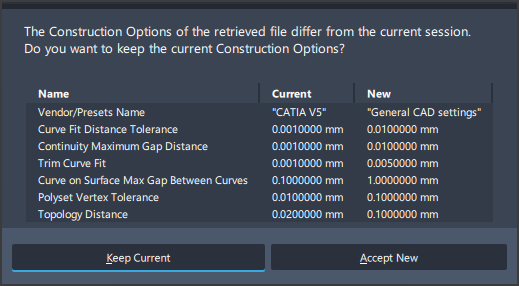
- Choose Keep Current to maintain the settings you have been using in the model on-screen.
- Choose Accept New to change the Construction Options settings to those in the new file being opened.
If you are not sure what to answer, choose Keep Current.
For more information on these Construction Options settings see Preferences > Construction Options
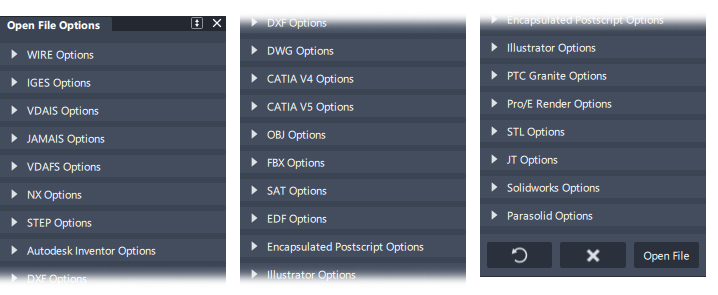
File formats that can be opened
Most 3D and many 2D file formats can be opened simply using File > Open.
To see which file types are supported click the  icon for File > Open to access the option window. This lists all the file formats that can be opened, with any relevant options:
Using File Save and File Save As
When you first install Alias, using File > Save or Save As will go to the C:/Users/username/Autodesk/Alias directory by default.
Subsequent saves go to the directory location from which the file was opened or the last location saved to.
There is no file management done by the Alias. The Windows file shortcuts can be used to quickly access your chosen project directories.
File formats that can be saved
When using File > Save As, click on the icon to open the option window. Choose the file format you want to save to:

Saving other data types
Images
The following tools default to the C:/Users/username/Pictures directory on launch, but thereafter all tools default to the last location used for an image save.
- File > Export > Current Screen
- File > Export > Markup
- File > Export > Canvas
- File > Import > Canvas
- File > Show Image
Extracted Image References
The following directory is created for the extracted images. If a different directory is used, this becomes the default location for subsequent uses of the tool.
- File > Image references > Extract Image References - C:/Users/username/Documents/Autodesk/Alias/_extractedImages
Geometry
The following save tools default to the C:/Users/username/Documents/Autodesk/Alias directory, but thereafter defaults to the last location used for an model save.
File > Export > Illustrator
File > Export > Active as Subdiv
File > Export > Rapid Prototype
File > Export > SLC
File > Import > As Reference
File > Import > Subdiv
Shader Lister > Save As...
Shader Lister > Import Shaders
For printing:
- File > Print (when Destination is set to File) defaults to the C:/Users/username/Documents/Autodesk/Alias directory.
Autosave (Checkpoints)
Autosaving is not turned on by default in Alias.
The Checkpoint tool is used to turn on the Autosave function. Use File > Checkpoint and click on the icon to open the option window.
Select Use Checkpoint in the option window. A checkpoint reminder appears on the menu bar, and the model is saved at regular intervals in the default Checkpoint file location. This can be set in Preferences > General Preferences in the File Paths section.
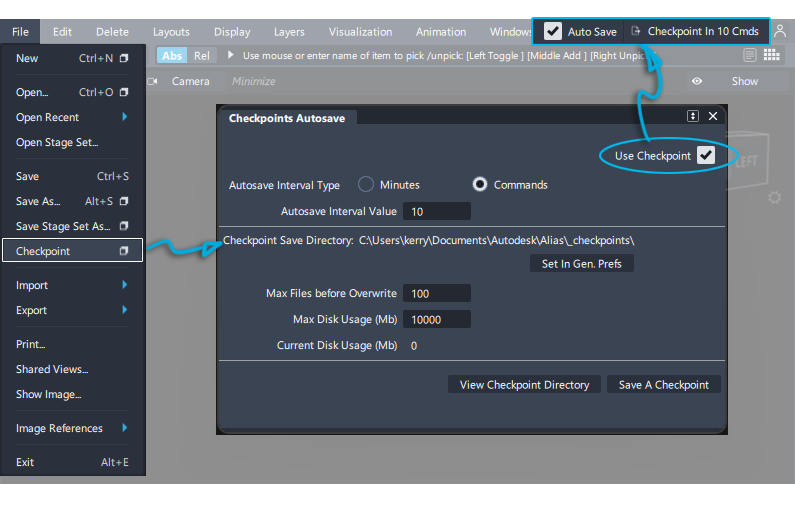
See File > Checkpoint for more details on modifying settings for autosave.
Recover data after an unexpected exit
If Alias quits unexpectedly, or freezes and you have to end its process, Alias attempts to back-up your models. These are known as '_msaved' files.
You are first prompted whether you want to attempt to save the model, or models if you have multiple stages:

- OK - Attempt to do an emergency save of the model before exiting Alias.
- Cancel - Exit Alias without attempting to save.
If you answered OK, then you have three options:
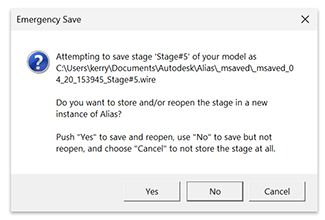
- Yes - To restart Alias and open the saved file.
- No - To save the file but not to restart Alias.
- Cancel - Gives you a second chance to cancel the save.
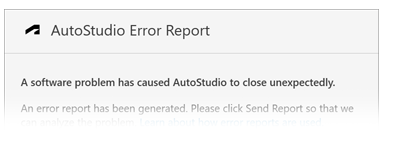
You are then asked to enter details of what may have caused the software to exit. An error report will then be sent to Autodesk and provides useful information for product development.
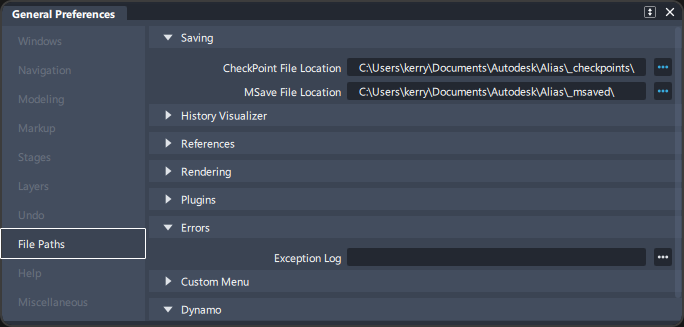
Location for _msaved files
The location for _msaved files is set in Preferences > General Preferences in the File Paths sections.
The emergency saved file will be named _msaved_<month>_<day>_<time>_Stage.wire
When you restart Alias you can open this file to retrieve any lost changes. You can then save the file under a new name in your normal project location.
Emergency save for multiple stages
You can also select to Perform Action for All Stages, in which case no additional confirmations display. When not selected, a dialog with the options Save, Skip, and Reopen displays for each stage. By default, this option is selected.
If you choose to save, as the application exits it writes the current data to the default checkpoint file location.
Safely terminate Alias and recover data (Windows only)
- From the Windows Start menu, select Programs > Autodesk > Alias > Save And Exit.
- Click Yes in the confirm box.
- Click OK in the next confirm box.
Your data is saved in your default _msaved location (as set in general Preferences) and Alias exits.
About exception logs
An exception log is created automatically after Alias quits unexpectedly, or freezes and you have to end its process.
This file may provide useful information to Customer Support about the application failure if it is repeatable.
By default, the file is saved in:
C:/Users/
You can change the location of the log in the File Path section of Preferences > General Preferences.
The file name of the log has the following format:
ExceptionLog-userName-binaryName-pid-mmddyyyyhhmmss.log
where
pid - Process ID of the Alias process when it first started
mm - Month (1 – 12; January = 1).
dd - Day of month (1 – 31).
yyyy - Year
hh - Hours after midnight (0 – 23).
mm - Minutes after hour (0 – 59).
ss - Seconds after minute (0 – 59).