Image References

Shows a list of all external image files used by the current .wire file.
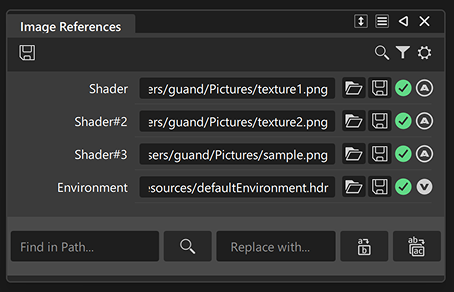
Image Lister icon bar
 Extract... - Access image extract options. You can extract individual images from the Extract Image icon in individual image references.
- Extract Image References - Saves all embedded image references to disk.
- Extract Selected Image References - Saves the selected embedded image references to disk.
 Search - Lets you use keywords to search for image references by name. Note: This does not search within file paths, use the Find and Replace bar instead to search for text in file paths.
 Filter - Displays images based on selected criteria.
 Settings - Access the Image Lister settings.
- Find and Replace - Show or hide the Find and Replace bar.
Image Lister icons
 Replace Image - Opens the file browser to replace images.
Extract Image - Saves the embedded image reference to disk. You can also click the Extract... icon in the toolbar.
 Valid Source /
  Missing Source - Displays the status of the image source. To locate an image with a missing source, see Fix a missing image below.
 Alias Renderer /
  VRED Renderer - Displays which images are embedded in the Alias shaders and which one are embedded in the VRED materials.
Fix a missing image file
- Open the Image References window in File > Image References > Image References... to locate the missing image reference. When Alias cannot find an image source file, the Missing Source icon appears to the left of the path name.
- Select the Replace Image icon to locate the missing image reference.
- Locate the correct folder and image source file, and open it to replace the missing image.
Replace the file path for multiple reference images
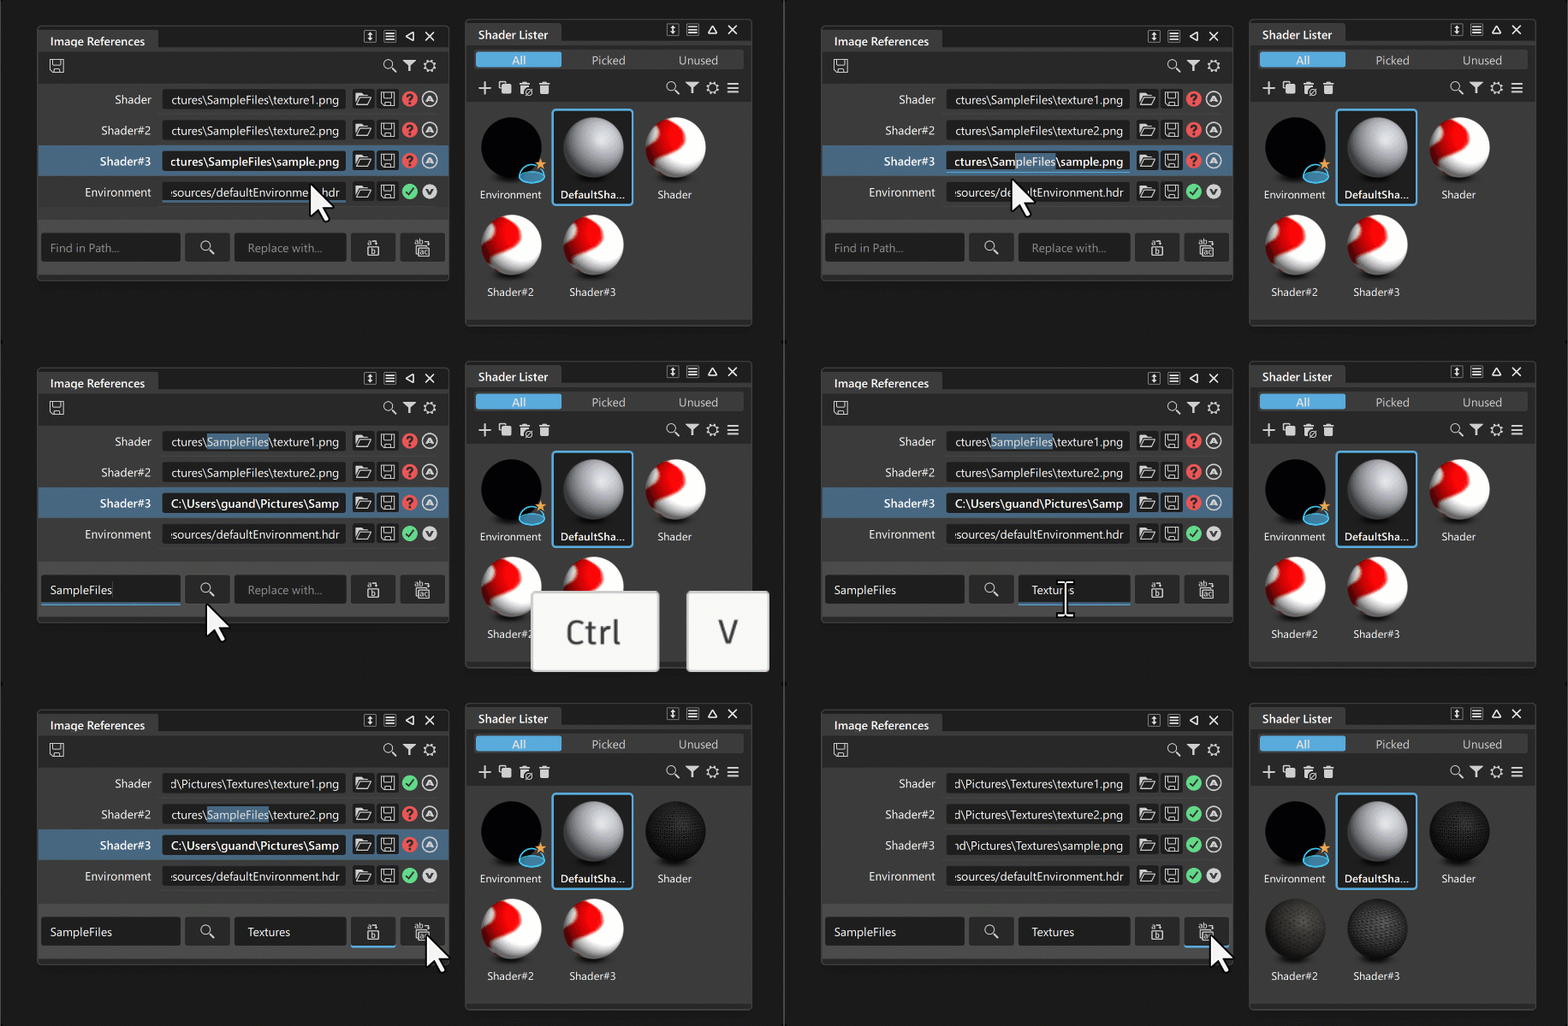
You can also use Find and Replace options to set a new file path for multiple reference images. This is useful when you have moved several referenced images to a new local or network directory.
- Open the Image References window in File > Image References > Image References....
- In the Find textfield, enter the part of the file path you would like to replace, and then click Find
 or press Enter.
 - In the Replace textfield, enter the file path to the new location the reference images are currently stored, and then click Replace
 or press Enter. You can also click Replace All
  to quickly replace every instance at once.
 - Show or hide the Find and Replace bar from the Settings menu in the toolbar.