ARRIRAW Format Settings - Import
About ARRIRAW 7
Although we have moved to a more recent ARRIRAW SDK version, a few words about version 7 which justified an entire new ARRIRAW handler.
ARRI developped the ARRIRAW 7 decoder as a major update to the ARRIRAW SDK. It introduces new capabilities, and what it loses as import options, it gains in the simplification of import options. ARRIRAW 7 is also essential to the support of new cameras such as the ARRI ALEXA 35.
What is new in ARRIRAW 7:
- ARRIRAW 7 always debayers at full resolution. In previous versions, you could set the debayer setting to, for example, half or quarter resolution.
- Display Window allows you to select between the native (Full) resolution and the cropped format (Camera) resolution.
- 2 new colour spaces:
- ARRI LogC4
- Linear ARRI Wide Gamut 4
- New ARRI Debayer Algorithm (ADA 7)
- Support for ARRIRAW HDE in MXF format
- Limited support for legacy LogC3 content. See below for more information.
- The following colour spaces are no longer available as colour spaces from Cameras
 ARRI:
ARRI:- LogC native
- LogC Film
- LogC Monochrome
- Scene Linear Native
- Scene Linear WideGamut
- Scene Linear ACES
- Video P3
- Video ITU709
- Video ITU2020
- Video DCI D60
- Video DCI D65
- Video Monochrome
- Video ITU2100PQ
- Video ITU2100 HLG
Handling of LogC3 Content
LogC3 is the colour space that was used for content created before the introduction of ARRIRAW 7. Flame Family products before version 2023.2 would decode ARRIRAW content using the LogC3 colour space.
LogC4 is the colour space now used for new content, either shot on new cameras such as the ARRI ALEXA 35, or on older cameras updated to the latest firmware.
Whenever you import content shot in LogC4, you are importing content using the latest ARRIRAW decoder and using the latest ARRI Debayer Algorithm (ADA-7).
When you import content shot in LogC3, you are also importing content using the latest ARRIRAW decoder. But in this case, the decoder uses an old version of the ARRI Debayer Algorithm, ADA-5.
Also be mindful of the following limitations when working with LogC3 content.
If you are importing content using MediaHub Files, or Batch Import Node:
- Set General Colour Management Tagged Colour Space to "From File or Rules" to automatically ensure the colour management is synchronized with the media decoding. Do not manually tag LogC3 content as LogC4.
ARRIRAW Image Colour Space to "From File Header". Alternatively, you may convert from LogC4 to LogC3, or vice versa by using General Colour Management Auto Convert and setting the Input Colour Space to "From File or Rules" and the Working Colour Space to correspond to what your LUT expects.If you are using LogC3 clips that were already imported when you installed Flame Family 2023.2 (or later) from Project Conversion, restored Archives, or wired from MediaHub Projects:
- For backward compatibility with content created in Flame Family product versions 2023.1 and earlier, LogC3 clips from converted projects, restored archives, or wired is always decoded using ARRIRAW SDK 6 and uses the options listed here. This applies to the following clips:
- ARRIRAW (.ari)
- ARRIRAW (HDE)
- ARRIRAW (MXF)
Metadata Settings
Clip Name option
Select how the clip is named when imported.
| Options are: |
|---|
| Clip Name from File Header |
| Clip Name from File Name |
| Enter Clip Name (manual entry) |
Clip Name field
Enter the name to use when importing the clip. Enabled when the Clip Name option is set to Enter Clip Name.
Tape Name option
Select an option to determine how the tape name is set when importing clips.
| Select: | To: |
|---|---|
Enter Tape Name | Activate the Tape Name field where you enter the tape name. When selecting multiple files for import, this tape name is used for all imported files. |
Tape Name from File Name | Use the name of the imported file as the tape name. |
Tape Name from Directory | Determine the tape name from the detected directory structure. Use the Level field below to configure the relative path to the directory from which the tape name can be determined. |
Tape Name from Header | Read the tape name from the header of the imported file. |
Level field
Set from which directory the tape name is taken, relative to the location of the clip in the directory structure.
Although available for all types of files, the Level field is intended for directory structures output by film scanners. A typical image file directory structure looks like this: ./<tape>/<resolution>/clip.######. In this case, selecting Levels Up 2 in the Level field identifies the directory that corresponds to the tape name (./<tape>). Enabled if Tape Name is set to Tape From Directory.
Tape Name field
Enter the name to use as the tape name when importing the clip. Enabled if the Tape Name is set to Enter Tape Name.
Orientation option
Flip (vertical) or flop (horizontal) the video frames read from the clip. Camera uses the orientation defined on the camera during the shoot. Select Disable Flip to use the true orientation of the image, as it was shot.
Timecode Selection option
Select which timecode to use, as ARRIRAW clips can have multiple timecodes. If the selected timecode is not available for the selected clip, the clip displays timecode 00:00:00.
| Selection: | ARRIRAW Definition |
|---|---|
| Clip Code | Internally generated timecode frame count increasing with each new take. |
| Edge Code | Internally generated timecode frame count increasing with each new media. |
| Record Run | Internally generated record run timecode starting at a value defined by the user. |
| Free Run | Internally generated free run timecode starting at a time defined by the user. |
| External LTC | Longitudinal Time Code from an external sync. |
| External VITC | Vertically Integrated Time Code from an external sync. |
| Time of Day | Internally generated free run timecode starting at time of day. |
| Master TC | Internally generated timecode. |
Resolution Settings
Display Window option
Select Full to use the full sensor resolution of the camera, which appears as the File Res in the Clip Info tab. Select Camera to use the cropped resolution set by the camera at capture, which appears as the Clip Res in the Clip Info tab.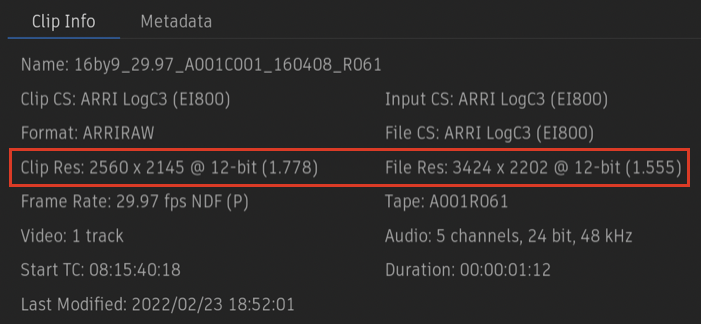
Bit Depth option
The ARRIRAW SDK will debayer natively to 16bit int or 32bit float. Select the latter if your workflow uses float.
Aspect Ratio option
Set the frame aspect ratio used when importing clips, including anamorphic ratios. Select Ratio from File Header to use the ratio set in the clip.
Debayering Settings
Select the ARRI Debayer algorithm (ADA) to use when importing files. ADA HW (hardware) refers to the method ARRI cameras use when decoding RAW media. ADA SW is an improved software version and is the default.
Note that ADA-5 is used on legacy clips using ImageProcessingGen1 or ImageProcessingGen2. The ADA-5 SW RGB settings apply only to those clips. They are enabled when the Debayering Mode option is set to ADA SW.
The Sharpness/Detail and Noise Reduction options apply only to legacy clips using ImageProcessingGen1.
Select Use CPU or Use GPU to decode on either set of processors. GPU is generally faster but you may want to use CPU to free up GPU resources.
Image Settings
Exposure option
Select how exposure is set. Choose Exposure From File to use the camera settings.
ISO field
Select the ISO rating that is applied to the imported clips. Supported values: 160 to 3200. Enabled when Exposure is Set ISO.
White Balance option
Select the white balance value to use. White Balance From File uses the camera settings burned in the clip.
Kelvin field
Set the perceptual colour temperature of the imported file. In Kelvin. Enabled if White Balance is set to Set Temperature.
Tint field
Set the green/magenta tint balance: positive value for green tint, negative value for magenta tint. Enabled if White Balance is set to Set Temperature.
Monochrome
For ARRIRAW Monochrome media only. Select Enforce to force the decoding of ARRIRAW media as monochrome. Use this option in cases where the metadata of the recorded media files is wrong.