Change shape for wires and cable wires
 |
 |
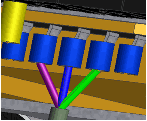
Wires and cables are created with natural curvature by default. You can also add work points to add additional shape to: | |
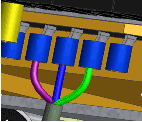
All wire and cable wire work points are deleted when routed from point to point. We recommend that you add work points only after routing the wire or cable wire for the first time. Once work points are added, you can adjust their location and offset value to achieve the appropriate shape.
Add wire points
When you add points, use the minimum number of points to achieve the desired shape. To provide more control over the shape of a wire in specific areas, add more points to that area.
Double-click the harness assembly that contains the wire or cable wire to edit.
In the browser or graphics window, right-click a location on the wire, and then select Add Points on the context menu.
Move the cursor over the wire path, and then click the path.
A grounded work point is created at the pick location, and the wire recomputes, changing shape slightly after each point is added.
Optionally, repeat steps 2 and 3 to add additional points.
Right-click, and then select Finish on the context menu.
Redefine wire points
Double-click the harness assembly that contains the wire to change.
In the browser or graphics window, select a harness wire point, right-click and then select Redefine Point on the context menu.
Change the selected wire point:
To select a new point, click a feature or location for the new point.
To change the offset value, right-click again, select Edit Offset on the context menu. Enter a new offset value.
The point is redefined and the wire recomputes to the new position.
Right-click, and then select Finish Edit on the context menu.
Dynamically move wire points
To reposition wire points dynamically or by precise coordinates, use the 3D Move/Rotate command.
Double-click the harness assembly that contains the wire to edit.
In the graphics window, right-click the harness wire point to move, and then select 3D Move/Rotate.
- To move multiple wire points in tandem, press the CTRL or SHIFT key and click each point. Right-click and select 3D Move/Rotate. When multiple points are selected for the move, they turn white until the operation is complete.
Use the 3D Move/Rotate command to reposition the wire point.
Select a triad arrowhead to translate the point along the axis. Click in the graphics window and drag the point or enter distances in the dialog box.
Select a triad plane to translate the point within the plane. Click in the graphics window and drag the point or enter distances in the dialog box.
Select the triad sphere to translate the point in 3D space. Click in the graphics window and drag the point or enter distances in the dialog box.
Select a triad axis to rotate the triad. Click in the graphics window and drag or enter angles in the dialog box. After the triad has been rotated, translate the point as desired.
Note: The initial offset value is ignored when using 3D Move/Rotate. The position of the wire is previewed and any bend radius violations noted before applying the move.
Preview the move in the graphics window and do one of the following:
- Click other points and reposition as needed. The preview updates to show the impact of each move.
- Click OK to accept the move and exit the command. The harness updates.
- Click Cancel to exit the command and clear all moves made since the command was invoked or since Apply was pressed, whichever occurred recently.
- Click Apply to accept the move and remain in the command. You can continue to move the currently selected points or select other points to move. Click Apply to accept the move is accepted and cannot be undone when you click Cancel.
Delete all wire points
- In the browser or graphics window, select one or more wires or cable wires that contain the work points to delete.
- Right-click, and then select Delete All Points on the context menu.
All work points except the start and endpoint are deleted. The position and length of the wire is recomputed.