To Create Presentation Storyboards and Animate Models
An animation consists of actions arranged on the timeline of one or more storyboards. Animations are used to publish videos or to create sequences of snapshot views.
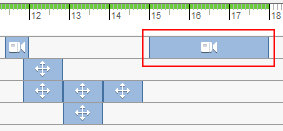
What's New: 2023
The following types of actions can be created: Move or rotate components, change component visibility or opacity, and change camera position. Actions are added to the storyboard timeline at the playhead position.
To Create a Storyboard
There are multiple ways to create a new storyboard:
 On the ribbon, on the Presentation tab
  Workshop panel click New Storyboard.
- In the Storyboard panel right-click a storyboard tab and click New Storyboard.
- In the Storyboard panel, next to a storyboard tab, click + and the New Storyboard dialog displays.
- If there are multiple storyboards, select one that to be the source storyboard. Source storyboards provide the initial settings for the new storyboard.
In the New Storyboard dialog box,
For Storyboard Type select from:
Start From End of Previous
The new storyboard is inserted next to the selected storyboard. The component positions, visibility, opacity, and camera settings as of the end of the source Storyboard establish the initial states for the new storyboard.
Clean
Starts the storyboard with the model and camera settings based on the design view representation used by the current scene. No actions are inherited. The new storyboard tab is added at the end of the storyboard list.
For Storyboard Name:
Specify the storyboard name you want to use. By default, storyboard's get a generic name and number in sequential order.
Click OK. The new storyboard is created and activated.
Pre-animation Setup
Use the Scratch Zone to set camera position and orientation and component visibility or opacity settings. Scratch Zone actions are not shown in the timeline.
Select or create a storyboard.
 To set the initial state of the model and camera without recording actions, drag the playhead to the scratch zone, or click the Scratch Zone icon. Then:
To change visibility for a component, select the component in the graphic window or browser, right-click, and click Visibility.
Note: To edit the visibility of a component hidden while in the Scratch Zone, access the component from the model browser and change the setting. To change opacity for a component, select the component in the graphic window or browser, and click Opacity. Then use the Opacity mini toolbar to specify the opacity value.
 To change position of the camera, use the ViewCube or other navigation tools to change the camera settings. Then, on the ribbon, click Presentation tab Camera panel Capture Camera.Note: To change the Scratch Zone camera position repeat the Capture Camera process.
Add Actions to a Storyboard Timeline
To record actions to the storyboard timeline, move the playhead to the desired position on the timeline. The playhead position sets start time for component actions, and end time for camera actions.
Tip:- If the playhead is not visible, click a point on the timeline.
- To move the playhead to the beginning of the current storyboard, click Back to Storyboard Beginning.

- To move the playhead to the end of the current storyboard, click Forward to Storyboard End.

Change component or camera settings:
 To move or rotate components, use the Tweak Components command.
- To change the camera settings, use the ViewCube or other navigation tools to display the desired view of the model. Then on the ribbon, click Presentation tab Camera panel Capture Camera.
- To change opacity for a component, select the component in the graphic window or browser, and click Opacity. Then use the Opacity mini toolbar to specify the opacity value.
To change visibility for a component, select the component in the graphic window or browser, right-click, and click Visibility.
After you confirm your edits, corresponding actions are added to the current storyboard.
To Preview the Animation
Use the toolbar in the storyboard panel to play back the animation preview:
- To preview the animation, click
 Play Current Storyboard or
  Play All Storyboards.
 - To play the animation in reverse order, click
 Reverse Play Current Storyboard, or
  Reverse Play All Storyboards.
 - To pause the preview, click
 Pause for the current storyboard or
  Pause for all storyboards.
 - To start at specific time, move the playhead to the desired position on the timeline and click Play Current Storyboard.