To Add Corner Round to Sheet Metal Face
What's New: 2026
You can add corner rounds to both inside and outside corners, and you can create fillets or rounds of different sizes in a single operation.
All fillets and rounds created in a single operation are one feature.
On the ribbon, click Sheet Metal tab
 Modify panel Corner Round
  .
.The command initiates with Tool Palette Selection Priority set for edges and the default corner radius value.
To change selection priority, in the Tool Palette, specify the selection priority choosing from Edge Priority or Feature priority.
 Edge Priority. Select one or more edges where a corner is desired. You can use window select to expedite selection. (Default)
 Feature Priority. Selects all corners of a feature, except the corners that result from intersections between the feature and other sheet metal faces.
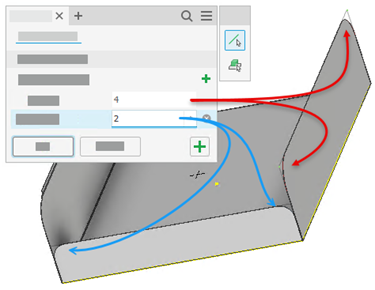
For the first Corner Edge Set, specify the radius. Alternatively, select a previously used size or a method from the drop-down list. Click to change a radius, and then enter a new value.
In the graphics window, select the edges or features that are to have the corner rounds of the same size.
In the Selection Sets group, Corner Edge Sets displays the selected edges.
You can have multiple sets, each with different sizes. Click
 Add corner edge set, at the right of Corner Edge Sets, to start a new selection set.
Select all edges that you want at the specified radius for the feature. Add a new corner edge set for a different size within the same feature.
In the graphics window, select model edges that represent corners of the same size. Window select is supported.
Specify a different radius.
Optionally, rename the feature as needed by clicking the name in the breadcrumb at the top.
Click OK to complete the task or
 Apply and Create to continue creating corner rounds.