MotionMaker: QuickStart Guide
MotionMaker is a Maya animation tool that uses machine learning to streamline character animation workflows, reducing the time spent on manual keyframing while preserving artistic control.
Getting Started
This QuickStart Guide teaches you how to use the MotionMaker Editor interface, create your first AI-generated animation, and remap it to a HumanIK character.
For video-based learning, watch the MotionMaker tutorials on the Maya Learning Channel.
Launching the MotionMaker Editor
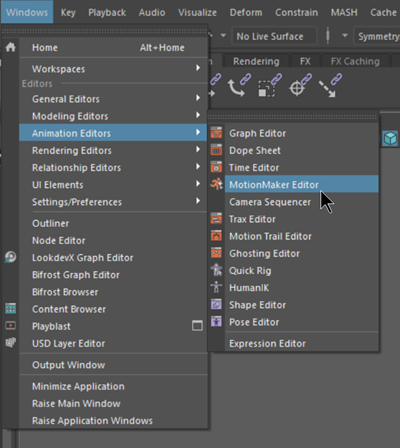
Navigate to Windows > Animation Editors > MotionMaker Editor.
Interface Overview
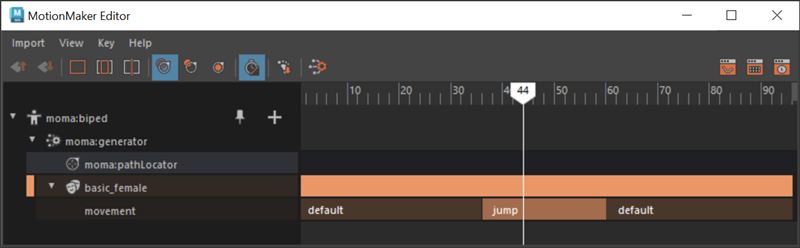
Menu Bar
- The Import menu: Access pre-rigged proxy characters (biped and canine available).
- The View menu: Standard timeline controls plus MotionMaker-specific tools such as List All Characters and Pin All Characters.
- The Key menu: Access to some of the keyframe creation and editing commands.
- The Help menu: Documentation and resources.
Panel Toolbar
For more information about these tools, consult the MotionMaker Attribute Editor to learn how they function.
| Feature | Description | Icons |
|---|---|---|
| Action Style Controls | Arrange styles in priority order |  |
| View Controls | Standard time-based editor navigation tools |  |
| Path Controller Settings | Manage Path Follow modes | 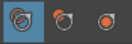 |
| Generator Controls | Auto Speed Ramp and Foot Slide Reduction |  |
| Generate Motion Button | Press this button to create your character's motion |  |
| Editor Launchers | Quick access to Graph Editor, Dope Sheet, and Time Editor |  |
Workspace Panels
Outliner: Displays imported proxy characters and their associated nodes.
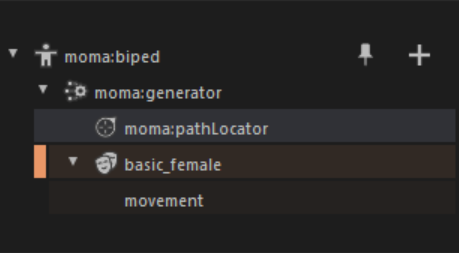
Editor View: A timeline-based interface for motion generation, editing, and control.
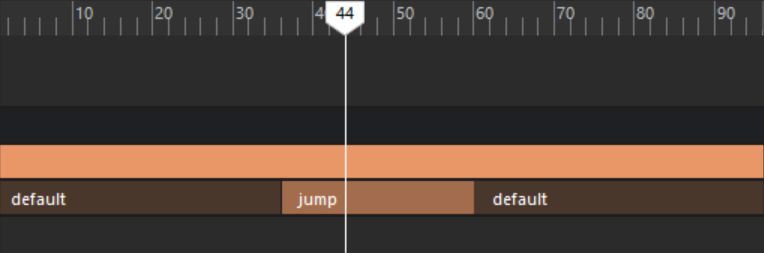
Creating Your First Generated Animation
Initial Setup
Create a new Maya scene.
Set the Playback range: 0 to 96 frames.
If not already open, launch the MotionMaker Editor: Windows > Animation Editors > MotionMaker Editor.
Import a character: Import > adsk_biped > Options.
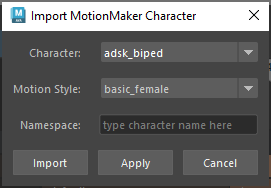
Click Import with default settings, then right-click in the viewport and press "a" to frame all.
Adjust the location of the character and path.
Select moma:biped and moma:pathLocator in the Outliner .
Move the selected items to the right of the viewport.
Note: Although the character is imported at origin, you can move the character to the location you want the animation to begin.
Creating the Motion Path
- Clear your selection and select moma:pathLocator in either the viewport or Outliner.
- Create path keyframes:
- Frame 0: Set start position.
- Frames 84 and 96: Set end position.
- Use the Move tool and translate the moma:pathLocator.
- Frame 48: Add arc keyframe (optional).
- Use the Move tool and translate the moma:pathLocator.
- Press "s" to set your keys.
- Create a Motion Trail to see the path.
- Navigate to Visualize > Motion Trail Editor.
- Click Create Motion Trail.
Generating and Refining Animation
With moma:pathLocator selected, click Generate Motion.
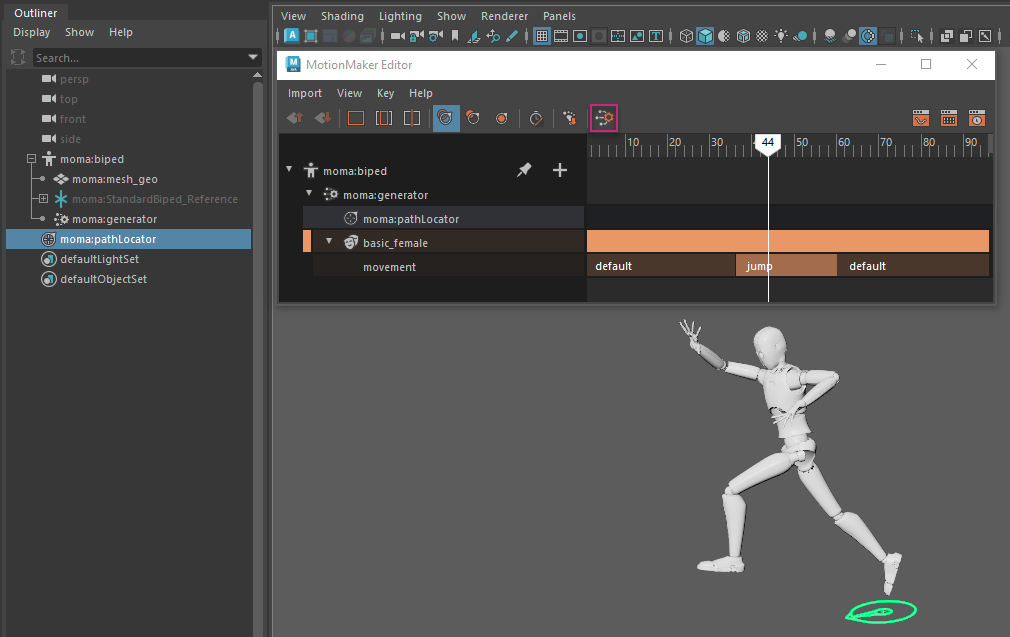
Once the calculation and caching is done, play or scrub through the timeline to preview the generated motion.
Note: The character's pacing depends on both the path length and the number of frames assigned to the motion.Refine the motion path:
- Adjust path length to make it longer.
- Modify path shape (i.e. create an arc or rise on the path).
- With moma:pathLocator selected, click Generate Motion.
Add an action tag:
Set Jump action.
Go to frame 24.
Right-click on the character's movement bar and select jump from the dropdown list.
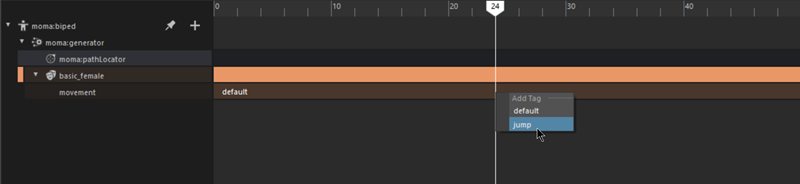
Set action to default.
- Go to frame 48.
- Right-click on the character's movement bar and select default from the dropdown list.
- With moma:pathLocator selected, click Generate Motion.
- Preview the animation by playing it back or scrubbing through the timeline.
Apply Auto Speed Ramp.
Click the Auto Speed Ramp button in the MotionMaker Editor toolbar.
 Note: Auto Speed Ramping dynamically speeds up animation playback — up to a predefined maximum — whenever a character falls behind the path locator.
With moma:pathLocator selected, click Generate Motion.
Preview the animation by playing it back or scrubbing through the timeline.
Character Retargeting
Open the Content Browser.
Navigate to Windows > Content Browser.
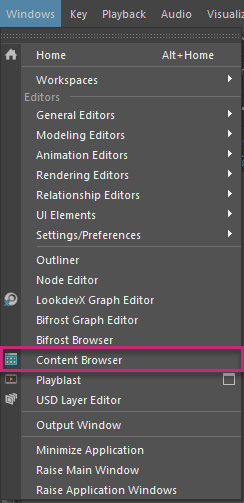
Import the M4Y4-B07 character.
In the Content Browser, navigate to Examples > Animation > Rigs.
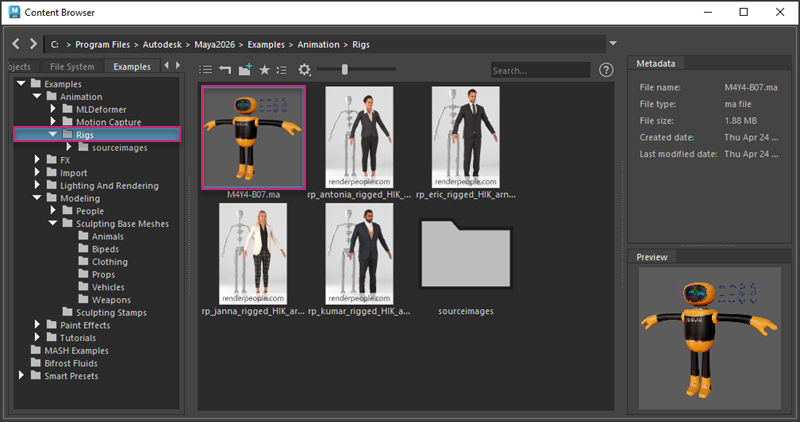
Left-click and drag the M4Y4_B07.ma character into the scene.
- The rigged character will load into the scene at origin. Press "6" if you want to see the character in Shaded mode.
- You can hide the rig's controllers if you like by using a combination of making layers not visible (Channel Box/Layer Editor) and disabling NURBs Curves and Rigging and Animation in the Show > Viewport panel menu.
Open the Human IK Panel by clicking the button in the top right-hand corner of the Maya UI.

Configure the character for retargeting:
Select M4Y4-B07:M4Y4_rig as Character.
Choose moma:standardBiped as Source.
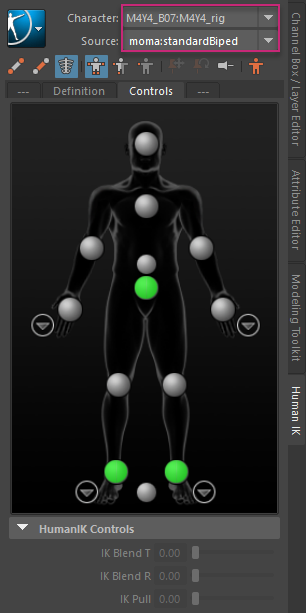 Note: The M4Y4-B07 character will automatically snap to its new position.
Preview the retargeted animation.
Playback the animation or scrub through the timeline.
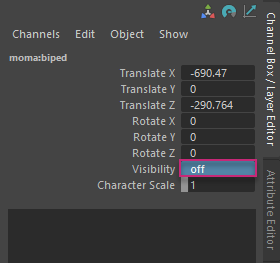
Hide the MotionMaker proxy character by selecting its top node (moma:biped) in the Outliner and setting Visibility to "off" in the Channel Box.