When a new P&ID object class is introduced during a project, you can map it to a corresponding Plant 3D object class.
- In the Project Setup tree view, expand Plant 3D DWG Settings. Click P&ID Object Mapping.
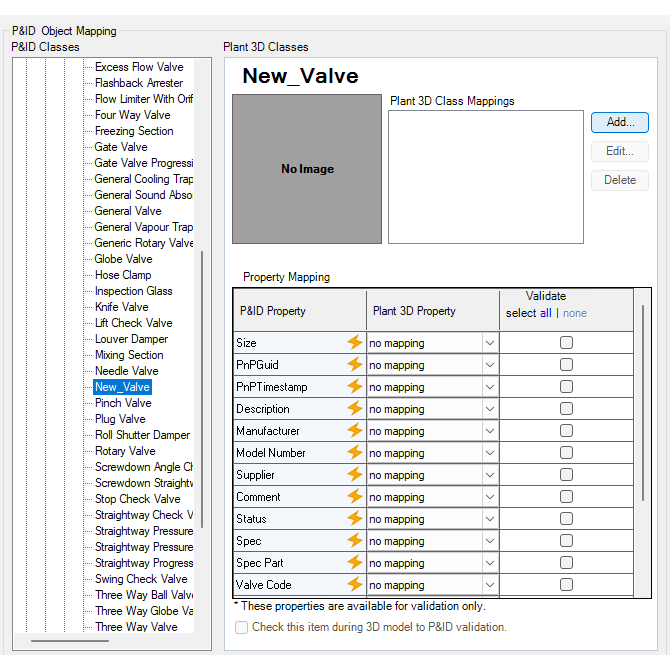
- On the P&ID Object Mapping pane, do the following:
- Under P&ID Classes, expand the tree and click the new P&ID object (for example, New_Valve)
- Under Plant 3D Classes, click Add.
- In the Select Plant 3D Class Mapping dialog box, do the following:
- Under Plant 3D Classes, expand the tree. Click a class (for example, Valve).
- Select the Map to All Subtypes of This Class check box, or under Map To One or More Specific Subtypes of This Class, select or clear the appropriate check boxes.
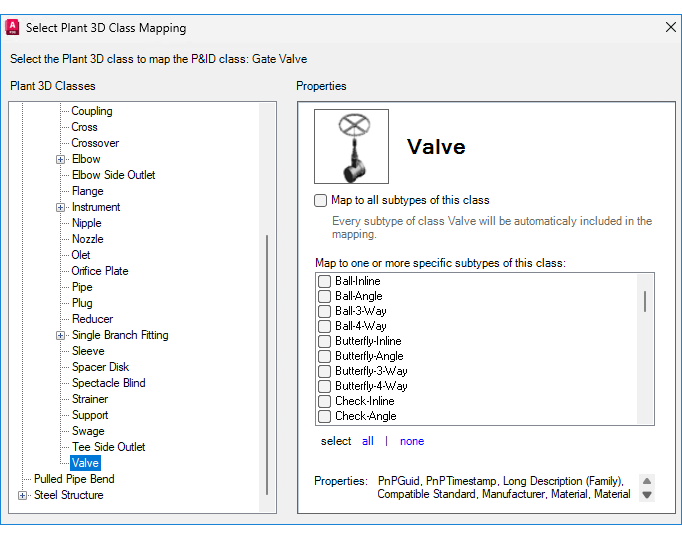
- Click OK.
- In the P&ID Object Mapping pane, under Plant 3D Classes, in the Property Mapping table, in the Plant 3D Property column, click the appropriate properties to correspond with th properties in the P&ID Property column (for example,
Manufacturer to
Manufacturer.
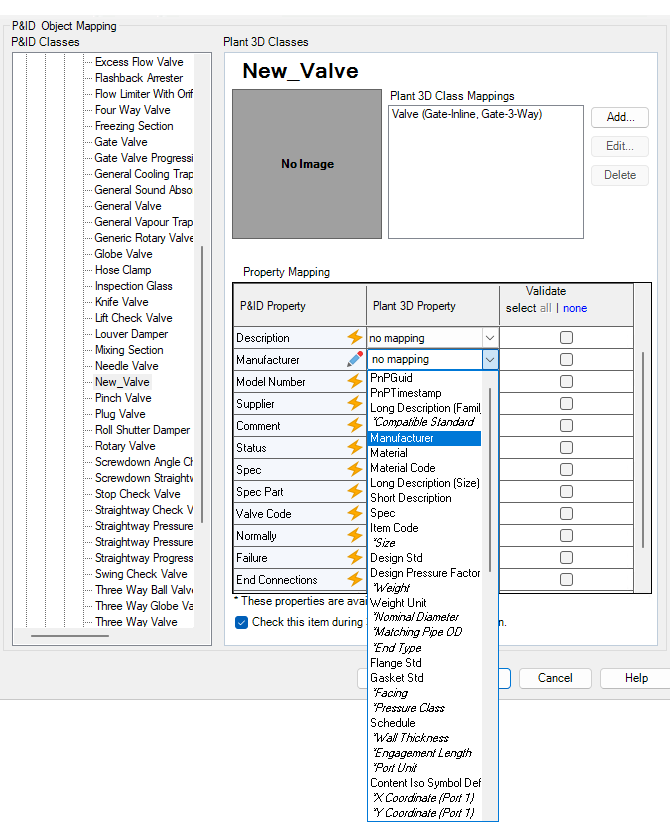 The Property Mapping table displays individual icons. These icons indicate whether a property is in acquired mode or override mode.
- For properties in override mode
- From dropdown list, choose the appropriate value for mapping.
- Alt+click to reset all properties to acquired mode.
- For properties in acquired mode
- Click the icon to switch to override mode before editing the mapping.
- Alt+click to override all properties.
- For properties in override mode
- To manage the validation process for the property mappings of a mapped item, select or clear the Check This Item During 3D To PID Validation option.
Selecting the check box enables validation, while clearing it sets the validation process to ignore the property mappings of the item.
- Click OK.