After adding a dormer, cut an opening for it through the roof.
 Video: Create a Dormer
- Create the walls and roof elements that make up the dormer.
- Use the Join Roof tool to join the dormer roof to the primary roof.
Note: Do not use the Join Geometry roof tool for this task, or you may encounter an error when creating the dormer opening.
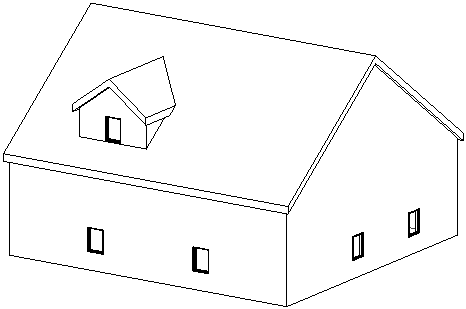
- Open a plan view or an elevation view in which you can see the dormer roof and the attached walls. If the roof is extruded, open an elevation view.
- Click
 (Dormer).
- Architecture tab
 Opening panel (Dormer Opening)
- Structure tabOpening panel (Dormer Opening)
Where is it?
- Architecture tab
- Highlight the main roof on the building model, and click to select it.
Watch the status bar to be sure that you are highlighting the main roof.
The Pick Roof/Wall Edges tool is active so that you can pick the boundaries that compose the dormer opening.
- Place the cursor in the drawing area.
Valid boundaries are highlighted. Valid boundaries are a joined roof or its bottom face, a side face of a wall, a bottom face of a floor, an edge of the roof to be cut, or a model line on the face of the roof to be cut.
- Click
 (Finish Edit Mode).
