Define an area of a toposolid to offset from the original toposolid surface.
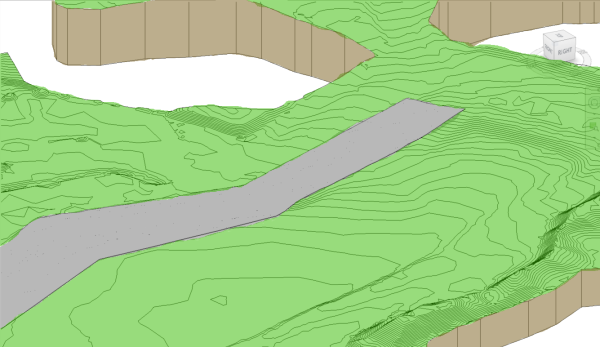
For example, you can use sub-divisions to draw parking lots, roads, or islands on a toposolid. Sub-divisions are assigned their own independant toposolid type. Assign a different type to have a sub-division with different material from the parent toposolid.
Creating a sub-division does not result in separate surfaces. The sub-division geometry is defined by the original surface and will reflect changes made to the parent toposolid. An offset may be defined for the sub-division. To create separate surfaces that can be edited independently, use the Split tool.
To sub-divide a toposolid
- Open a view that displays a toposolid.
- Select the toposolid
- Click Modify | Toposolid tab
 Toposolid Shaping
 (Sub-Divide).
Revit LT enters sketch mode.
- Click
 (Pick Lines) or use other sketching tools to create a sub-division on the toposolid.
- On the properties palette, select a toposolid type for the sub-division and provide a value for the Sub-divide Offset parameter. Positive values raise the sub-division above the surface of the toposolid, negative values will excavate the toposolid. A value of 0 will create a sub-division aligned with the toposolid geometry.
- Click
 (Finish Edit Mode).
To modify sub-division boundaries
- Select the sub-division.
- Click Modify | Toposolid tab Mode panel
 (Edit Sketch).
- Click
(Pick Lines) or use other sketching tools to modify the sub-division.
- Click
(Finish Edit Mode).
Note: If you
split a toposolid with a sub-division but the split does not cross the sub-division, you will receive a notification about deleting the sub-division element because it cannot be created. This is normal, click Delete Instance(s) to continue with the split action.
Example