Render Window Preferences
In the Menu Bar, click Edit > Preferences, then on the left side of the dialog box, select Rendering > Render Window. After making any changes, press Apply and Save to save them.
Visualization tab
Viewport
Use the resolution controls at the top of the viewport to set your preferred render resolution. If you do not set a resolution, the render window will adapt to the size of the viewport.
Default Rasterizer - Sets the default rasterizer used by VRED. Choose from Vulkan and OpenGL.
- Vulkan has advanced functionalities unavailable in OpenGL, such as GPU-accelerated raytracing, which requires a raytracing-compatible graphics card. Rasterization closely resembles that of the GPU Raytracer in precompute mode, simplifying the transition between rasterization and raytracing. It efficiently handles a large number of objects, especially when in motion, and doesn't have the light limitations of OpenGL, as all lights illuminate both geometry and volumes.
- OpenGL has no graphics card requirements and renders 2D and 3D vector graphics.
Default Raytracer - Sets the default raytracer used by VRED. Choose from CPU and GPU. If your hardware doesn't support your selection, VRED will default to one it does.
Use Fixed Resolution - Locks the viewport to a fixed pixel resolution.
Pixel Resolution - Sets the width and height of the Fixed Pixel resolution.
Enable Downscale - Enables downscaling to help less powerful computers render more interactively, according to individual scene complexities and when moving the camera. Available only in raytracing.
Downscale Quality - Contains the following options:
- Low - Uses every second pixel for the calculation.
- Medium - Uses every fourth pixel for the calculation.
- High - Uses every eighth pixel for the calculation.
Limit Near and Far Clipping Plane - Objects closer to the camera than the near clipping plane and farther than the far clipping plane are not drawn anymore. Sets the distances using the Near Clipping Plane and Far Clipping Plane controls.
Near/Far Clipping - Sets the distance between the near and far clipping plane and the camera position. Objects between the camera position and these clipping planes are not drawn.
HDR Reference White - Sets the value used for white in your HDR.
Default Display - Choose from a standard or HDR10 display as the default used by VRED for displaying the UI.
Use 16-Bit Float RGB - Sets the default behavior when using a wide gamut display, when enabled. VRED will no longer apply ICC profiles to the render output. Instead, it renders to a 16-bit floating point framebuffer and passes it to the operating system to apply the correct monitor profile. Changing this setting requires a VRED restart to become active.
Use 10-Bit RGB - Enables rendering to a 10-bit buffer.
Show Camera Visualizations - Displays a representation of the cameras in the viewport.
Show Constraint Visualizations - Displays a representation of the constraints in the viewport when enabled. When disabled, only the geometry is visible.
Enabled Disabled 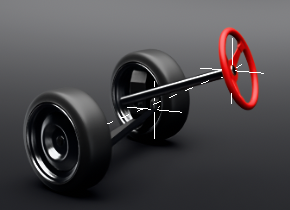
Show Light Visualizations - Displays a representation of the lights in the viewport.
Show Joint Visualizations - Displays a representation of the joints in the viewport.
Show Volume Visualizations - Displays a representation of the volumes in the viewport.
Lighting
Headlight Behavior - Sets the default state of the headlight for new scenes. Select Auto to leave the headlight turned on until the first Truelight Shader is used. Select Ignore to retain the headlight state. Headlights can also be set as always off or always on.
Use Point Headlight - Uses a point light as headlight, instead of a directional light.
Background
Sets the background colors of the viewport. The background can be a gradient, with different colors set at specified positions. Use the sliders to define the colors used to create the background gradient or click a slider, then use ![]() or click a slider and enter a numeric value in the Gradient field. Define each color using RGB values and with positions ranging from 0 to 1 (bottom to top).
or click a slider and enter a numeric value in the Gradient field. Define each color using RGB values and with positions ranging from 0 to 1 (bottom to top).

Advanced Rendering
Transparency Mode - Sets the default behavior for the Transparency mode. Choose from the following:
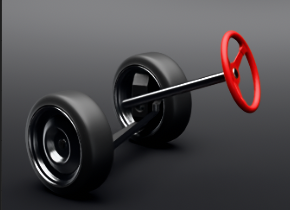
- Object Sorting - If you value performance more than correct results, don't have intersecting transparent objects, or transparent objects that intersect themselves, choose Object Sorting. It enables object sorting transparency, where every object in the scene is rendered one at a time, from back to front. The ordering can be overridden via the Sort Key option in the Material Editor > Common (tab). Find Object Sorting in Visualization > Rasterization Settings > Transparency Mode.
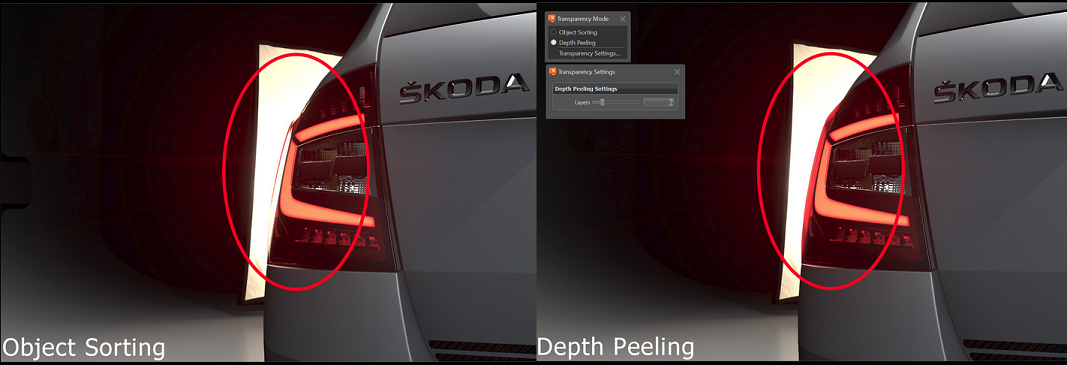
- Depth Peeling - If your scene has intersecting transparent objects or transparent objects that intersect themselves, use Depth Peeling. It is for order-independent transparency and per-pixel correct blending of transparent surfaces without sorting. Render images with complex intersecting transparent objects, such as a headlight, with pixel-perfect accuracy. Find Depth Peeling in Visualization > Rasterization Settings > Transparency Mode.
Without Depth Peeling With Depth Peeling 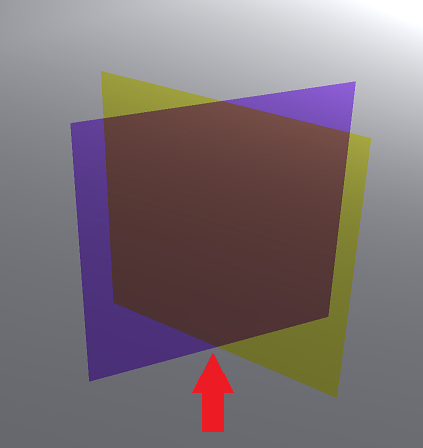

Video captions: For a pixel correct result with self-intersecting transparent objects in OpenGL, we’ve added additionally to the Object Sorting, the so-called Depth Peeling. This can also solve the issue of wrongly sorted transparent materials. Use the slider to adjust the number of layers that should be taken into the calculation.
- Disable Main Thread Sleep - Prevents the computer from sending the main thread to sleep.
- Cache Geometry - Uses extra main memory (RAM) to try and improve performance.
- Force GLFinish - Forces a full syncpoint for the GPUs, after a buffer swap, when rendering is slow, due to background buffers in the GPU driver.
- Single Pass Stereo - Improves performance by rendering a pair of stereo images in a single render pass. Check out the Stereo video to see how to set up rendering in stereo.
- Occlusion Culling - Disables the rendering of invisible objects. This can improve performance in complex scenes.
Use GPU Texture Compression - Compresses textures when uploading them to the GPU in GPU Raytracing (and in OpenGL) without changing the original images. This process is rather time consuming, so initialization of the GPU raytracer will take longer.
Note:Textures with dynamic content, such as web engine textures, image sequences, and images created by vrVirtualEye and vrMoviePlayer2, are not compressed, so the texture update is not slowed down.
Realtime Antialiasing tab
General
Antialiasing Quality - Contains the following options:
- Off - The original resolution is displayed.
- Low, Medium, High, and Ultra High - Quality levels are configured in Visualization Advanced > Realtime Antialiasing Presets.
For example - With Multisampling set to 2 Samples, two times the original resolution displays. If Enable Supersampling is selected, rendering occurs twice in the x and y (effectively four times). With Multisampling at 2 and Supersampling selected, the quality is eight times the original resolution.
Enabled Stillframe Antialiasing - Enables Stillframe Antialiasing when checked for rasterization and raytracing render modes. Still frame antialiasing progressively renders the still image over time.
Stillframe AA After - Sets the duration to wait for user input before automatically beginning antialiasing.
Enable Postprocess Antialiasing - Attempts to smooth the hard edges of the image, based on filtering. Results are lower quality, but you get higher performance.
Disable Realtime Antialiasing on Camera Movement - Disables realtime antialiasing during camera movement and re-enables it when camera movement stops.
Show Auxiliary Nodes During Antialiasing - Keeps all auxiliary visualizations, like clipping or manipulators, visible during antialiasing.
Realtime Antialiasing Presets
Uses these to set the defaults for the Visualization > Realtime Antialiasing options. Set customize values for low, medium, high, and ultra quality settings. Click here to view a rendering Antialiasing video.
- Multisampling - Samples ranges from 1x to 16x. If a platform does not support a sampling level, it is silently clamped.
- Variable Rate Shading - Sets the shading rate per material, which is useful for materials with fine patterns that are prone to the moiré effect. Choose from 1 Sample (Native shading), 2 Samples, 4 Samples, and 8 Samples (Supersampling).
- Enable Pixelfilter - Enables a triangle pixelfilter to use with multisampling. Staircase artifacts caused by standard GPU Box filtering are removed.
- Enable Supersampling - Creates a render buffer with 2x the size and is downscaled with a triangle filter. When combined with 16x multisampling, 256 samples are taken.
- Raytracing - Displays the number of samples, from 1 to 64, used in the raytracer for realtime antialiasing. Check out the Raytracing videos to see how to set up raytracing.