Camera Tracks
Scene > Camera Editor
Cameras can contain one or more tracks. Tracks contain viewpoints, which can animated, but don't have to be. Use the Camera Editor to create, edit, and view tracks, as well as create, recapture, animate, and remove viewpoints.
To access tracks, viewpoints, and their options, in the Camera Tree, expand a camera and select a track ![]() .
.
 Track View
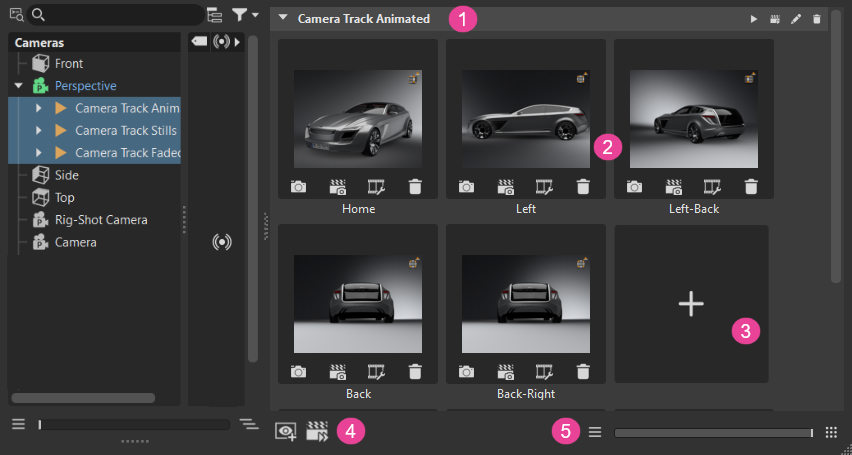
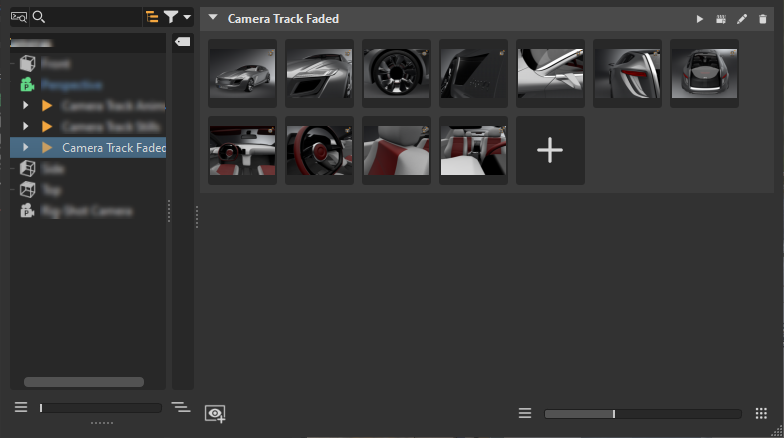
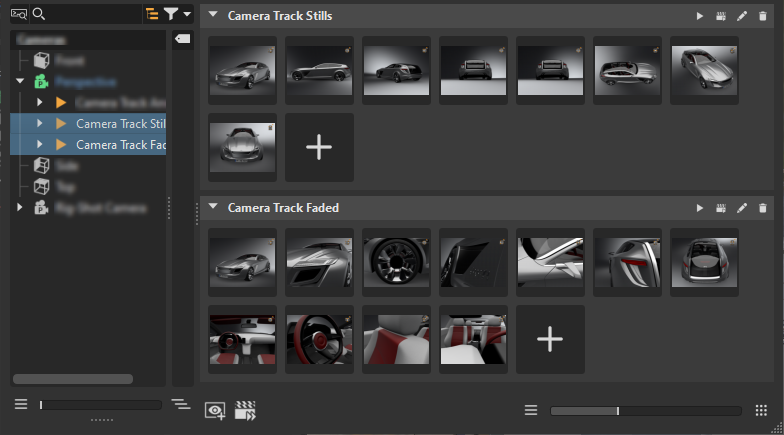
Once a track is created, expand the camera in the tree to access it. Click the track to load it into the Track View. The number of tracks selected in the tree determines the number of tracks displayed in the Track View.
| One Track Selected | Multiple Tracked Selected |
|---|---|
 |
 |
Track Controls
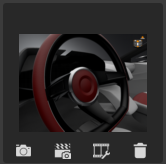
These controls affect the track and all its viewpoints. Within each track are controls for playing the camera track, rendering previews, showing camera track settings, and deleting the track.
![]() Play/Stop Camera Track - Plays the track viewpoints in the Render Window. For how to use it, see Playing and Stopping Track Playback.
Play/Stop Camera Track - Plays the track viewpoints in the Render Window. For how to use it, see Playing and Stopping Track Playback.
![]() Render All Previews Inside Track - Rerenders all viewpoints with the current scene settings. Use this when changes have been made. For how to use it, see Re-rendering All Viewpoints.
Render All Previews Inside Track - Rerenders all viewpoints with the current scene settings. Use this when changes have been made. For how to use it, see Re-rendering All Viewpoints.
![]() Show Camera Track Settings - Opens the Camera Track Settings dialog for renaming a track, setting the fade-in time, animation duration, and pause time. When finished, click OK to save the changes. For how to use it, see Working with Camera Track Settings.
Show Camera Track Settings - Opens the Camera Track Settings dialog for renaming a track, setting the fade-in time, animation duration, and pause time. When finished, click OK to save the changes. For how to use it, see Working with Camera Track Settings.
Name - Enables you to rename the camera track/viewpoint.
Fade-In Time - Sets the start time for the playback to fade from a complete black screen to the colored image. The threshold defines the time that is used for the moment of fading. A value from 0.00 disables feature.
Animation Duration - Controls the time the camera animation uses to move from its current position to the one stored within the viewpoint. A duration value of 0.00 corresponds to a hard cut, meaning there is no animation between different viewpoints. The viewpoint duration doesn't affect the track duration.
Pause Time - Determines how long before the camera to move to the related viewpoint.
![]() Delete - Deletes the track and all its viewpoints. For how to use it, see Deleting a Viewpoint.
Delete - Deletes the track and all its viewpoints. For how to use it, see Deleting a Viewpoint.
 Tracks and Viewpoints
Each camera track contains viewpoints, along with Viewpoint Controls to recapture the viewpoint preview, update the preview, adjust animation settings and create a shortcut key for the viewpoint, and delete the viewpoint, as well as ![]() to capture the current viewpoint in the renderview and add it to the track.
to capture the current viewpoint in the renderview and add it to the track.
Viewpoint Thumbnail Controls
These controls are visible when the viewpoint thumbnails are displayed at their maximum size.
As they are resized with the slider, the controls are hidden but available in the right-click context menu.
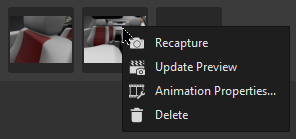
![]() Recapture - Overwrites the viewpoint with the current position and orientation from the Render Window’s camera. Another way to recapture a viewpoint is to use
Recapture - Overwrites the viewpoint with the current position and orientation from the Render Window’s camera. Another way to recapture a viewpoint is to use ![]() . For how to use it, see Recapturing a Viewpoint.
. For how to use it, see Recapturing a Viewpoint.
![]() Update Preview - Updates the thumbnail of the image to the current renderview, adapting the active camera's position and orientation. For how to use it, see Changing the Active Camera's Viewpoint.
Update Preview - Updates the thumbnail of the image to the current renderview, adapting the active camera's position and orientation. For how to use it, see Changing the Active Camera's Viewpoint.
![]() Show Animation Properties - Opens the Animation Properties dialog for setting the camera's animation behavior, name, fade-in time, animation duration, pause, overriding track settings, and defining a hotkey for the viewpoint. When changes are made, click OK to save them. For how to use it, see Setting Animation Properties. For setting these for the entire track, see Working with Camera Track Settings.
Show Animation Properties - Opens the Animation Properties dialog for setting the camera's animation behavior, name, fade-in time, animation duration, pause, overriding track settings, and defining a hotkey for the viewpoint. When changes are made, click OK to save them. For how to use it, see Setting Animation Properties. For setting these for the entire track, see Working with Camera Track Settings.
- Name - Enables the renaming of the viewpoint.
- Fade-In Time - Sets when the playback to fade starts for the current viewpoint, fading it from a complete black screen to the colored image. The threshold defines the time that is used for the moment of fading. A value from 0.00 disables the feature.
- Animation Duration - Sets how long the camera is animated, moving from its current position to the viewpoint position. A duration value of 0.00 seconds gives a hard cut. The viewpoint duration doesn’t affect the track duration.
- Pause Time - Determines the time the animation waits before the camera moves to the viewpoint position.
- Overwrite Track Settings - Adapts adjusted settings from viewpoint to the animation track properties, once OK is pressed. It makes the viewpoint use its own animation settings, created in this Animation Properties dialog, when enabled. These settings only have an effect on the final animation. When disabled, the viewpoint uses the Global Camera Track animation settings.
- Hotkey - Defines a hotkey for the current viewpoint.
![]() Delete - Deletes the viewpoint from the track. For how to use it, see Deleting a Viewpoint.
Delete - Deletes the viewpoint from the track. For how to use it, see Deleting a Viewpoint.
Reorder Viewpoints
Drag viewpoint thumbnails to rearrange their order.
Changing the Renderview
Click a viewpoint to change the view in the renderview to it.

![]() Create Viewpoint
Create Viewpoint
Click ![]() to capture the current viewpoint in the renderview and add it to the track. The current position and orientation of the active camera are stored. If no camera track exists at the point of viewpoint creation, it is generated automatically. Each thumbnail image represents a different viewpoint. For how to use it, see Creating a Viewpoint.
to capture the current viewpoint in the renderview and add it to the track. The current position and orientation of the active camera are stored. If no camera track exists at the point of viewpoint creation, it is generated automatically. Each thumbnail image represents a different viewpoint. For how to use it, see Creating a Viewpoint.
Renaming a Viewpoint
To rename a viewpoint, click its name and enter a new value.
 Track Toolbar
These tools are only available when multiple tracks are selected.
![]() Add Track - Creates a new empty track in the Track View and tree list. For how to use it, see Adding a Track.
Add Track - Creates a new empty track in the Track View and tree list. For how to use it, see Adding a Track.
![]() Update Preview - Rerenders and updates all previews for the selected tracks in the tree list. For how to use it, see Re-rendering All Viewpoints.
Update Preview - Rerenders and updates all previews for the selected tracks in the tree list. For how to use it, see Re-rendering All Viewpoints.
 Slider
At the bottom of the Camera Track, is a slider. Use it and its buttons to adjust the size of the viewpoints and zoom in and out of the preview thumbnails, changing the layout in the Track View. For how to use it, see Changing the Viewpoint Preview Size.