Image Processing Tab
Scene > Camera Editor > Image Processing
All camera image processing parameters are found in this tab.

Video captions: Available in VRED 2025.3. Our new color management system, called OpenColor IO, gives us the opportunity within the physical camera to include support for ACES 2.0, Kronos PBR Neutral, and an un-toned view transform.
And second, you can now apply brand new color grading methods to your cameras. When you select a camera, you will find a new frame within the Image Processing tab, called Grading. This Grading contains four new entries for Primary, Tone, RGB Curves, and LUTs.
You will also recognize the new checkboxes, so you can now temporarily enable or disable single settings without the need to expand the frame.
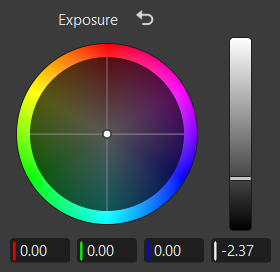
Under Primary, you will find 3 new color wheels for Exposure, Contrast, and Offset. You can also use the vertical sliders to adjust the values. And, if you want to reset your values, just use the reset button.
The Tone menu is very similar with 5 different colors wheels for Blacks, Shadows, Midtones, Highlights, and Whites.
The RGB Curves frame allows adjusting the tones using a B-Spline curves, where you have a curve for R, G, B, and one master curve. Use either the existing 3 control points of the curve to change the look, or just add additional control points by just clicking into the curve or by using the pipette to search for a specific color within the viewport. You can also delete control points or use the rest button to get back to the default curve.
And the LUT area gives you the option to use one of the preinstalled LUTs or load a custom LUT from your disk. And if you want to mix the LUT grading, you can use the Weight control.
After you have done all your settings, you maybe want to save these as a custom preset to reuse and share this in other projects. The default folder for your presets can be changed here in the preferences. This is also the area where you can set the folder for your LUT collection. So, you might want to set it to a folder where all team members have access to.
You can also copy paste all settings from one camera to another. And the Settings will also be available in the Python API.
Also, new is a color picker for the white balancing in your scene. Just activate the new picker tool and select a point in your scene that you consider to be white. This makes finding the right white balancing in your scene so much more comfortable now and its less guesswork.
Tonemapping
Makes it possible to map the high dynamic range rendering for display onto an output device with lower dynamic range.
Tonemapper - Selects an algorithm to adjust the appearance of a 32-bit render.
Reinhard Luminance - Uses the tone mapping methods, based on Erik Reinhard’s methods. The tone mapping takes place, based on the luminance values of a pixel. The pixel color information is retained.
Reinhard RGB - Uses the tone mapping methods, based on Erik Reinhard’s methods. The tone mapping takes place separately for each channel of an RGB pixel. Bright pixels are desaturated, as with a digital camera sensor. When selected, the Color Space option appears. Select from sRGB or ACES.
Logarithmic Luminance - Uses a logarithmic mapping, based on the luminance values. This mapping corresponds approximately to the human perception. The color information remains unchanged.
Logarithmic RGB - Uses a logarithmic mapping that affects each channel of an RGB pixel separately. Bright pixels are desaturated. When selected, the Color Space option appears. Select from sRGB or ACES.
Filmic - Uses an s-curve mapping that reproduces the behavior of a photographic film. RGB channels are mapped separately. Two parameters control the shape of the s-curve, Shoulder and Toe Strength.
Physical Camera - Available in VRED Professional and Design as of 2023.4. Enables the option to work with physical values like F-stop, Shutter Speed, Sensor Response, View, Look, ISO, and Automatic ISO Adaption to control the tonemapping of the image. Additionally, presets of response camera curves can be loaded and edited to adjust the appearance of the rendering. These values affect the amount of motion blur and depth of field. Also, a focal length change affects the exposure of the rendering.
Luminance - Available in VRED Professional and Design as of 2023.4. Shows the luminance values in the scene. Luminance is the light reflected from a surface, so this is what a human eye would see.
Get information on the actual luminance values of an individual pixel, which is displayed as the cursor moves over the pixel. Brightness values are displayed in cd/m² and Lux (lm/m²) within a radius of 5 x 5 pixels around your cursor. Values are slightly offset when anti-aliasing, but are still visible. Use this when precise brightness measurements, regardless of the value scale, are needed for lighting simulations.
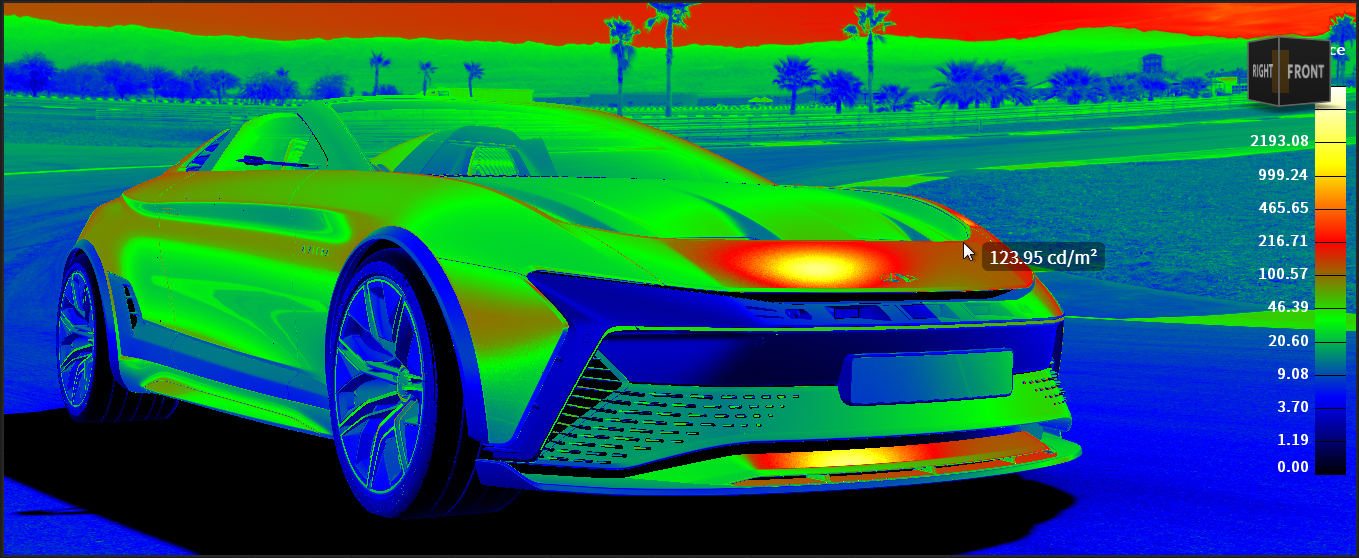
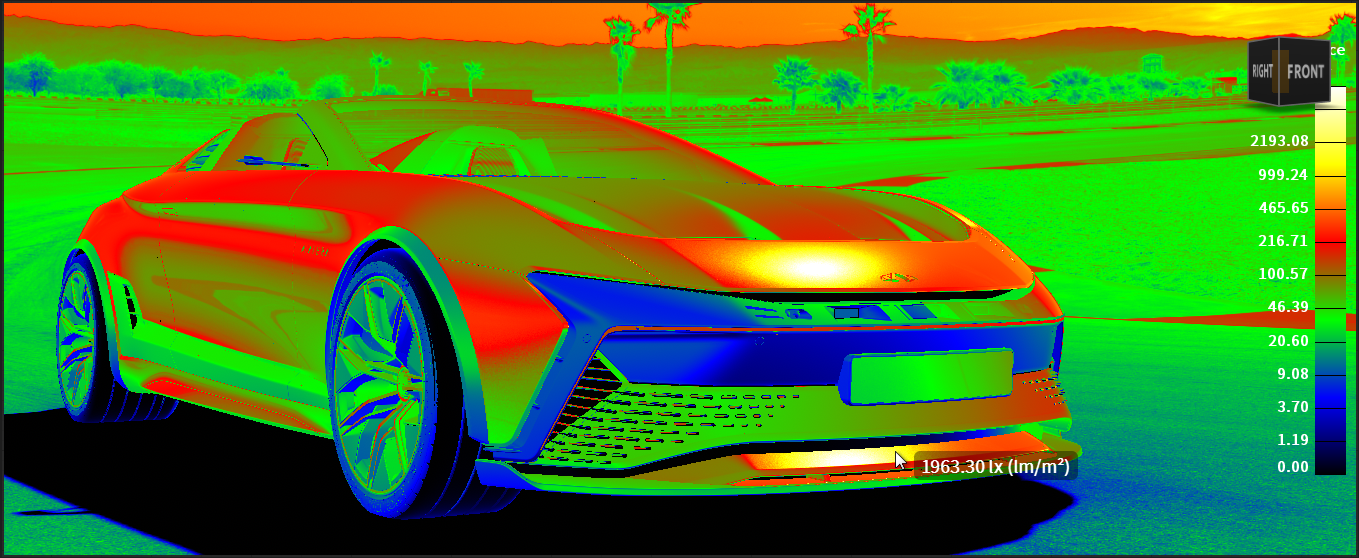
Video Captions: For extracting information from detailed lighting simulations, the Luminance / Illuminance Value Indicator displays brightness values in candela per m ² and lumen per m² around your cursor. This precision is invaluable for measuring and adjusting brightness accurately, providing optimal visual outcomes in lighting setups.
Illuminance - Available in VRED Professional and Design as of 2023.4. Shows the illuminance arriving at a surface.
Get information on the actual illuminance values of an individual pixel, which is displayed as the cursor moves over the pixel. Brightness values are displayed in cd/m² and Lux (lm/m²) within a radius of 5 x 5 pixels around your cursor. Values are slightly offset when anti-aliasing, but are still visible. Use this when precise brightness measurements, regardless of the value scale, are needed for lighting simulations.
- Exposure - Not available for the Physical Camera, Luminance, or Illuminance tonemapper. Affects the illumination behavior from the environment texture on the usage of the related camera. A threshold from 1.0 interprets the HDR environment texture exactly like it's given within its environmental property settings. A value below/above darkens/lightens the illustration from that camera.
- White Point - Not available for the Physical Camera, Luminance, or Illuminance tonemapper. Defines the tone above everything that should be shown as white. It maps the luminance value to the value 1 (that is, the maximum luminance of the display device).
- Contrast - Only available for the Reinhard Luminance, Reinhard RGB, Logarithmic Luminance, and Logarithmic RGB tonemapper. Locally adjusts the contrast, using a contrast range, to keep the image looking as close to the original HDR image as possible.
Color Space - Only available when the Logarithmic RGB, Reinhard RGB, Physical Camera, or Filmic Tonemapper and the Custom Response Curve Sensor Response is selected . Sets the color space used when rendering your images.
sRGB - Uses the standard RGB color space for vibrant saturated consistently displayed colors.
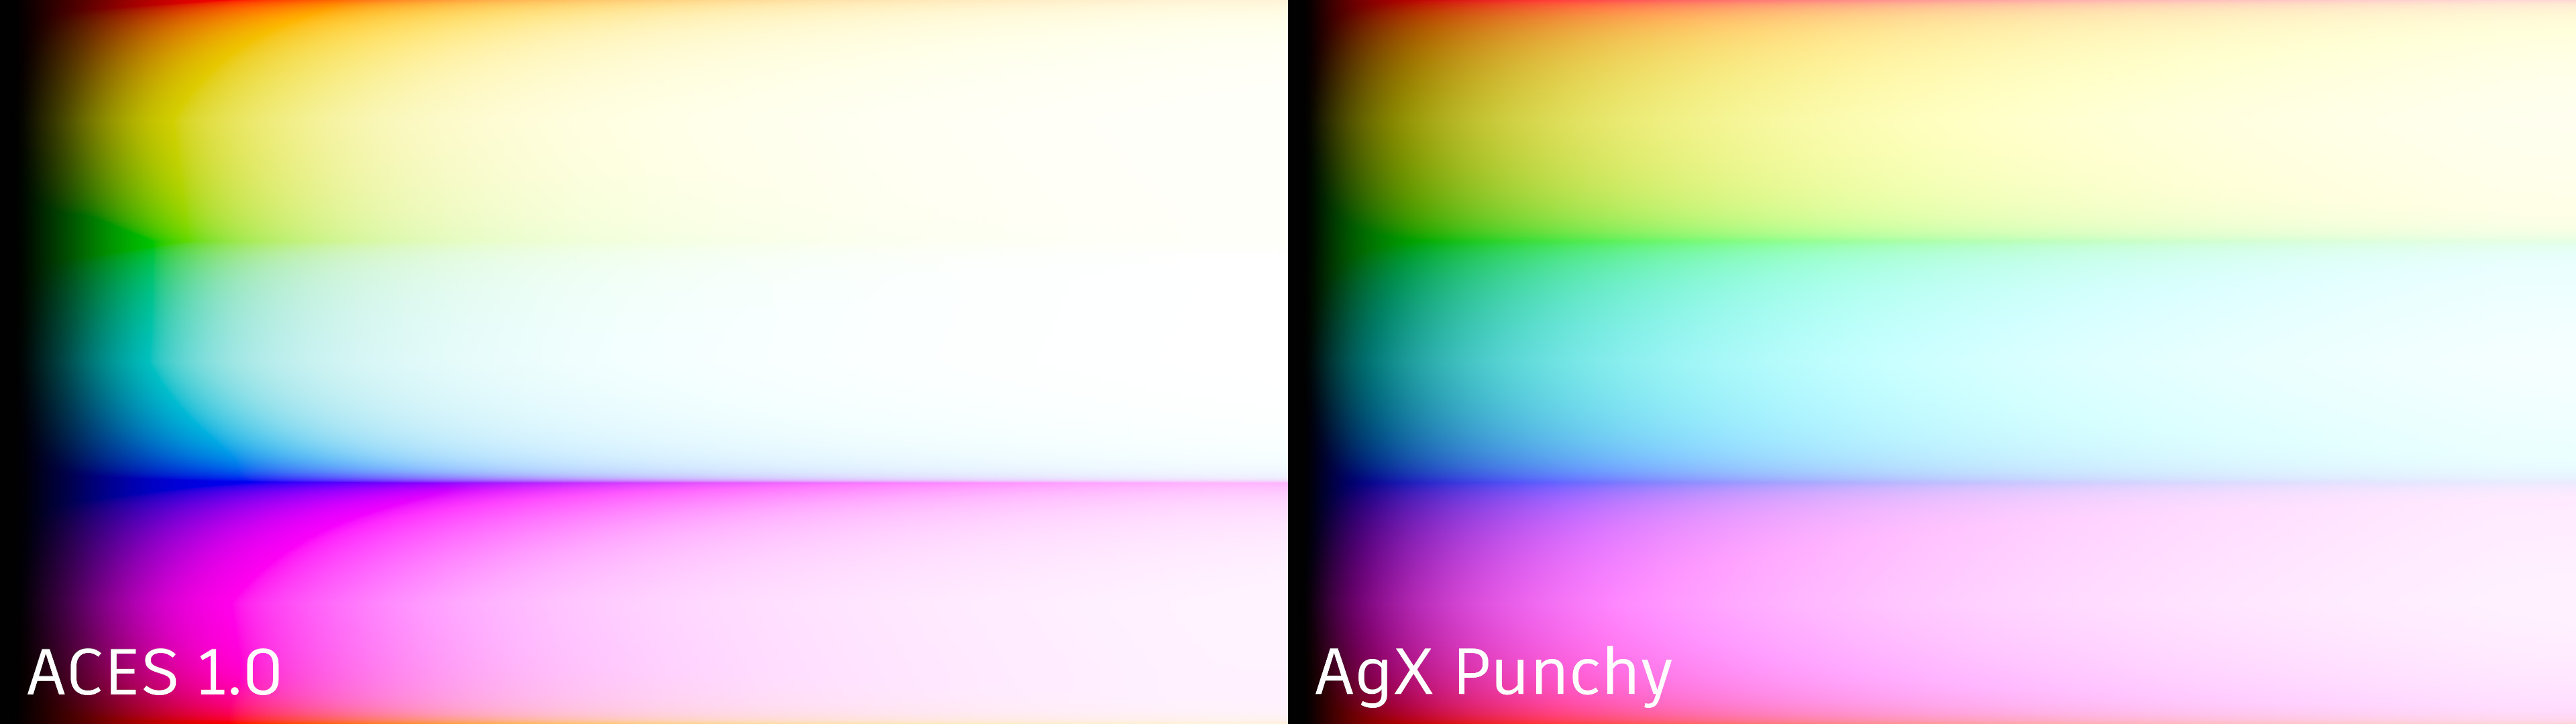
ACES - Helps reproduce the color shifts that occur when filming a bright light. For example, think of a taillight where red gets shifted to yellow or a bright sky that gets slightly desaturated.
AgX - Offers improved color handling in bright areas compared to ACES, where colors tend to shift their hue value and are too saturated. In AgX, bright colors move toward white, replicating the behavior of real cameras.
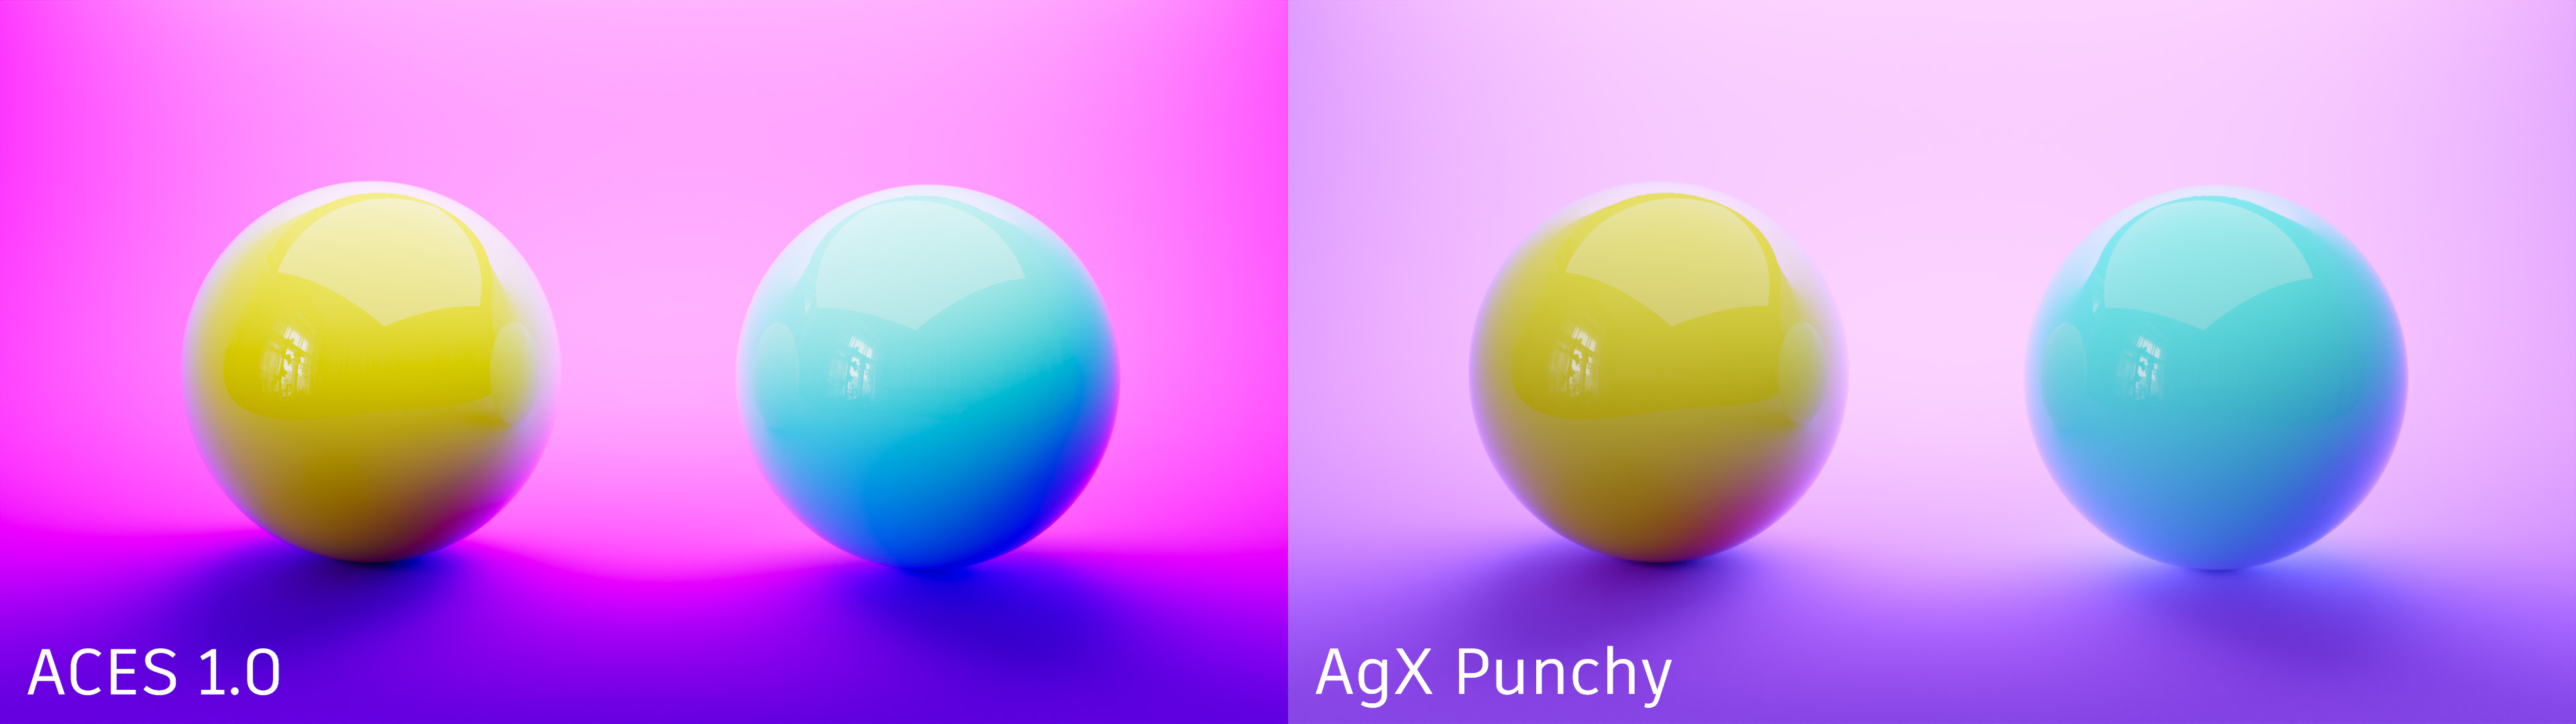
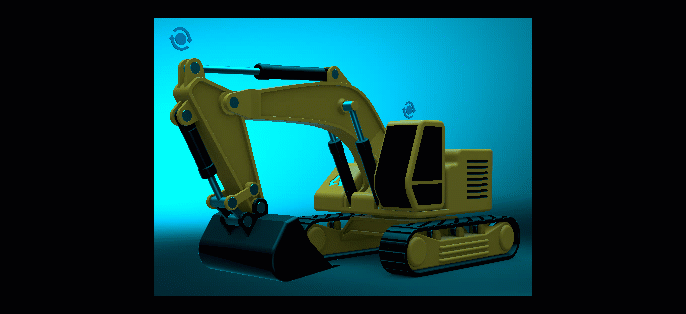
The following color sweep example, rendered in VRED, nicely illustrates the different hue shifts of the two tonemappers across the color spectrum.
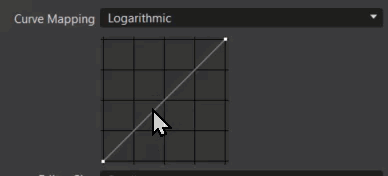
Curve Mapping - Only available using the Physical Camera tonemapper and Custom Response Curve sensor response. Sets the mapping of input values to the sensor response curve lookup table.
Linear (Legacy option) - Clamps the HDR rendering results to the 0 to 1 range, as input to the lookup table.
Logarithmic - Uses the -12.473930 to 12.56068812 range of the log2 of the HDR rendering results, as input to the lookup table. This allows for 25 stops of dynamic range.
- Shoulder Strength - Only available for the Filmic tonemapper. Controls the gradient in the area of bright pixels.
- Toe Strength - Only available for the Filmic tonemapper. Controls the gradient in the area of the dark pixels.
- F-Stop - Only available when the Physical Camera Tonemapper is selected. Sets the ratio of the focal length to the aperture.
- Shutter Speed - Only available when the Physical Camera Tonemapper is selected. Defines a custom shutter speed in 1 over the input value (1/x).
Automatic Exposure - Adjusts the brightness to what is on the screen, automatically calculating the exposure, based on the image. This is really useful for an interactive scenario, such as moving through the interior of a car. When Automatic Exposure is disabled, the interior can be too dark, as not enough scene lighting penetrates the interior. When enabled, the automatic ISO is disabled.
Video Captions: Navigating scenes with varying brightness levels is now simpler with our Automatic Camera Exposure option. Just turn on the checkbox in the tone mapping tab of the camera editor. This feature automatically adjusts exposure based on average image brightness, ensuring seamless and consistent visual quality between differently lit environments.
This works for animation and offline rendering and is stored per viewpoint. This also works in clustering, but does not display the cluster image. Use this with the Exposure Compensation option.
- Exposure Compensation - Only available when the Automatic Exposure is enabled. Not available for the Luminance or Illuminance tonemapper. Adjusts the brightness applied when Automatic Exposure is enabled. Values above zero increase the exposure applied to the scene, brightening it, where values below zero decrease it, darkening it.
- ISO - Only available when the Physical Camera Tonemapper is selected and Automatic Exposure is disabled. Automatically adjusts the camera sensor's ISO when the F-Stop or shutter speed changes to maintain consistent brightness, determining the sensitivity of the image sensor; the lower the number, the less sensitive the camera is to light.
- Automatic ISO Adaption - Only available when the Physical Camera Tonemapper is selected and Automatic Exposure is disabled. Automatically adjusts the camera sensor's ISO when the F-Stop or shutter speed changes to maintain consistent brightness.
Sensor Response - Only available for the Physical Camera Tonemapper. Sets the tonemapping algorithm to use for mapping HDR rendering results to the valid value range. Provides the following options:
Custom Response Curve - Allows the use of a custom sensor response curve for RGB or Luminance by enabling the Curve Mapping, Editor Size, Response Curve, and Response Curve Mode options.
OpenColorIO - Unlocks new capabilities in the Physical Camera for a more flexible way to manage color transformations when working with high-fidelity color imaging. We support OpenColorIO v.2.4.2.
Note:As of 2026.2, there is OpenColorIO tonemapping for the Physical Camera in the display cluster.
AgX - Uses sensor response behavior to transforms the tonemapping by improving upon Filmic to achieve a more photorealistic results. AgX provides a dynamic range of 16.5 stops and desaturates highly exposed colors to replicate the natural light response of film.
AgX Punchy - Uses sensor response behavior to transforms the tonemapping by improving upon AgX to achieve more vibrant results.
AgX Custom - Uses sensor response behavior to transforms the tonemapping by controlling the power and saturation of an image.
Power - Only available when Sensor Response is set to AgX Custom. Applies a power value to the image after applying the response curve to control the contrast.
Saturation - Only available when Sensor Response is set to AgX Custom. Applies a saturation value to the image after applying the response curve.
View - Only available when the Sensor Response OpenColorIO is selected. Sets the tonemapping curve used for transforming the view. Choose from the following:
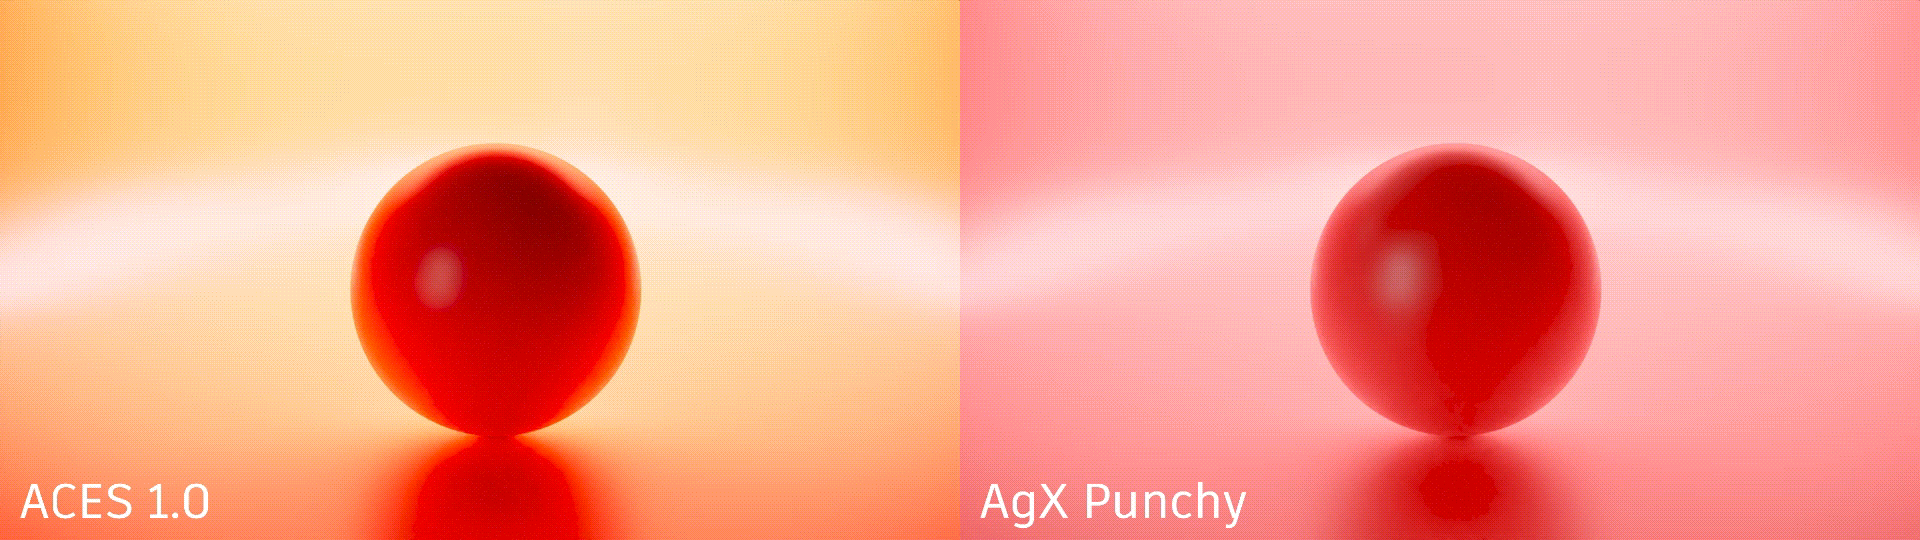
ACES 2.0 - Improves the consistency of an image's tone and minimizes color distortions.
ACES 1.0 - Uses sensor response behavior, as defined in the Academy Color Encoding System, so there will be a filmic color shift. For example, red glowing objects shift to yellow.
PBR Neutral - Uses PBR color accuracy to achieve an accurate physical simulation rendering that is optimally illuminated and uses an exact sRGB color representation for grayscale lighting conditions that is neutrally depicted under colored light, such as sunlight.
Un-tone-mapped - Use when wanting to see an image's source color texture values as they appear during editing without tonemapping.
Look - Only available when the Sensor Response OpenColorIO 2.4 is selected. Sets the specific look modification transform used when tonemapping. Choose from the following:
None - No look modifications are made.
ACES 1.3 Reference Gamut Compression - Corrects artifacts in source images. This is the replacement created for the Blue Light Artifact LMT. It uses a simple RGB ratio-based algorithm that compresses values based on their distance from the neutral axis.
- LMT - Blue Light Artifact Fix - Blue light exposure increases to white, instead of magenta, fixing blue light artifacts.
Adjust 18% Gray Level - Only available when Tonemapper is set to Physical Camera and Sensor Response to OpenColorIO. Adjusts the view transform, so that 18% gray levels stay at 18% gray after applying the view transform. When switching between ACES 1.0, ACES 2.0, and PBR Neutral, brightness remains consistent.
Video Captions: The Adjust 18% Gray Level ensures consistent brightness across different view transforms, maintaining color fidelity and uniform visual output. This streamlines your workflow when switching between ACES 1.0, ACES 2.0, and PBR Neutral settings.
- Editor Size - Only available when the Custom Response Curve Sensor Response is selected. Sets the response curve editor size to small, medium, or large.
- Response Curve - Only available when the Custom Response Curve Sensor Response is selected. Allows a custom response curve, from or to a file, to be loaded or saved.
- Response Curve Mode - Only available when the Custom Response Curve Sensor Response is selected. Sets the response curve mode to use luminance, red, green, or RGB.
- Luminance (cd/m2) Range - Only available for the Luminance tonemapper. Sets the luminance values in the scene when looking at it from a particular angle or point of view.
- Lux (lm/m2) Range - Only available for the Illuminance tonemapper. Sets the speed at which the illuminance arrives at the surface.
- Mapping Mode - Only available for the Luminance or Illuminance tonemapper. Select one of the following mapping modes: Logarithmic RGB Scale, Logarithmic HSV Scale, Linear RGB Scale, or Linear HSV Scale.
Basic Color Correction
This section contains options for basic color correction:
White Balance - Defines the white balance value that affects the image in the post-processing procedure, which is measured in Kelvin. 6500 Kelvin is used as standard for video productions.
Cool/Warm - Adjusts the color temperature of the image to give it a warmer or cooler tone.
 - Quickly adjusts the white balance. Click an area of the image that should be white and VRED will adjust the white balance based on your selection.
- Hue-Shift - Shifts all colors uniformly towards a color shade.
- Contrast - Separates the light and dark color values further from each other.
- Brightness - Increases or decreases lightness for the scene.
- Saturation - Sets the intensity of the color values.
- Apply To Backplates - Applies the camera color correction and the camera's white balance to the backplate. Otherwise it is only applied to the rendered geometry.
- Apply To Frontplates - Applies the camera color correction and the camera's white balance to the frontplate. Otherwise it is only applied to the rendered geometry.
Color Grading
The Color Grading options to help with exposure and impact the mood, tone, and the overall visual appeal of your project. Use the QuickAccess Bar tool ![]() to instantly enable or disable any color grading options.
to instantly enable or disable any color grading options.
Video captions: After releasing color grading in VRED 2025 update 3, we've now added a global weight option to control the overall impact of the tone mapping. This allows you to easily adjust and create subtle results, increasing the ease of use.
Presets - Provides an extensive list of presets. For how to create a camera preset, see Creating a Camera Preset.

Default Film Warm Preset 
Filename - Provides options for creating/saving and importing color grading presets into your project. Click
 to locate the file, which is stored here,
 C:\ProgramData\Autodesk\VREDPro-17.3\data\OpenColorIO\Presets, by default. Select the file and click Open. When using one of the provided presets, select Default.Weight - Sets the influence of the overall color grading of the image. To apply full color grading, enter 1. For no color grading, enter 0. Find this in the Camera Editor > Image Processing tab > Color Grading section.
As the Weight value is decreased, so is the color grading's influence on the image's color grading.
Color Grading Sections
Within the Color Grading section are additional sections, Primary, Tone, RGB Curves, and LUT.
To enable the options in a section and make them editable, add a check in front of it.
To disable all options in a section instantly, unchecking the section.
Each section contains several new controls, including color wheels, vertical sliders, and a new curve editor, to help you fine-tune the color balance of your rendering that are grouped within a frame.
 |
|---|
| The color wheel controls within the Exposure frame |
Using the Color Wheel Controls
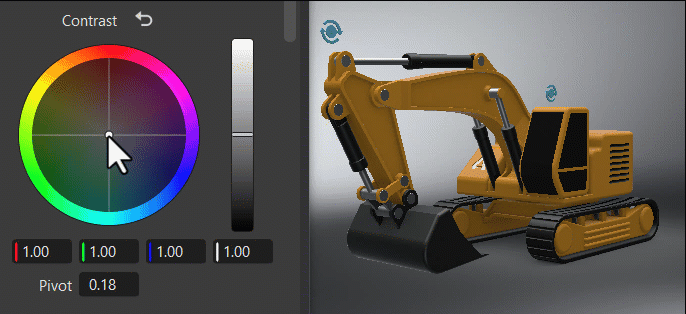
Within the color wheel, click-dragging the center control toward the edge to adjust the grading, increasing the tint and intensity. This slowed mouse movement is intentional, as it provides more granular control in a relatively small control field. Clicking a specific location instantly jump to that position.
The vertical slider to the right of the wheel is the main control. For example, dragging the Contrast main slider up would increase difference between the brighter and darker parts, sharpening the entire image; whereas dragging it down would decrease the difference, softening the entire image.
The fields below the color wheel display the color transforms made in the color wheel, representing the individual RGB and Luminance values.
Clicking ![]() , found next to the frame title, reverts all color wheel controls for that frame to their original default state.
, found next to the frame title, reverts all color wheel controls for that frame to their original default state.
The first time color grading options are used, it can take a while to compile.
Primary
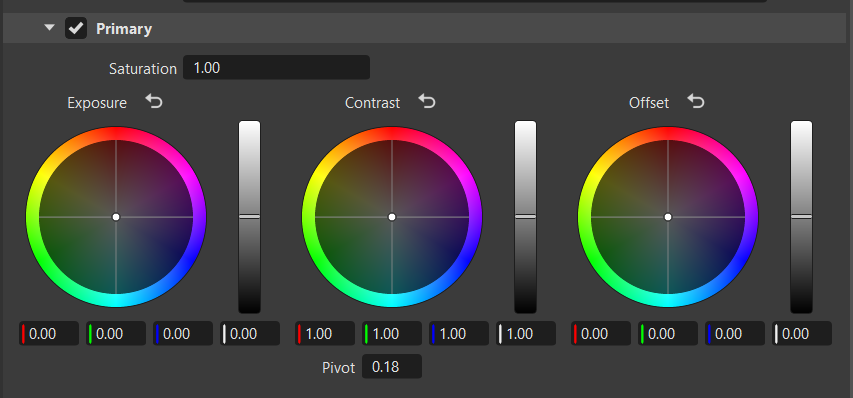
The Primary frame offers color wheel controls to allow broad adjustments made to the overall image. This includes adjustments to the entire image's saturation, exposure, and offset.
The Saturation slider adjusts the intensity and vividness of the image colors. Increasing the saturation makes colors more vibrant, while decreasing it brings them closer to black, white, or gray.
The Pivot adjusts the contrast balance and location of the center point used for making changes. Use it to fine-tune your contrast adjustments. Increasing the pivot value, darkens the image, while decreasing it brightens it.
Tone

The Tone frame changes the image's color tone, helping to establish a mood or visual tone. Use the controls to color your blacks, shadows, midtones, highlights, and whites.
The S Contrast is a contrast curve. Use it to increase the image's contrast by darkening shadows and brightening highlights.
The Start and Width sets the range used for the contrast between the deepest blacks, modtones, and brightest whites. The higher the value, the larger the dynamic range.
The Pivot adjusts the contrast balance and location of the center point used for making changes. Use it to fine-tune your contrast adjustments. Increasing the pivot value, darkens the image, while decreasing it brightens it.
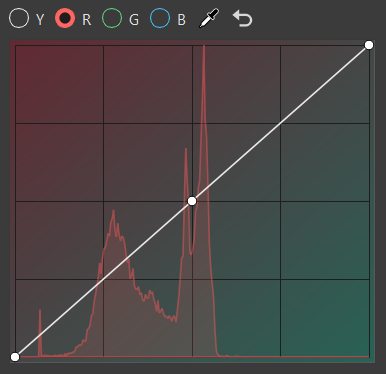
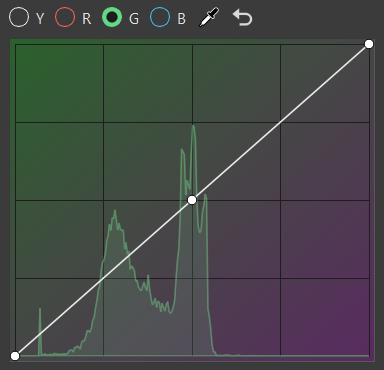
RGB Curve
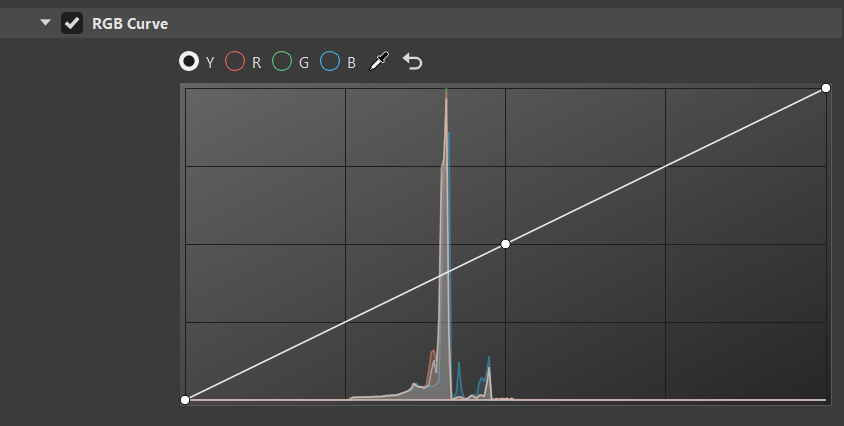
The histogram is purely based on the rendered image before any tonemapping or color correction. Its grading curves update as you move the camera around.
Along the top of the histogram are the following options:
Y for selecting luminance curve
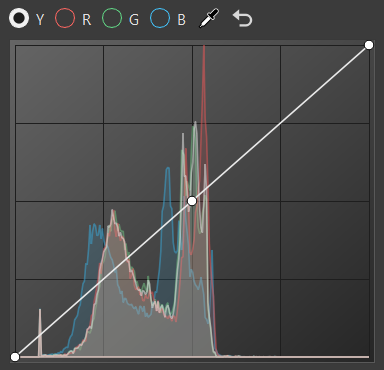
R for selecting red curve
G for selecting green curve
B for selecting blue curve
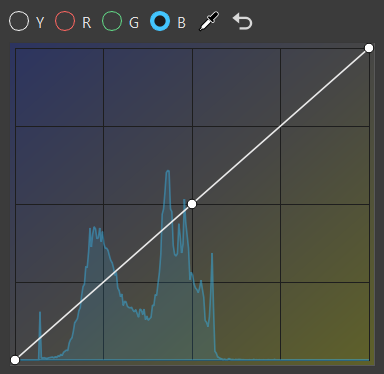
- for picking a color from the viewport and adding a new control point to the curve
 for returning fields to their default values
Click the curve to add a new point and increase the contrast or pick a certain color and add a point to the graph that explicitly affects that range.
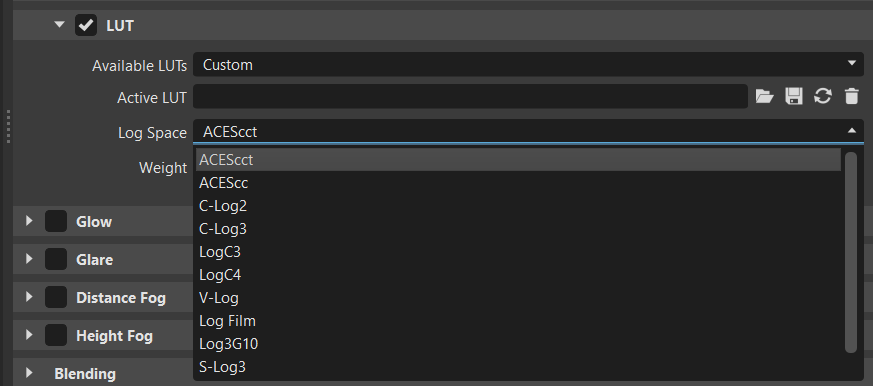
LUT
A LUT is a look up table that's used to tell VRED what color to make things. This can save a lot of time when color grading your content.
If rendering with HDR values, your LUT must work with logarithmic space and output to the same.
Available LUTs - Provides a list of LUT presets, as well as a custom LUT option.
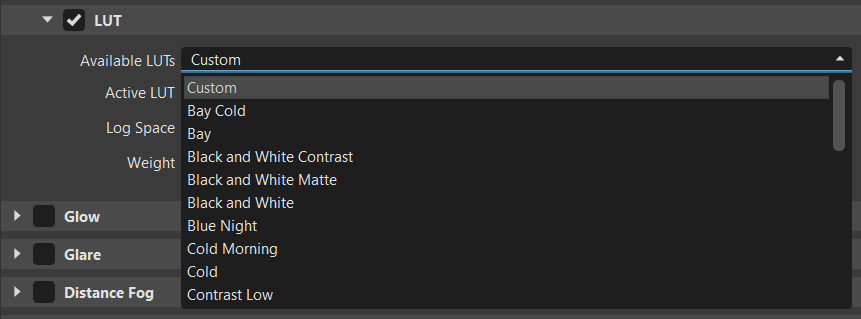
Bay Cold LUT Vintage LUT 
Active LUT - Displays the current active LUT and provides options to open, import, save, update, or remove a LUT.
Log Space - Provides a list of logarithmic spaces to be applied to the LUT.
Weight - Sets the influence of the LUT on the overall color grading of the image. To apply full color grading to the LUT, enter 1. For none, enter 0.
For LUT workflows, see the following:
Chromatic Aberration
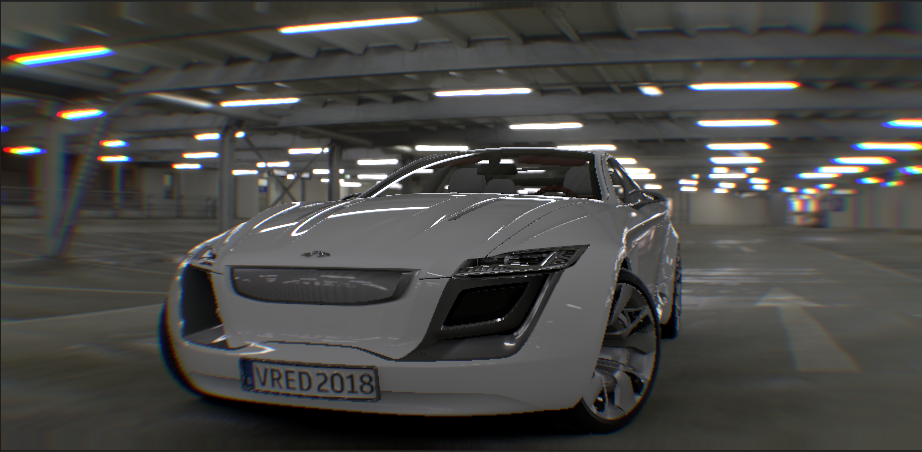
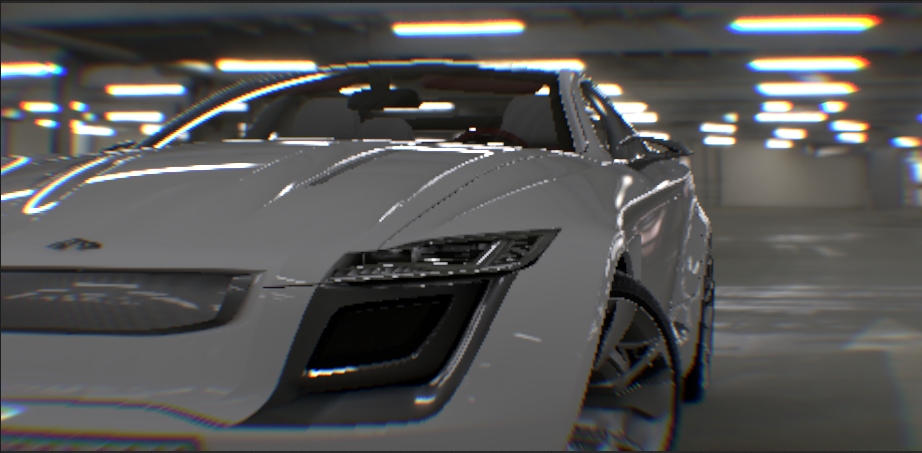
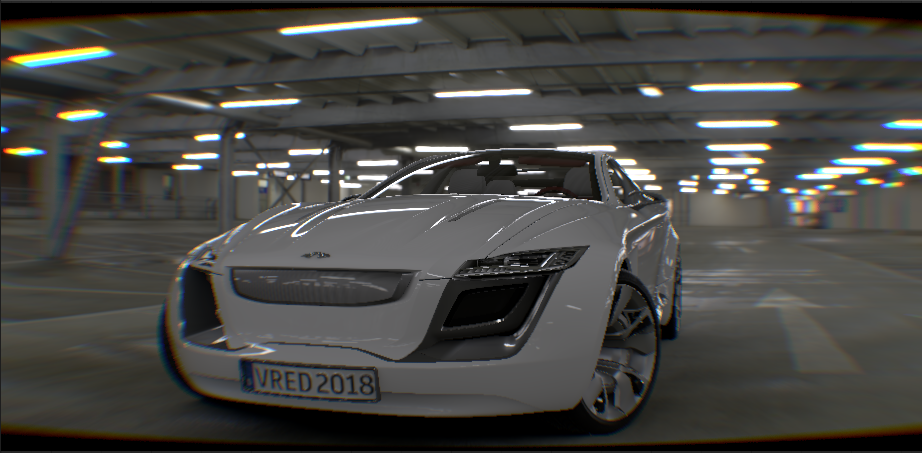
Use Chromatic Aberration to achieve cinematic camera effects that distort clean rendering and shift the look to something more emotional.
Video captions: Rendering is often perfect. Reality is not. To achieve more realistic and life-like rendering results in real time and offline we have a new addition to our list of visual effects called Chromatic Aberration. It is mimicking the effects caused by a camera’s lens in traditional filmmaking by adding distortion and splitting up color at the edges of objects. It's a subtle effect but something that adds greatly to the perceived realism of 3D experiences and renderings.
What is Chromatic Aberration?
When light passes through a lens, it is separated into the different wavelengths. The variability in the reflective index of the lens for each wavelength results in each traveling at different speeds. This is apparent by the colors separating around the edges of an object. This effect is used a lot in video games to add an artistic effect and simulate the optical properties of a camera lens, creating a more photorealistic look. It is also used by some as a stylistic tool.
Chromatic Aberration Settings
Use the following settings to customize the chromatic aberration effect.
Distortion - Sets the lens distortion coefficients for the chromatic aberration effect in X, Y, and Z.
Distortion Type - Sets the type of distortion applied. Choose from Barrel, which is based on the aspect ratio of the image, and Radial, which ignores the aspect ratio of the image and tries to use a round shape for the distortion.
Barrel Distortion Radial Distortion 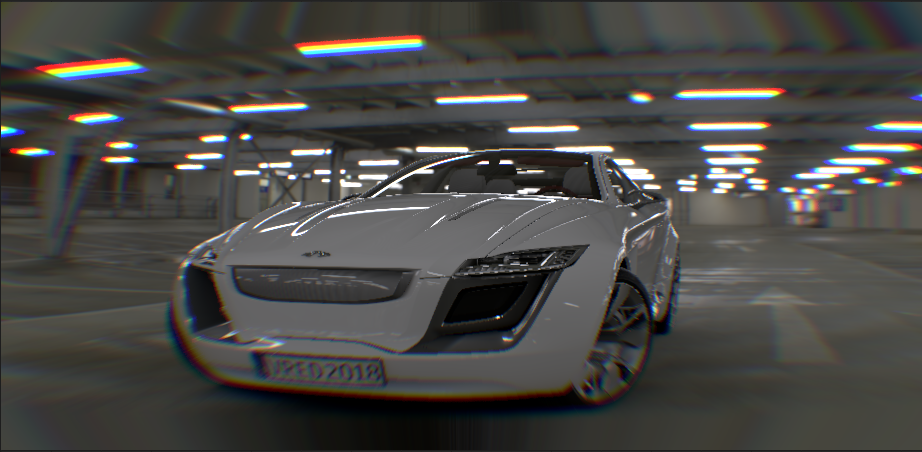
Edge Mode - Determines how edges are handled. If the edges don't contain an relevant information, try using the following:
Zoom - Zooms into the image to move undefined regions outside of the visible image.
Black - Sets the color outside the image to black.
Mirror Repeat - Mirrors and repeats the edge pixels of the image.
Clamp - Repeats the edge pixel of the image.
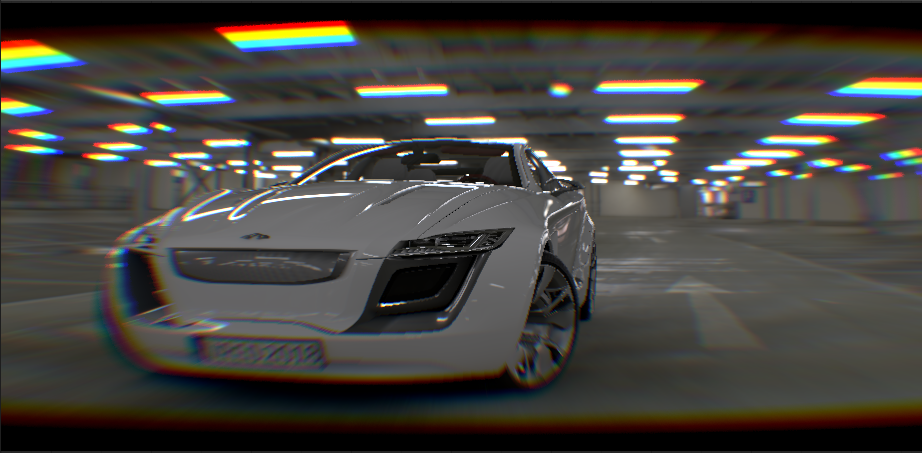
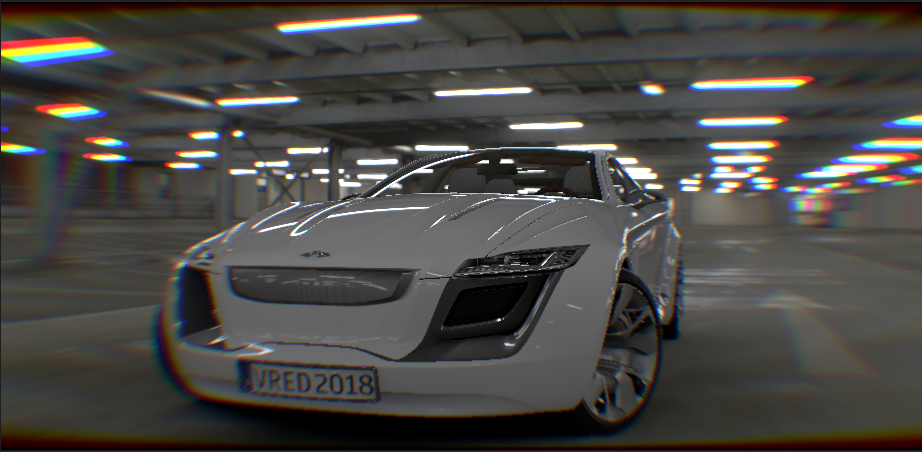
Strength - Determines the strength of the color aberration effect and distortion of the lenses. To increase the effect, increase the value. To reduce the effect, decrease the value.
Strength = 0.3 Strength = 1 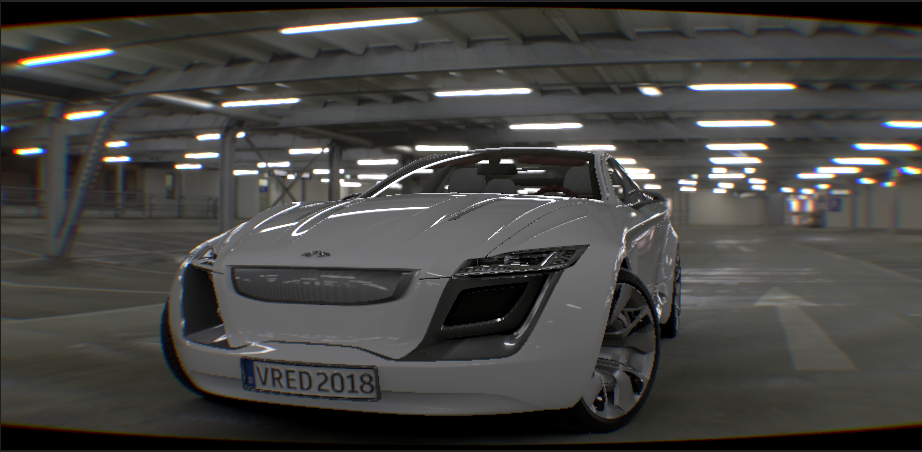
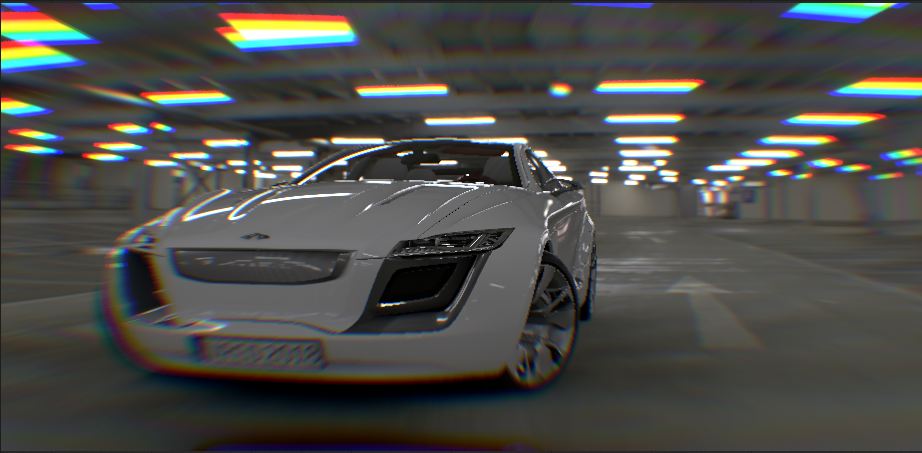
Blur - Sets the amount of blurring between the color channels. To increase the effect, increase the value. To reduce the effect, decrease the value.
Blur = 0 Blur = 1 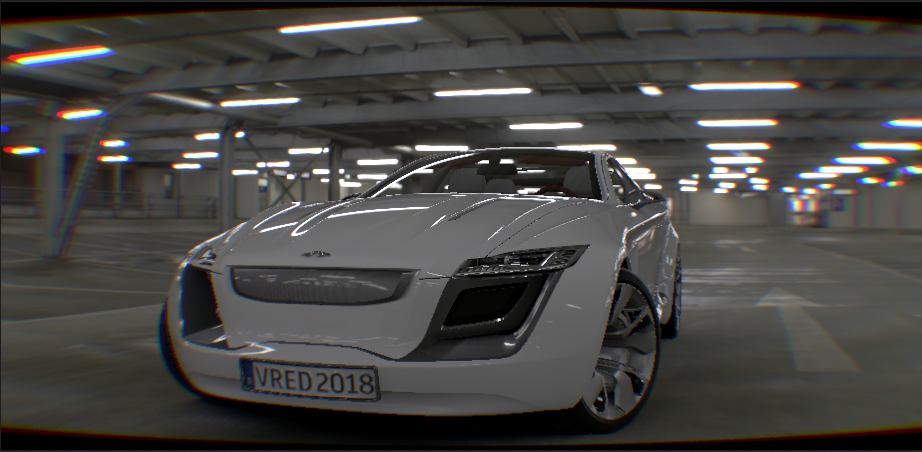
Limitations
These are the current limitations you will find with Chromatic Aberration:
- Multisegment display clustering will not handle the chromatic aberration effect correctly, since the full image is needed. Artefacts at the segment edges will occur, depending on the distortion settings used.
- HMDs will not properly handle chromatic aberrations when using more than 1 view per eye.
- Offline rendering will not be able to render the image in subimages, but will render the full image in one pass. This limits the maximum renderable resolution by the GPU memory and the maximum texture resolution.
Film Grain
Use the Film Grain section to create a cinematic camera effect that distorts clean rendering and shifts it for a very emotional look. It simulates the noise of the camera and is more visible in darker areas, than light.
Luminance Amount - Sets the amount of luminance film grain.
Luminance Amount = 0.25 Luminance Amount = 1 
Size - Sets the size of the grains.
Size = 2 Size = 4.87 
Splotchiness - Sets the intensity of the splotches in the film grain.
Splotchiness = 0.5 Splotchiness = 1 
Color Amount - Sets the amount of colored film grain.
Color Amount = 0.5 Color Amount = 1 
Glow
This section contains glow parameters:
- Enable - Enables/disables glow. When enabled, Threshold, Size, and Intensity are activated.
- Threshold - Determines the threshold of the brightness of a pixel where the glow effect sets in.
- Size - The glow size determines the size of the glow surrounding an object.
- Intensity - The glow intensity determines the brightness of the glow.
Glare
This section contains parameters for glare:
Enable - Enables/disables glare.
Threshold - Determines the threshold of the brightness of a pixel for where the glare effect sets in.
Size - Determines the size of the glare.
Intensity - Determines the brightness of the glare.
- Rotation - Sets the rotation of streaks in a specified angle.
- Streaks - Determines the maximum count of streaks. Higher values appear like stars.
Distance and Height Fog
These two sections contain many of the same parameters for controlling either distance fog or height fog. To see how to use fog, see Working with Fog.
Use the Distance Fog parameters to define the characteristics of fog as it gets farther away. As it travels further into the scene, objects become less visible and the fog gets thicker, just like in real life. So, if you want your object to stand out against your background, this is an elegant way to achieve this.
Use the Height Fog to simulate effects like ground fog or fog at the top of high buildings. Like Distance fog, Height fog depends how far away things are and where they are inside the fog.
Things that are closer are move visible. As things get further away, the fog gets thicker.
When things are inside the fog, you won't notice a difference between Distance fog and Height Fog. Where you will notice a difference is where parts of objects can be outside the fog, unobscured, while others won't be and are obstructed.
- Color - Determines the color of the fog. Use the slider or enter the RGB value for the color of your fog. The color set is blended with the lit material color and factors in the Falloff value you've set..
Falloff - Describes how the fog changes in density as you travel deeper into a scene. There are two options:
- Linear - Creates fog that slowly thickens as you move deeper into the scene and away from the camera, ultimately creating less fog than Realistic.
- Realistic - Creates life-like fog that quickly thickens (exponentially) as you move deeper into the scene and away from the camera.
- Density - Determines the thickness of the fog, based on the selected Falloff option and distance. When set to a high value, objects in the scene quickly blend into the background, getting obstructed by the fog.
- Distance - Only available for Distance Fog. Sets how near or far the camera is from the beginning of the fog.
- Min Max - Only available for Height Fog. Min defines at what height from the ground the fog begins. Max defines at what height from the ground the fog ends. To see Height fog, the Max value must be greater than Min.
- Noise Intensity - Creates noise in the fog density. The density of the fog appears to be different in different places, not uniform. Use it to roughly approximate clouds or similar phenomena.
- Noise Size - Determines the size of the irregularities in the fog, made by the noise function or texture. When Noise Intensity is greater than zero, you can change their size. Use the three sliders to scale the size of the irregularities in one or all three directions (X, Y, and Z). If you want uniform scaling, tick the Uniform Scaling check box.
- Uniform Scaling - Determines whether noise functions/textures are all scaled uniformly or at different rates when Noise Size is set.
- Noise Offset - Changes the position of the irregularities in the fog, made by the noise function or texture, when Noise Intensity is greater than zero.
- Blend Range - Only available for Height Fog. Normally, fog density is constant, resulting in unpleasant sharp transitions between foggy and non-foggy areas. Use the Blend Range slider to gradually change fog density as you get higher into the fog. At the beginning, the fog gradually builds, until it's reached maximum density, then gradually fades away. The fog disappears when Blend Range is set to 1.
Blending
VRED provides different modes of blending. By default, this will be off.
Mode - Sets the blending mode used during image processing.
- Off - No blending.
- Vignette - Renders a vignette on top of the rendering. A vignette darkens the corners of an image.
- Image - Multiplies a texture on top of the rendering. Can be used for texture overlays.
- Amount - Sets the opacity of the vignette or image. The amount can be used to control the darkness of the vignette or image.
- Radius - Only available when Vignette blending is selected. Sets the radius of the vignette.
- Roundness - Only available when Vignette blending is selected. Sets the shape of the vignette. A roundness of 0 indicates the ellipse fits the render resolution.
- Feather - Only available when Vignette blending is selected. Defines the blurriness of the vignette.
- Left and Right Eye Blend Map - Only available when Image blending is selected. Allows the use of blending textures at pixel level. At a final pass, the input image is multiplied with the rendering. In stereo mode, it is possible to define different images for left and right eye.
Lens Flare
- Enable - Enables or disables lens flares.
For how to use lens flares, see Working with Lens Flares.
Click here to watch the VRED 2019 Lens Flare video.