 Annotation
Interaction > Annotation
Place text annotations (or notes) into the scene. When in a Collaboration session, use annotations so all participants can see notes upon creation. Any participant can add, edit, or delete annotations. Annotations are saved within a VRED-project file or can be saved as an XML file for further processing in other applications. Most tasks related to annotations are done using the Annotation module.
Video Captions: The Anchor to Node feature ensures annotations retain their relative position to associated nodes, adapting to node transformations for accurate documentation and presentations. This enhances clarity in collaborative settings, minimizing errors and improving communication.
For reference information, check out this Python tutorial for adding and removing annotations.
Learn how to create and place annotations in VRED with the Annotation video.
 Menu Bar
These are the menus and options found in the Annotation module and can also be found in the List view right-click menu.
File
This menu contains the following options:
 Load Annotations - Enables the loading of XML annotation descriptions from other files into your scene.
 Save Annotations - Saves the current list of annotations to an XML file, so they can be loaded into the scene later.
Edit
This menu contains the following options:
 Rename (Ctrl + R) - Renames the annotation node in the List View.
 Duplicate (Ctrl + D) - Duplicates all selected annotations. Duplicates are created on top of the originals, so use
  Reposition to position them elsewhere.
- Reposition - Relocates the selected annotation, once you shift-click in a different location in the scene.
 Delete (Del) - Deletes the selected annotation from the List View and removes it from your scene. You can remove all or a range of annotations. See How to Remove Annotations for details.
Create
This menu contains this option:
 Create - Creates an annotation node in the list view. In your scene, shift-click to select a location for the annotation and use the Description section to add your annotation.
 Create Group (Ctrl + G) - Creates a group where annotations can be dragged and dropped and groups can also be nested within. Checking or unchecking the box in front of a group toggles the visibility of the grouped annotations, displaying or hiding them. When searching for annotations within a group, use Toggle Search Depth.
Selection
This menu contains the following options:
 Zoom To (F) - Zoom your view to the selected annotation, centering it in your view.
 Select Nodes (Ctrl + N) - Select nodes in the Scenegraph associated with the selected annotations.
 QuickActions Bar
- Create - Creates an annotation node in the list view. In your scene, shift-click to select a location for the annotation and use the Description section to add your annotation.
- Duplicate (Ctrl + D) - Duplicates all selected annotations. Duplicates are created on top of the originals, so use Reposition to position them elsewhere.
- Select Nodes (Ctrl + N) - Select nodes in the Scenegraph associated with the selected annotations.
- Reposition - Relocates the selected annotation, once you shift-click in a different location in the scene.
- Delete (Del) - Deletes the selected annotation from the List View and removes it from your scene. You can remove all or a range of annotations. See How to Remove Annotations for details.
 Toggle Annotations - Shows or hide annotations in your scene. You can also click the check box next to any annotation in the List View to hide its display.
 Search
Use the regular search to find specific annotations. Enter a name, for example, to conduct a flat search for annotations specific to someone at the top-level. Click the X to clear the search and return to the Library.
Use ![]() Toggle Search Depth to toggle between flat (regular search) and recursive matching. When disabled, only top-level matches appear. When enabled, the search looks within the branches of the hierarchy for deeper matches.
Toggle Search Depth to toggle between flat (regular search) and recursive matching. When disabled, only top-level matches appear. When enabled, the search looks within the branches of the hierarchy for deeper matches.

 List View
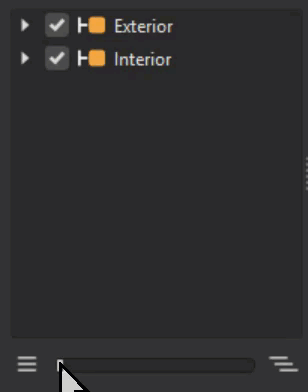
The List View displays all annotations, which can be grouped and toggled on to display or off to hide by checking or unchecking the box next to an annotation or group.
Right-click an annotation to access the context menu containing options for creating, grouping, repositioning, duplicating, selecting nodes, deleting, and toggling annotation display, editing a description, zooming to an annotation, as well as loading and saving annotations.
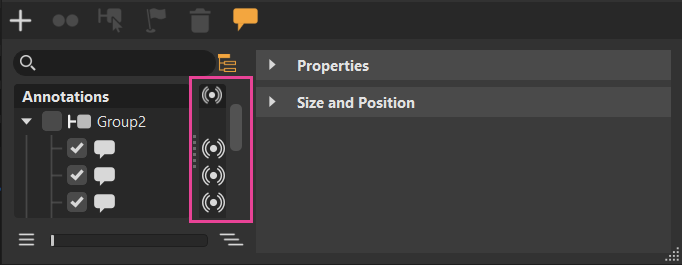
Expansion Column
To the right of the List View is a column which displays an icon ![]() , visually indicating a Live Reference node. Double-clicking the icon opens the Live Reference module, with the node selected. Pull the grip to expose this column, if not visible.
, visually indicating a Live Reference node. Double-clicking the icon opens the Live Reference module, with the node selected. Pull the grip to expose this column, if not visible.
Slider
The slider and its buttons are a fast way to expand or collapse the sub-structure of the selection or multi-selection. With nothing selected in the List View, all nodes are expanded.
Click ![]() to collapse the hierarchy of the selected node or
to collapse the hierarchy of the selected node or ![]() to expand it.
to expand it.
 Attributes
Use these sections to customize annotation text, font and background color, as well as size and position.
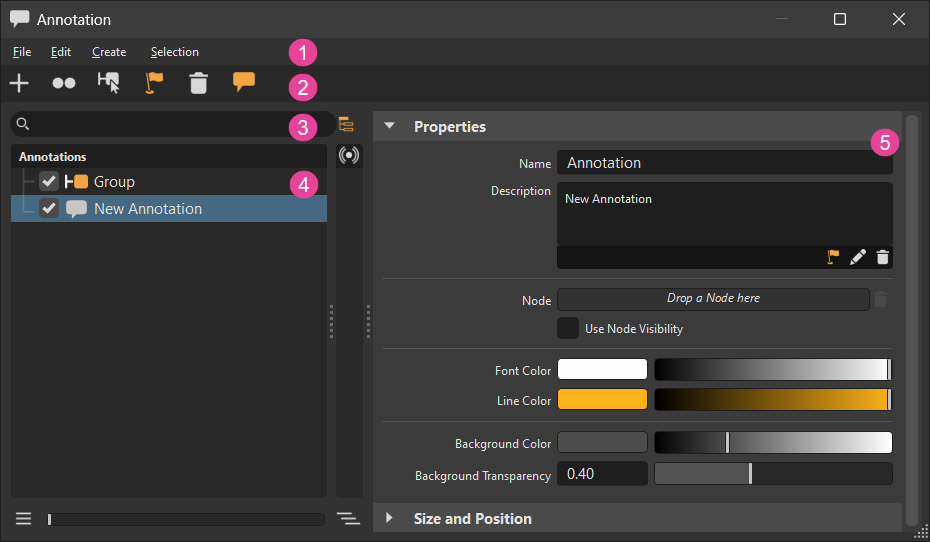
Properties
Contains options for adjusting the font, line, and background color, and background transparency, as well as these:
Name - Identifies an annotation when using Python.
Description - Use this field to enter and edit annotation text. Right-click for options to undo, redo, cut, copy, paste, copy link location, delete, and select all. When finished, the annotation updates in the List View and your scene.
Node - Identifies the Scenegraph node associated with the annotation. Drag and drop the Scenegraph node you want associated with this annotation onto this field. To remove the association, click
. To change the node assigned to the annotation, drag a different one from the Scenegraph onto the Node field.Use Node Visibility - Uses the visibility state of the associated node for the annotation. When Use Node Visibility is enabled, if the node is invisible, so is the annotation. If the annotation has no node association, Use Node Visibility has no effect.
Font Color - Sets the color used for the annotated text.
Line Color - Sets the color used for the line leading to the annotated text.
Background Color - Sets the color of the annotation's background.
Background Transparency - Sets the transparency of the annotation's background.
Size and Position
Adjust the position and size of the annotation.
Anchor to Node - Determines whether an annotation moves with the changing relative position of its associated Scenegraph node. If the node is transformed, the position of the annotation adapts accordingly (as the annotation's position is always calculated in world coordinates).
Position - Sets where the annotation appears on screen. Enter an x, y, and z position. To manually position the annotation, enable
, then Shift-click elsewhere on the screen.Size - Sets the size of the annotation. Increasing this increases the annotation bubble and font size.
Dynamic Scaling - Enables size variation of labels based on their depth within the Render Window. For example, an object's label appears closer in the Render Window and is larger than that of an object further back. There are three scaling options:
Near - Makes the closest labels smaller, which is appropriate when working close to the screen.
Far - Makes labels further away larger, which is appropriate when working far from the computer screen. This is good when sharing a presentation with others.
Off - Makes labels larger, but the same size.
Since both Size and Dynamic Scaling affect annotation size, use them in combination to get the right size.