New projects are created based on a project template. When creating a new project that will be built into a DLL assembly that will be loaded into AutoCAD, use the Class Library template that comes with Microsoft Visual Studio or one of the AutoCAD Managed project application templates that get installed with the AutoCAD .NET Wizard. Both types of templates are available for the C# programming language. After a new project is created, you will need to reference the files that make up the AutoCAD .NET API.
Procedures
- In Microsoft Visual Studio, on the Start window, click Create a New Project.
If the Start window isn't displayed, click File menu
 New Project to create a new project.
- In the Create a New Project dialog box, from the Language drop-down list, select C#.
- From the Platforms drop-down list, select Windows.
- From the Project Types drop-down list, select Library.
- In the Templates list, select Class Library - A project for creating a class library that targets .NET or .NET Standard.
To utilize forms in your application, select one of the following:
- WPF Class Library - A project for creating a class library that targets a .NET WPF Application
- Windows Forms Class Library - A project template for creating a class library that targets a .NET Windows Forms (WinForms)
Warning: Make sure to not select the Class Library (.NET Framework) or Class Library (Universal Windows) template.Note: If you created a C# Class Library project, it can be changed to a WPF Class Library or Windows Forms Class Library by editing the project file and adding the attribute <UseWPF>true</UseWPF> or <UseWindowsForms>true</UseWindowsForms> to the PropertyGroup element.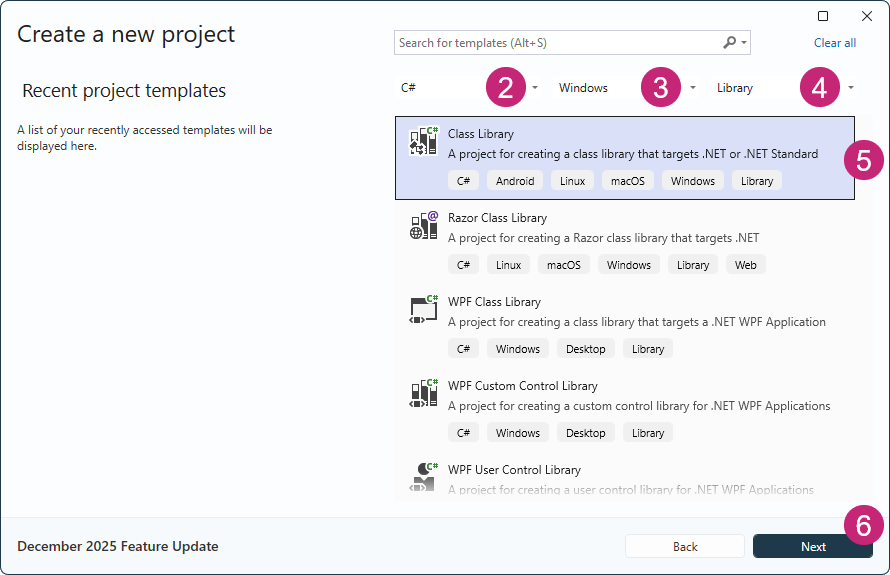
- Click Next.
- In the Configure Your New Project dialog box, click in the Project Name box and enter a name for the new project.
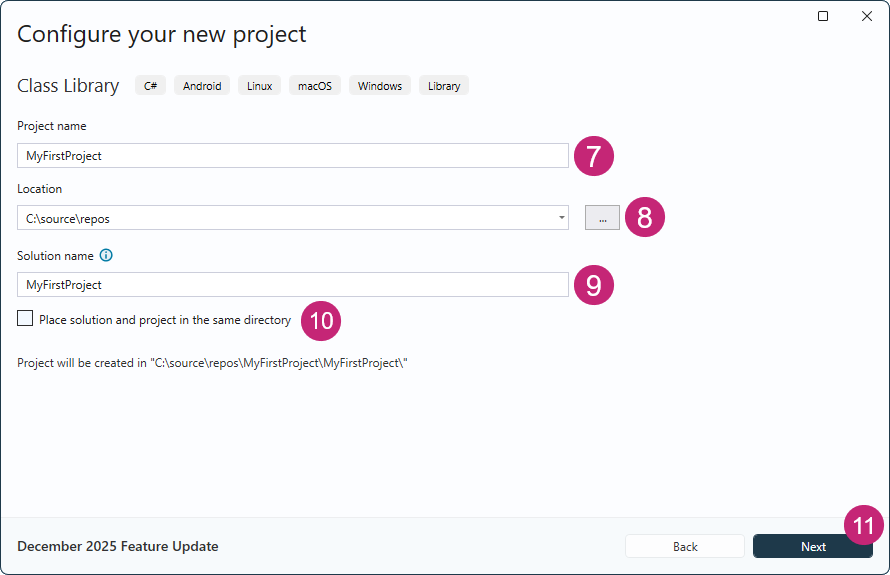
- In the Location box, enter a location or click Browse to select a folder for the new project.
- In the Solution Name box, enter a name for the new solution that the project will be added to.
- Optionally, clear the Place Solution and Project in the Same Directory check box to create a sub-folder under the solution for the project.
- Click Next.
- In the Additional Information dialog box, from the Framework drop-down list, select .NET 10.0 (Long Term Support).
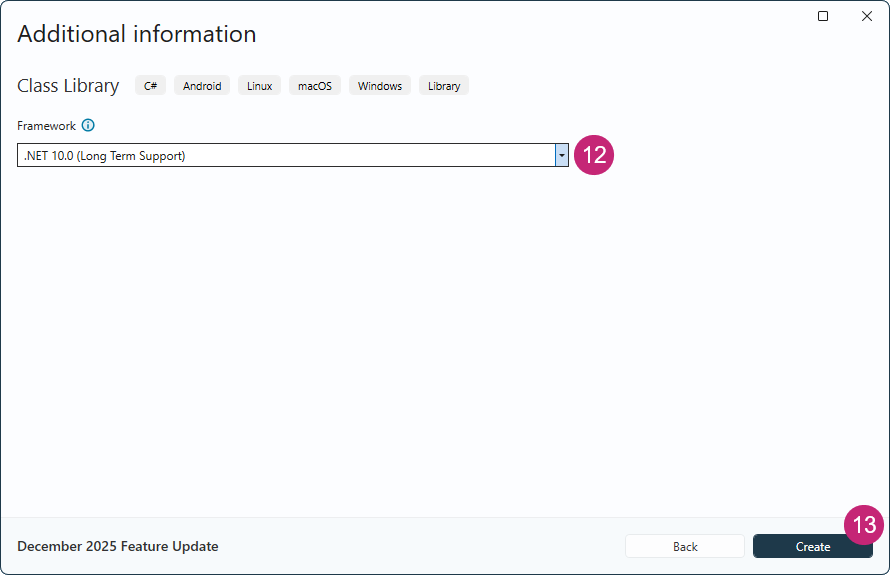
- Click Create.
- On the Solution Explorer, right-click over the project's node and choose Edit Project File.
- In the editor window, add the following in bold within the
Project element and below the
ProjectGroup element.
<Project Sdk="Microsoft.NET.Sdk">

  <PropertyGroup>
    <TargetFramework>net10.0</TargetFramework>
    <ImplicitUsings>enable</ImplicitUsings>
    <Nullable>enable</Nullable>
  </PropertyGroup>

  <ItemGroup>
    <FrameworkReference Include="Microsoft.WindowsDesktop.App"></FrameworkReference>
  </ItemGroup>
</Project>
Note: TargetFramework can also be updated from net10.0 to net10.0-windows to target the Windows OS and utilize Windows related libraries. Instead of editing the value directly in the project's file, the value can be made under the Application section of the Project Properties window. - Save and close the project file.
To create a new project using a standard template