Mixer Transition Editor Dialog (Biped Object)
The Mixer Transition Editor controls transitions on transition tracks. When it is active, you view transitionary stick figures to aid in placing your transitions. You can use this dialog to change the start and end times of transitions, change the transition focus, and perform other functions.
- Select a biped. >
 Motion panel > Biped Apps rollout > Mixer > Motion Mixer dialog > Add clips to the Mixer. > Select a transition in the Mixer. > Motion Mixer menu bar > Transitions > Edit > Transition Editor
This dialog is very similar to the Motion Flow Transition Editor.
Interface
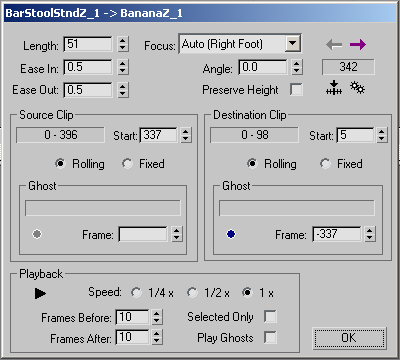
Length
Sets the number of frames for the duration of the transition.
Transitions are calculated by matching velocities in both clips. Smooth out abrupt velocity changes using longer transitions.
Ease In
Ease-in value for the source clip.
Ease Out
Ease-out value for the destination clip.
Transition Focus
Lets you specify a focus point on the biped where the transition takes place. The Mixer will attempt to match movement based on this selection. For example, if Left Foot is selected, the transition will use the left foot as a focal point during the transition, aligning the motion of the left foot in both clips as much as possible during the transition. Default=Auto.
- Auto The transition focus is calculated by averaging the overall position of the biped as it transitions from one clip to the next.
- Center Of Mass The transition focus is based on the center of mass position of the biped as it transitions from one clip to the next.
- Left Foot The transition focus is based on the left foot position of the biped as it transitions from one clip to the next.
- Right Foot The transition focus is based on the right foot position of the biped as it transitions from one clip to the next.
- Both Feet The transition focus is based on an averaged foot position of both of the biped's feet as it transitions from one clip to the next.
Angle
Sets the direction of the destination clip.
The angle of the destination clip is automatically set for best body fit between the two clips when the Start Frame values change. Use Angle to change the direction of the destination clip.
Preserve Height
When turned on, Preserve Height will allow gradual vertical motion to accumulate from the source to the destination clip. For example, climbing stairs will loop upward. If it is turned off, the next clip is always set so that its lowest point is at z=0. This default insures that motion does not gradually float up (or down) with each additional clip.
[Previous/Next Transition buttons, Start Frame controls, and Optimize button]

 Previous Transition
Go to the previous transition in the transition track.
Displays the previous transition in the Transition Editor, moves the time slider to the start frame of the previous transition and highlights the previous clip in the transition track.
 Next Transition
Go to the next transition in the transition track.
Displays the next transition in the Transition Editor, moves the time slider to the start frame of the next transition and highlights the next clip in the Scripts list.
Start Frame
This text field displays the number of the first frame of the transition.
 Go To Start Frame
Moves the time slider to the first frame of the transition.
 Optimize Transition
Displays the Transition Optimization dialog.
Options in the Transition Optimization dialog allow you to search for the range over which the optimizer searches for the transition.
Source Clip and Destination Cip groups

Clip range
This text field displays the range of the source or destination clip. The ranges are relative to the clip itself, not to the frame range of the full animation.
Start Frame
Sets the transition start frame for the source or destination clip. The start frame is relative to the clip itself, not to the frame range of the full animation.
Transition options
These choices control how the transition is interpolated.
- Rolling Retains the clip motion during the transition.
- Fixed For the source clip, this option freezes the biped at the Start Frame position during the transition. For the destination clip, this option freezes the biped at the End Frame position. If Fixed is chosen for both the source and destination clips, the transition is a gradual interpolation from one frozen pose to another.
Ghost subgroups (Source and Destination clips)
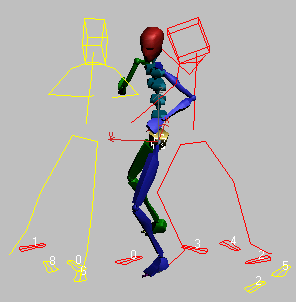
The Ghost group Frame spinners allow you to view and scrub the source and destination clips by displaying stick figures (ghosts); yellow and red stick figures represent the source and destination clips. The source and destination bipeds might not be near each other during this scrubbing process; the destination clip will be repositioned when you click Set Start Frame is clicked. When you locate a suitable start frame, click Set Start Frame to copy the values in the Frame field to the Start Frame field. Monitor foot position status in the field provided.
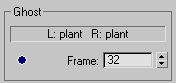
Footstep key display
This text field shows the state of footstep keys for the current frame.
 Set Start Frame
Copies the value in the Frame field of the Ghost area to the Start Frame field in the Clip area. The position of the destination clip changes to match the biped body in the destination clip to the biped body in the source clip.
Locate an appropriate start frame for the source and destination clips by using the Frame spinner and viewing the positions of both stick figures, then click Set Start Frame.
The destination clip is rotated and positioned to match both bipeds. Use the Angle spinner to reorient the destination clip.
Frame
Shows the current frame in the clip. The frame value is relative to the clip itself, not to the frame range of the full animation.
You can use the Frame spinner to scrub a stick figure back and forth, which can help you choose a start frame for the source and destination clips. Visual feedback of the stick figures is a good way to judge which start frames are needed for the source and destination clips.
Playback group
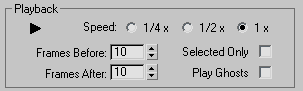
These controls let you play back the transition from the Transition Editor dialog.
 Play Transition
Click to play the transition. Click again to stop playback.
Speed
Chooses the playback speed.
- 1/4 x Plays at one-quarter of real time.
- 1/2 x Plays at half real time.
- 1 x (The default.) Plays at real time (full speed).
Frames Before/Frames After
Set the number of frames to play before and after the transition period.
Selected Only
When on, plays back only the selected biped. Default=off.
Play Ghosts
When on, shows transition ghosts during playback. Default=off.