To Insert a Content Center Part Manually
What's New: 2027.1
Use standard placement methods to manually insert components from Content Center into assemblies. A Content Center component can be inserted as a standard or custom part.
For troubleshooting information, refer to the following help and support articles for more details:
To Access Content Center (Desktop Content) Libraries
Content Center files not available in Inventor
Missing Content Center files after upgrading Inventor
AutoDrop is the default placement method. To place components manually, in the Place from Content Center dialog, switch off the AutoDrop button. Alternatively, hold down the ALT key, and click OK or double-click the family to insert.
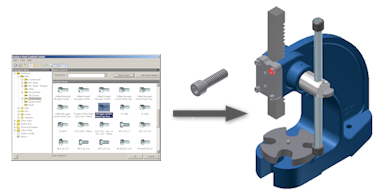
Place a Content Center part as standard part
In an assembly file, click Assemble tab
 Component panel Place from Content Center.
In the Place from Content Center dialog, locate the part family whose member you want to place:
- Browse in the library structure: Double-click a category to display its descendant categories or part families.
- Use the Search to find the component.
- Select a previously placed component from History.
- Select a component from Favorites.
Select a family and click OK.
In the Select or Table View tab of the Family dialog, select a family member to place.
(For parts with custom parameters only) Enter the custom parameters.
If the custom parameter is Boolean, select 1 or 0 to specify the Boolean value (1 means True and 0 means False).
(For parts with custom parameters only.) Select As Standard to save the part file in the Content Center Files folder and treat it as a Content Center standard part.
Click OK in the Family dialog.
Use the typical placement operation to place the part in assembly. Add the constraints required to position the part to other geometry.
Component panel Place from Content Center. The Place from Content Center dialog displays with the component highlighted in the list panel. When you insert the component, the corresponding size is selected in the Family dialog.Place a Content Center part as custom part
Custom Content Center parts are treated as regular part files and can be edited by using Autodesk Inventor editing commands.
In an assembly file, click Assemble tab
Component panel Place from Content Center. In the Place from Content Center dialog, locate the component family whose member you want to place:
- Browse in the library structure: Double-click a category to display its descendant categories or component families.
- Use the Search.
- Use History.
- Create a list of Favorites for quick access to components frequently accessed.
Select the family and click OK.
Select the family member to place in the Select or Table View tab of the Family dialog.
(For custom parts only) Enter the custom parameters.
Note: If the custom parameter is Boolean, select 1 or 0 to specify the Boolean value (1 means True and 0 means False).Select As Custom to create the component file as a custom Content Center file.
Click OK in the Family dialog.
Set the filename and location for the component file.
Note: When placing a content center assembly where duplication occurs, the Family File Naming dialog displays highlighting duplicate names. The Duplicate Filename dialog displays. You can rename all duplicate components with one action - Rename all documents. You can add a prefix or suffix to the new filenames.Use the typical placement operation to place the component in assembly. Add the constraints required to position the part to other geometry.