To Use Multi-Sheet Plot
What's New: 2027
Print multiple drawing sheets of various sizes from IDW, 2D DWF, and DWG files.
On the Start menu, click Programs
 Autodesk Autodesk Inventor <version> Autodesk Multi-sheet Plot.
In the Page Setup page, specify print preferences:
- Printer, select a printer from the dropdown.
- If needed, click Properties to specify paper quality and layout preferences.
- In the Sheet group, modify sheet types as needed. Specify units, paper size, gap between views, scale, and your preference for showing the boundary.
- In the Margins group, specify margins for Top, Bottom, Left and Right.
- Click Next.
On the Select Drawing Files page
Click Browse to select a project.
In the Source files pane, select a drawing and click the right arrow to add it to the Selected files pane. You can select IDW, 2D DWF, and DWG files.
In the Selected files pane, verify the items. If needed, select one or more drawings and click the left arrow to remove from the list.
Tip: To select multiple files, hold down Ctrl or Shift, and click a file name to select.If necessary, click Browse to locate individual IDW, 2D DWF, or DWG files to print.
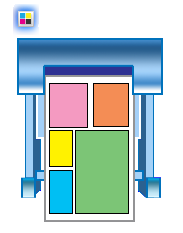
To begin generating a composite print, click Next. Sheets are automatically arranged in the print area to use the area efficiently.
Note: If one or more sheets in the selected drawings are larger than the print area, a warning message displays. Return to Page Setup to choose a different paper size or to Select Drawing Files to remove some files from the selection list. If you prefer, you can select Skip File or Scale to Fit.
On the Preview page, view the composite print in the Preview box, and details in the Report box. If multiple pages were generated, click Next or Previous to cycle through pages. If available, use the mouse wheel to zoom in and out.
When you are satisfied with the composite, click Submit.
On the Print page:
The Printer group shows the printer selected on Page Setup, and lists its status, type, and connection.
If necessary, select the Print to file checkbox to print to a file instead of sending to a printer.
- If printing to a file, you can select the Schedule Task command to set up a print time using the Task Scheduler. After you save the print file, the Task Scheduler opens so you can set up a print time.
In the Orientation group, review the orientation of printed pages. To change the orientation, return to the Page Setup dialog box and click Properties.
In the Settings group, specify the number of copies. Select Collate, if necessary. You can select All Colors As Black.
In the Print Range group, select All pages, Current Sheet only, or Sheets. If Sheets, specify individually or in a range.
When ready, select Print. The pages print according to your preferences.