How to configure Autodesk software to use high-performance graphics
Overview
This article explains how to configure Autodesk software to use the high-performance graphics card (GPU) on systems with dual video (integrated and discrete graphics).
Why this matters
To optimize battery life, many laptop PCs contain a graphics adapter integrated into the motherboard. It is used for basic graphics display, along with a faster discrete graphics adapter for more demanding graphical tasks.
When working with Autodesk software that is graphically intense, switching the graphics adapter during operation can lead to display and performance issues or program crashes. Also, by default, the system may load the software with the low-end video option and not switch to the high-performance GPU. Configuring the system to always use discrete graphics for the software helps avoid these issues.
Choose a setup method
There are different ways to set up high-performance graphics, depending on the video card and its software/driver version. Windows 11 includes an option to designate the high-performance card for specific software. This is a top-level setting that should work no matter what graphics card and driver is in a system.
You can manually choose a graphics performance setting for a specific software in Windows, or configure graphics card settings for your NVIDIA card. Choose one of the following methods.
Windows 11 Graphics Settings (High-Performance GPU)
Follow the section that matches your Windows build.
Windows 11 23H2
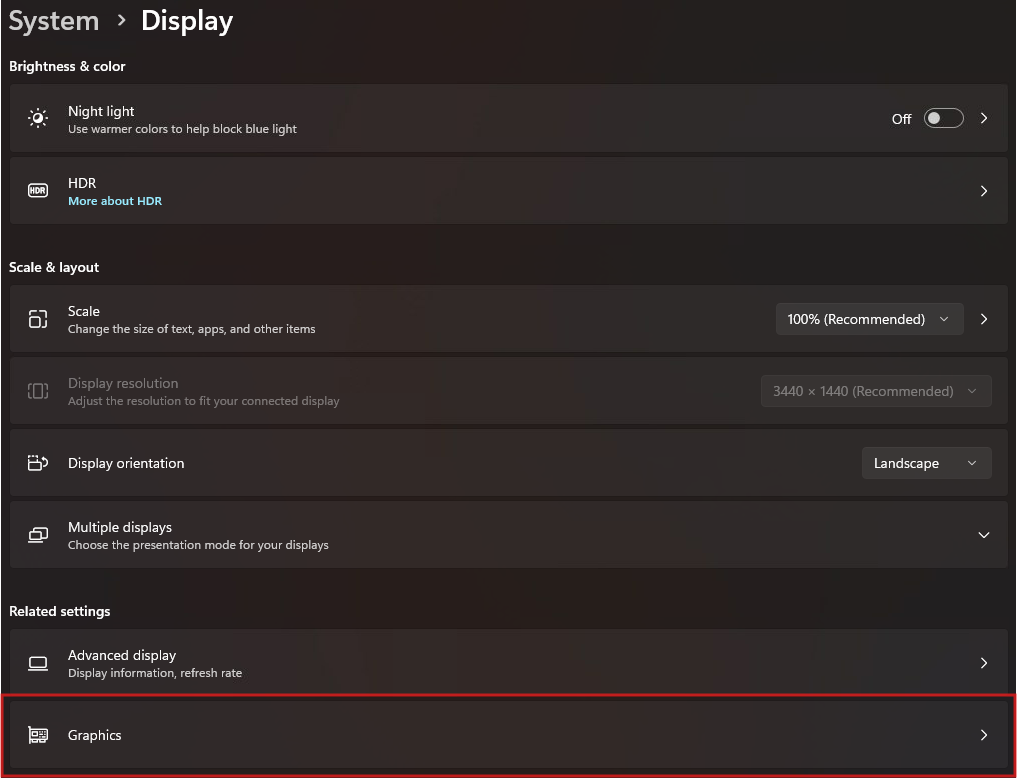
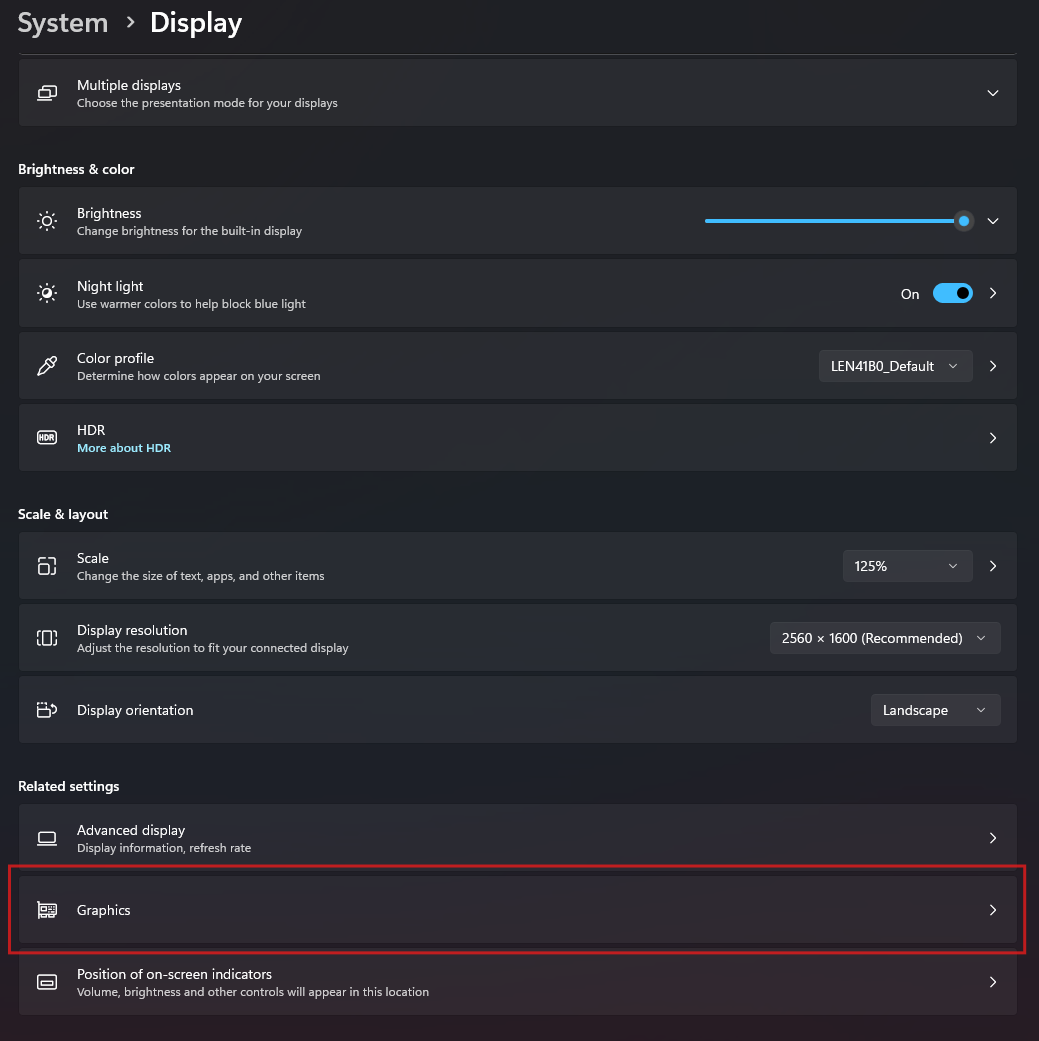
Right-click the desktop and choose Display settings.
In Display, scroll down and click Graphics.
Under Custom options for apps, ensure that Desktop app is selected, then click Browse.
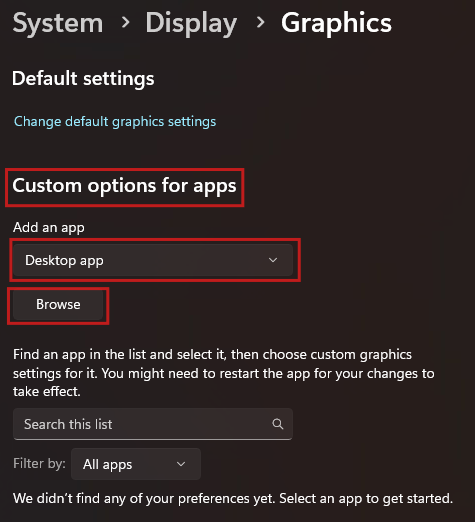
Navigate to and select the software executable.
As an example, for Moldflow Synergy 2027, this would be:C:\Program Files\Autodesk\Moldflow Synergy 2027\bin\synergy.exe.
Double-clicksynergy.exeto add it to the list.Click the application entry to activate the Options button, then click Options.
Select High performance, then click Save.
Close the Settings panel.
Restart the software (if it was running) and verify within the program that the high-performance GPU is enabled.
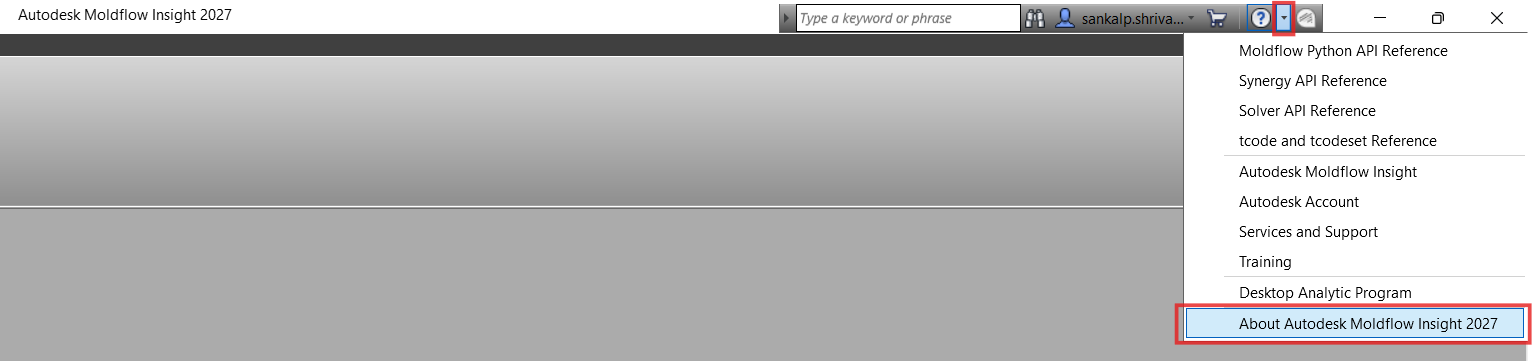
For Autodesk Moldflow Synergy, use the drop-down in the toolbar next to the Help icon and select About Autodesk Moldflow Insight 20XX.
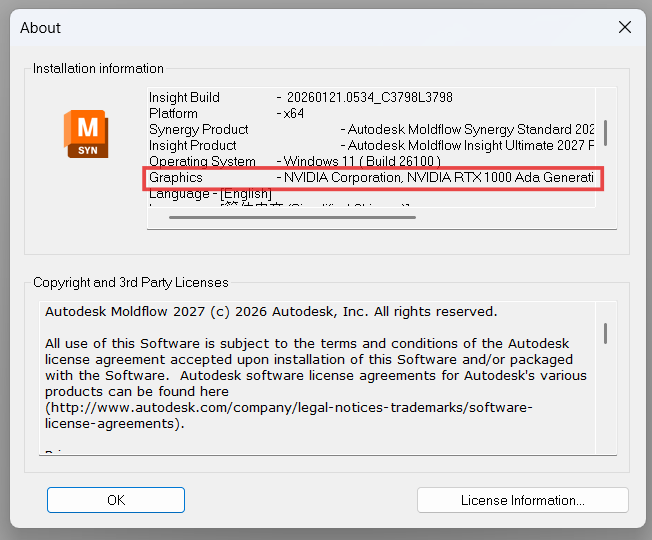
In the About dialog, check the Graphics entry to confirm the high-performance GPU.
Windows 11 24H2
Right-click the desktop and choose Display settings.
In Display, scroll down and click Graphics.
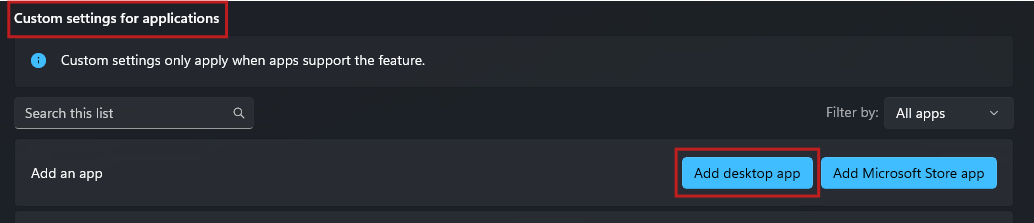
Under Custom settings for applications, click Add desktop app.
Navigate to and select the software executable.
As an example, for Moldflow Synergy 2027, this would be:C:\Program Files\Autodesk\Moldflow Synergy 2027\bin\synergy.exe.
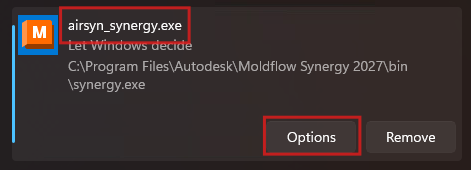
Double-clicksynergy.exeto add it to the list.Click the application entry (example: airsyn_synergy.exe) to expand it.
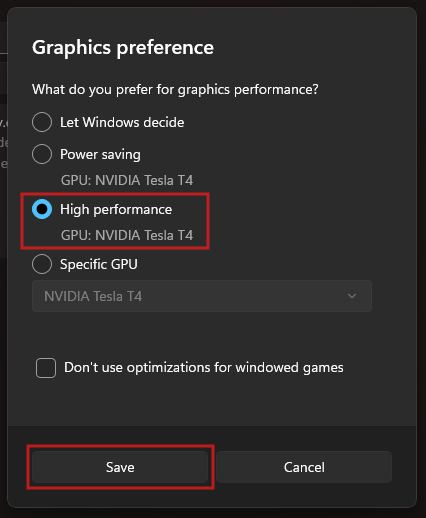
Under GPU preference, open the dropdown (default is Let Windows decide) and select High performance.
Close the Settings panel. The change is saved automatically.
Restart the software (if it was running) and verify within the program that the high-performance graphics device is enabled.
For Autodesk Moldflow Synergy, use the drop-down in the toolbar next to the Help icon and select About Autodesk Moldflow Insight 20XX.
In the About dialog, check the Graphics entry to confirm the high-performance GPU.
NVIDIA related optimization
Update to the latest NVIDIA graphics driver
Download and install the latest driver (see NVIDIA Downloads).
Restart the system after installation.Open NVIDIA Control Panel
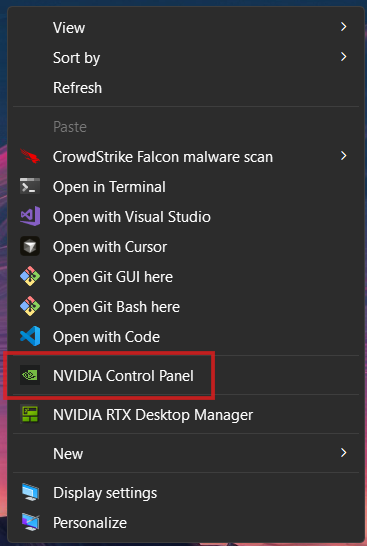
Right-click on the desktop, click Show more options, then select NVIDIA Control Panel.
Open Program Settings and select the app
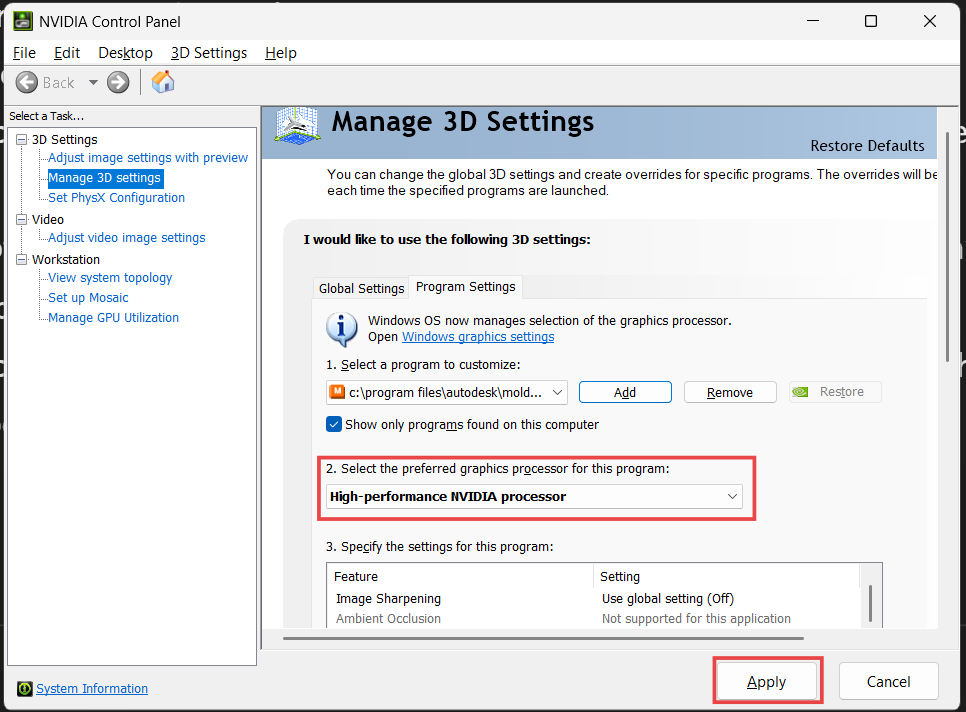
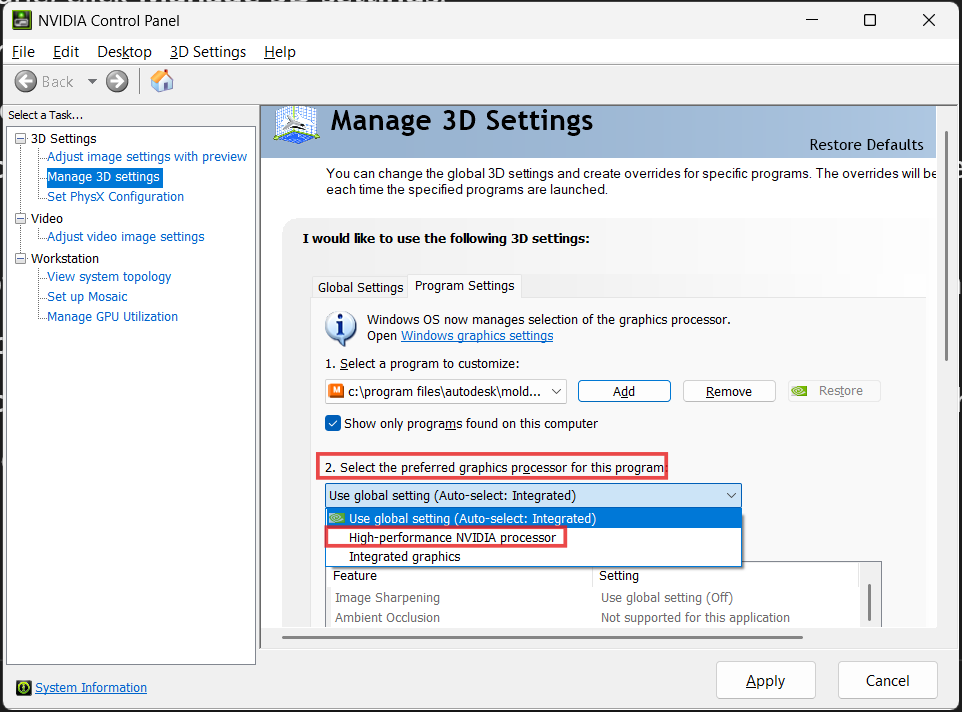
- In the left pane, click Manage 3D settings, then select the Program Settings tab.
- Under Select a program to customize, choose the Autodesk application (for example, Autodesk Moldflow Synergy).
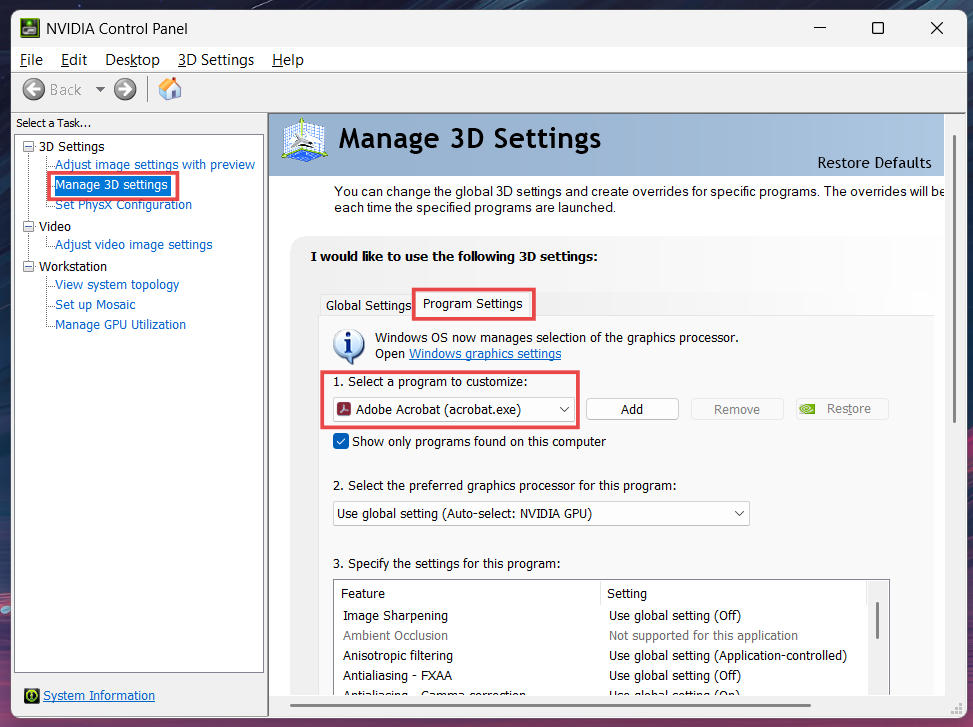
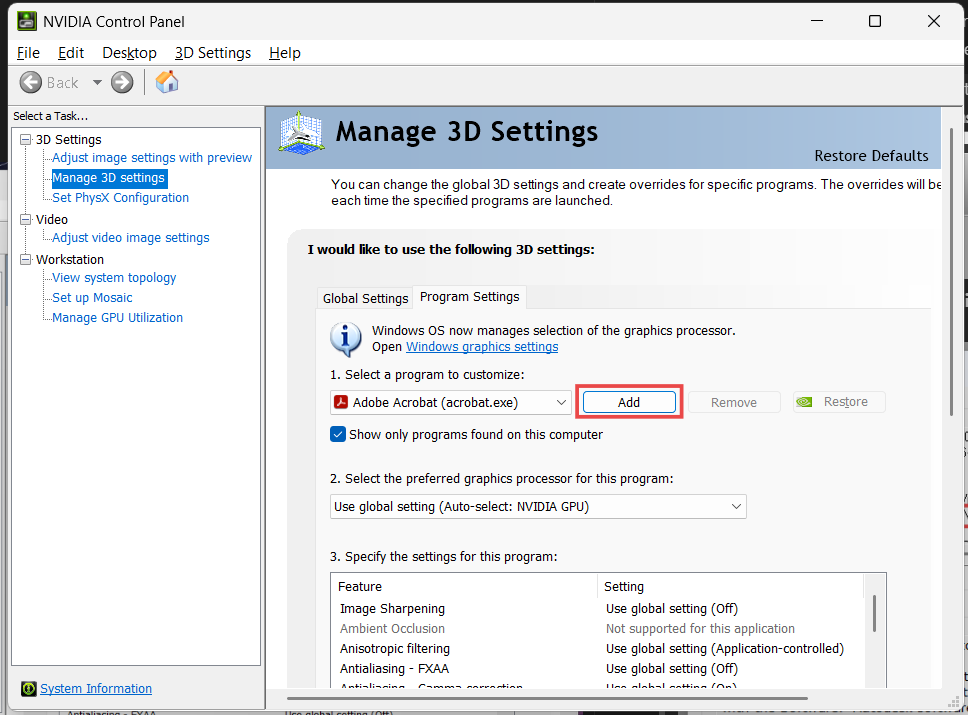
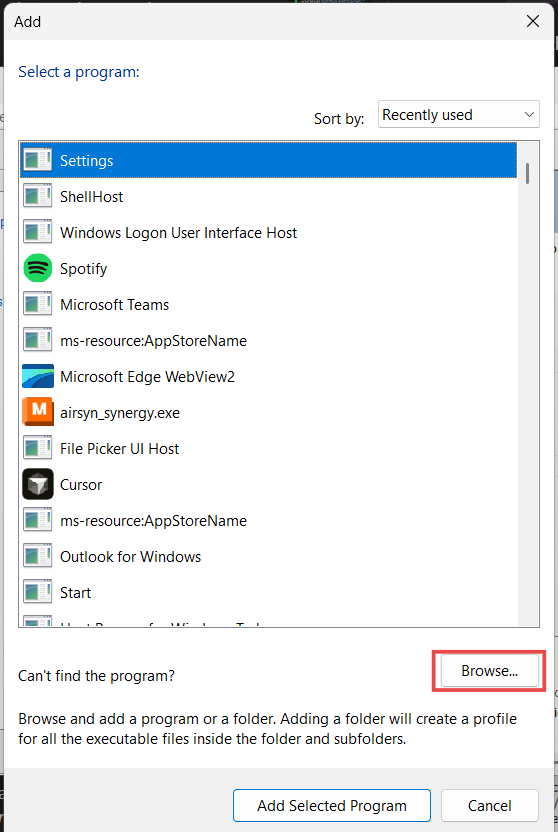
- If it does not appear, click Add → Browse, and manually select the software's
.exefile.As an example, for Moldflow Synergy 2027, this would be:
C:\Program Files\Autodesk\Moldflow Synergy 2027\bin\synergy.exe.
Force the high-performance GPU
- Under Select the preferred graphics processor for this program, choose High-performance NVIDIA processor.
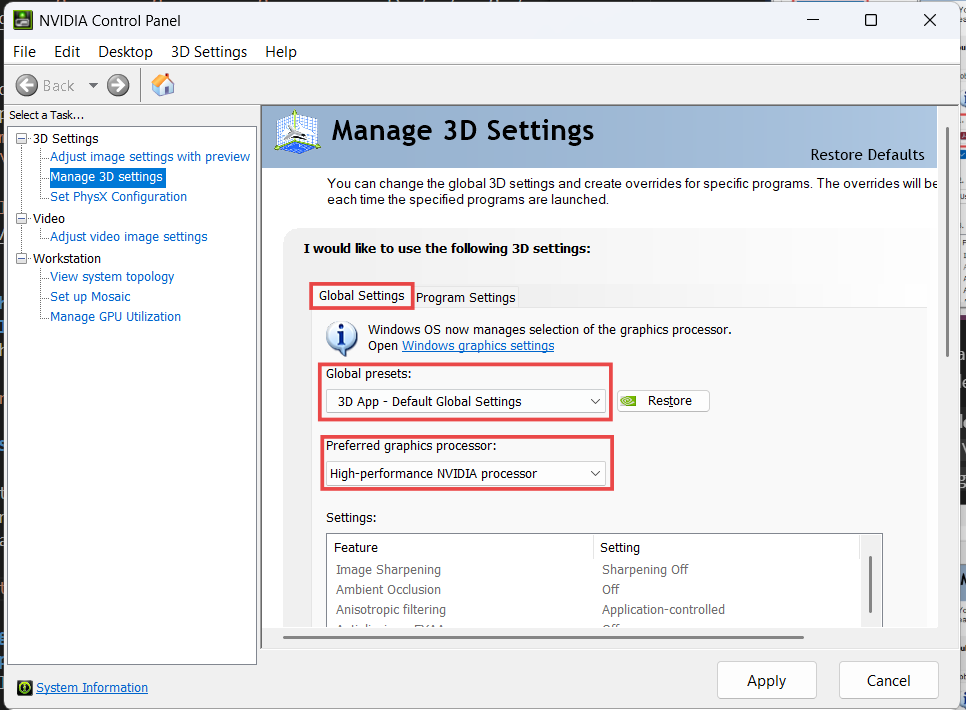
Optional: Set a global default GPU
- Select the Global Settings tab and set Preferred graphics processor to High-performance NVIDIA processor.
- Use this only if you want all applications to use the high-performance GPU.
Apply changes
- Click Apply (scroll down if needed) and close the NVIDIA Control Panel.