- On the ribbon, click Isos tab
 Iso Creation Quick Iso.
- Do one of the following:
- In the drawing area, select the objects that you want to include in the Quick Iso.
- Press L to select one or more line numbers.
- In the Create Quick Iso dialog box, under Settings, click the Iso style drop-down list and select the iso style you want to create.
- Optionally, to specify a different output directory, click the Save Isos to [...] button and choose a folder. Click Open.
- In the Revision number text box, enter a revision number as needed.
- Click the Create DWG file drop-down list and choose how the Iso sheets should be collected.
- Per line: All Iso sheets with the same line number are created in a single Iso drawing file. (Recommended)
- Per sheet: Each Iso sheet is created as a separate Iso drawing file.
- If you want to overwrite previously generated Quick Iso files for the iso style, select Overwrite if existing.
- Click Create.
The dialog closes and the isometric drawings are created in the background. You can monitor progress from the status bar.
- After some time, an Isometrics Creation Complete balloon message appears.
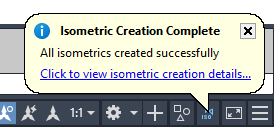
- Click the link in the balloon to display the Isometric Creation results and open the isometric drawing.
Note: Isometric drawings created with this dialog box are not added to the project and are available during the current session only.