Make accelerated graphics available for use in views of your model.
The Accelerated Graphics toolbar is enabled by default. This can be disabled from the Revit.ini file. For additional information see: Graphics Settings in Revit.ini
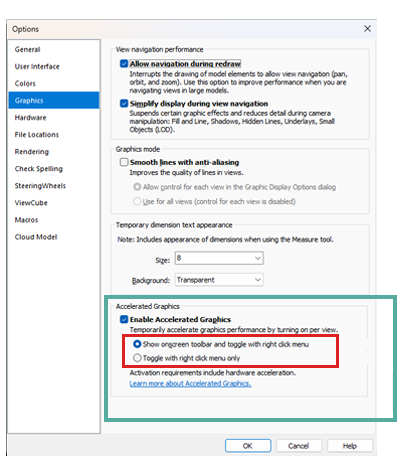
To manually enable or disable access to Accelerated Graphics, go to Options dialog  Graphics tab Accelerated Revit Graphics and select Enable the Accelerated Graphics. Once enabled, use the radio buttons to enable or disable how the accelerated graphics will be enabled in individual views.
Graphics tab Accelerated Revit Graphics and select Enable the Accelerated Graphics. Once enabled, use the radio buttons to enable or disable how the accelerated graphics will be enabled in individual views.
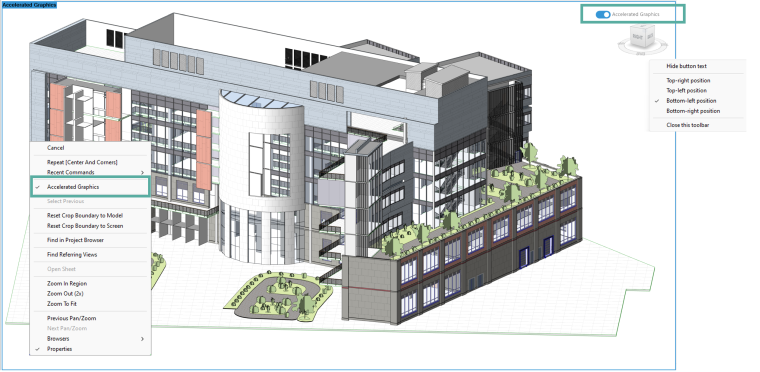
- Show onscreen toolbar and toggle with right-click menu—both the onscreen toolbar and right-click options are available to enable and disable accelerated graphics in a view
- Toggle with right-click only—onscreen control is not visible only right-click can be used to enable and disable accelerated graphics
Note: It is recommended your computer has the following to take advantage of Accelerated Graphics:
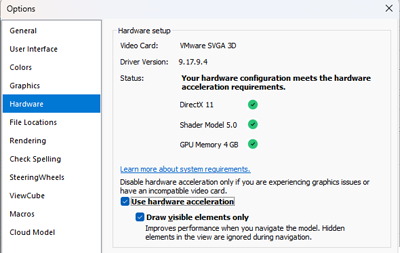
- GPU Enabled—Accelerated Graphics will not be available if a graphics card is not detected
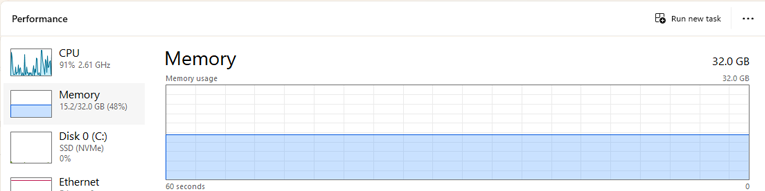
- Adequate RAM
- RAM shortages will impact all performance and display in Revit. Accelerated Graphics will not improve this.
- Enabling Accelerated Graphics in multiple views may increase memory utilization. Additional RAM capacity is recommended.
- Windows Task Manager may assist with total and available RAM statistics.
Note: We do not recommend the entry level system configuration.
For an optimal experience using the Accelerated Graphics, we recommend you to use at least 64 GB of system RAM and a graphics card with 8 GB of RAM.
Note: Accelerated Revit Graphics is not supported on Parallels Desktop for Mac or other virtualization solutions.