Bars in rebar sets are arranged based on the chosen layout rule.
When placing or editing a rebar set - whether it is shape-driven or free-form - you must select a layout rule that will determine how the bars are distributed.
Choose the layout rule
- Start placing rebar using any of the rebar tools (Rebar, Path or Morphed Free Form Rebar) OR select an existing rebar set.
- Go the properties palette and click the drop-down for the Layout Rule parameter.
- Select the desired layout.
Layout rules
Single
- You can use this to place bars 1 by 1.
- Setting the Fixed Number to 1 reverts the layout to Single.
- For path free form rebar distribution, a single bar is placed in the middle of the distribution path.
Fixed Number
- The spacing between the bars is adjustable, but the number of bars is constant, based on your input. Example for number of bars = 10.
- Dragging the shape handles modifies the distance between the bars in the set.
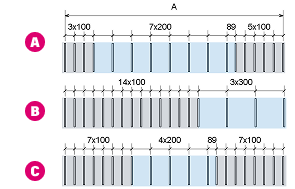
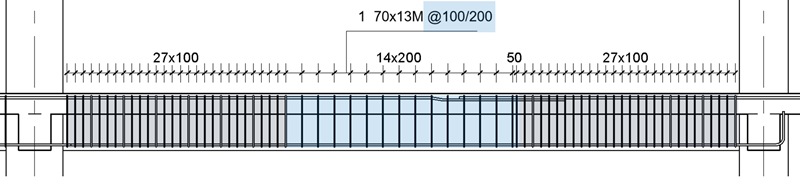
Custom Spacing
- Specify the formula for distributing the bars in the set, using a combination of numbers, lengths or length percentages and spacings. You can use the following syntax when defining the layout formula:
A. Number of spaces x Spacing - example: 3x100; ?x200; 5x100
- Including "?", makes the formula variable and the bar plane (start of the set) or out of plane extent (end of the set) handles can be dragged.
- The remainder is placed at the end of the variable part ("?").
B. Length @ Spacing - example: 1400@100; 900@300- If the length cannot be evenly divided by the spacing, any leftover portion will not be considered. You can include a variable part ("?") to make the set range adjustable.
C. Percentage of set Length % @ Spacing - example: 33%@100; ?@200; 33%@100- The percentages in a formula must add up to 100% or you can use "?" in one part of the formula.
Note:- You can use Spacing Summary and Detailed Spacing Summary parameters in schedules and tags to extract information about the distribution of bars in a rebar set.
- The formula uses the units defined in the project for Reinforcement Spacing and Reinforcement Length. You can input any length unit value with its respective symbol, and it will be converted.
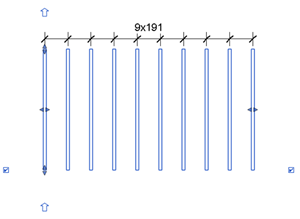
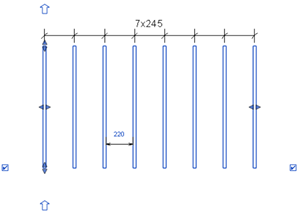
- Example of distributing bars at exact spacing with remainder (formula:
?x200 mm
) at the end of the set (1). You can flip the set (2) to have the remainder on the other end.
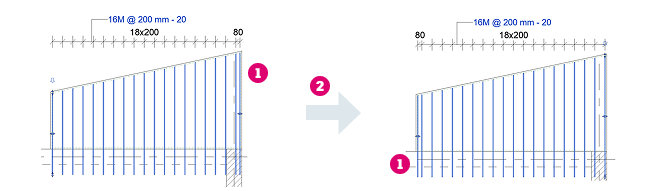
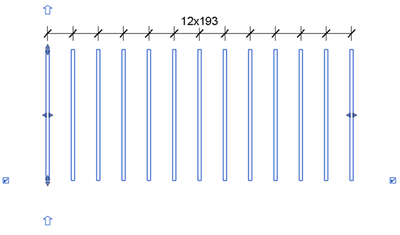
- Example of distributing 1/3 of the bars at the start and end of the set, with the remaining bars in the middle (Formula:
33%@100; ?@200; 33%@100). The remainder is at the end of the variable part (which contains "?"). You can drag the start or end handles to adjust the set because the formula is variable.
- When switching to Custom Spacing, the default formula depends on the layout you started with.
Switch from Resulting Layout Formula for Custom Spacing Single ?x100, where 100 is a default spacing (4 in for Imperial units) Max spacing or Minimum clear spacing ?x200 where 200 is the spacing value; set will have remainder Fixed Number ?xS, where S is the actual spacing of the bars in the fixed number distribution Number with Spacing nxS, where n and Spacing are the properties of the Number with Spacing layout
Maximum Spacing
- You specify the maximum distance between rebar, but the number of rebar changes, based on the distance between the first and last bars. Example for Spacing = 200 mm.
- Dragging the shape handles modifies the number of rebar instances in the set, while maintaining a distance that is no larger than the maximum spacing you defined.
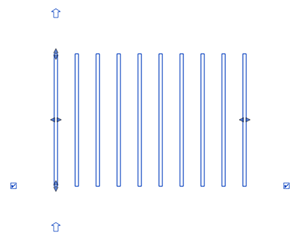
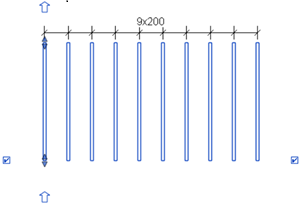
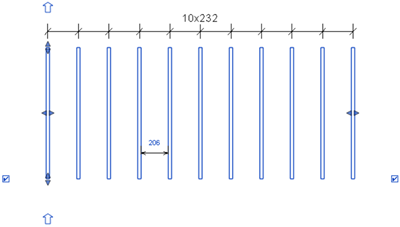
Number with Spacing
- You specify constant values for quantity and spacing. Example for Number = 10, Spacing = 200mm.
Minimum Clear Spacing
- You specify the minimum distance between rebar, and the quantity of rebar changes, based on the distance between the first and last bars. This spacing maintains even if the rebar size changes. Example for Spacing = 200, bar diameter = 25 mm.
- Dragging the shape handles modifies the number of bars in the set, while maintaining a distance that is no smaller than the minimum amount of clear spacing you defined.
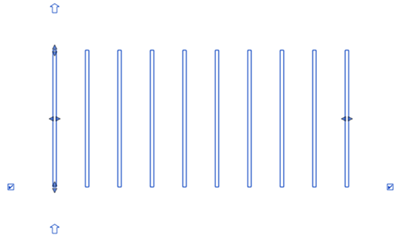
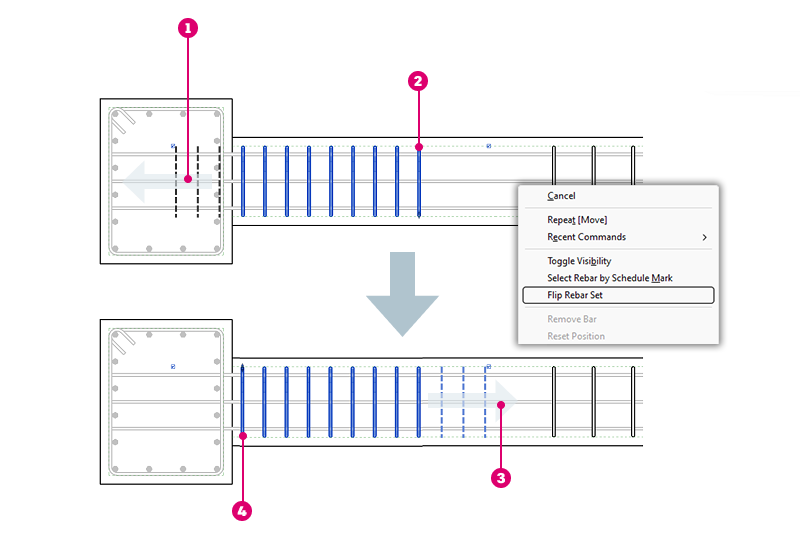
Flip Rebar Set Direction
- Select the rebar set you want to flip.
- Right click and select Flip Rebar Set from the menu.
- The first bar of the set is now the one at the opposite end of the set.

|
Expansion direction for set. |

|
First bar in Number with Spacing set. |

|
Expansion direction for set. |

|
First bar in Number with Spacing set after flip. |