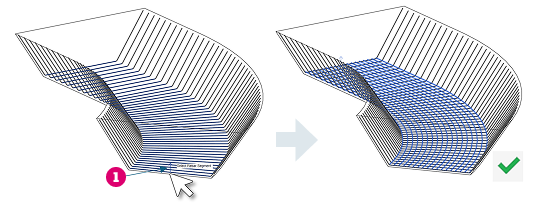
Place longitudinal free form rebar by specifying the transverse rebar it should follow. The transverse rebar can be shape-driven or free form, with the same number of segments for all the bars in the set.
Select entire bar
- Click Concrete tab
 Reinforcement panel
 (Morphed).
- Click Modify | Place Rebar Distribution panel and select
(By Rebar).
- Specify a rebar type and a layout in the Properties palette.
- Click Modify | Place Rebar Target panel and select
 (Entire Bar).
- Click to select transverse rebar. The morphed set is shown as a preview.
- Click again to deselect or, click Finish to create the longitudinal set.
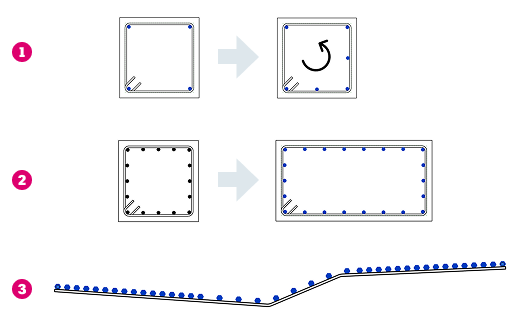
Bars are added to the corners of the transverse rebar. For Fixed Number, bars are added to the transverse segments in order. In the following example (1), the 2 bars are added on segment 1 and 2.
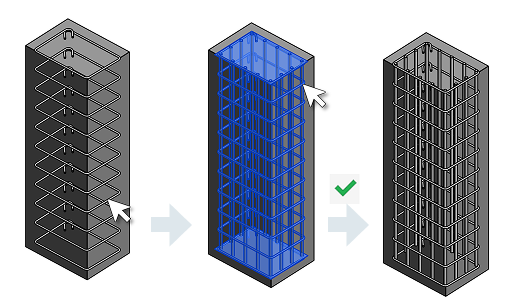
When using Maximum Spacing, the bars are distributed along each segment, such that the distance between them does not exceed the maximum spacing. In example (2), longitudinal bars in the column using Maximum Spacing 150 mm. The layout updates when changing the dimensions of the transverse rebar.
For the custom spacing layout, the bars are distributed according to the formula and bars are not placed at corners. Example (3), shows bars distributed such that 1/3 of the bars at the beginning and end of the set are distributed at 100 mm and the rest at 200 mm.
Select bar segment
- Click Concrete tab Reinforcement panel
(Morphed).
- Click Modify | Place Rebar Distribution panel and select
(By Rebar).
- Specify a rebar type and a layout in the Properties palette.
- Click Modify | Place Rebar Target panel and select
 (Bar Segment).
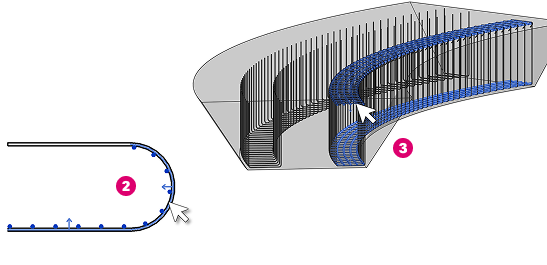
- Hover over the segment such that the arrow is pointing (1) to the expected side of the segment and click to select it. The bars will show as a preview. Select more segments, select again to remove, click Finish to create the morphed set.
- Optionally, during placement, you can edit the offset value in the Options panel. This will apply for each subsequent selected segment, similar to pick lines with offset. You can edit this later morphed sets by editing constraints.