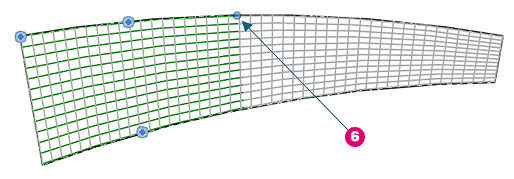
Like shape driven rebar, the morphed rebar driven distribution has handles which you can drag to adjust the range of the set or length of bars.
Drag to adjust the range of the set (1).
Drag to adjust the length of bars (2).
Editing constraints - ends of the set
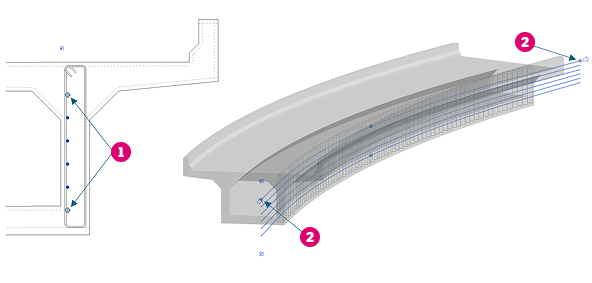
To make precise edits of the offset for each handle, select the set and go to Edit Constraints.
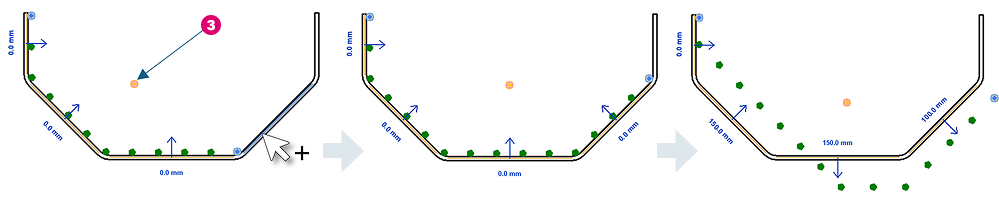
For the start / end of set handles, the offset is measured from the end of the defining segment. A positive value moves the set on the inside, along the segment, while a negative offset extends it out on a tangent. Here's an example of adding a positive offset to a morphed set defined along one segment of the transverse rebar and for one set defined across 2 segments.

And adding a negative offset to a morphed set defined along a curved transverse segment. The set extends on a tangent from the end.

Editing constraints - the definition handle
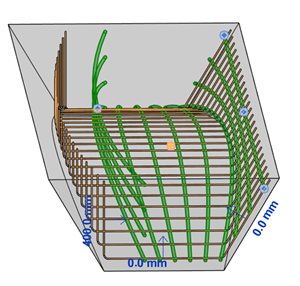
Click the Definition handle (3) to add or remove defining segments for the morphed rebar driven distribution. Input a negative value or click the direction arrow to flip the bars to the other side.
The example below, shows adding another segment to the definition and editing offsets for the segments.
You can edit the bar constraints in any view that makes sense.
Editing constraints - bar ends
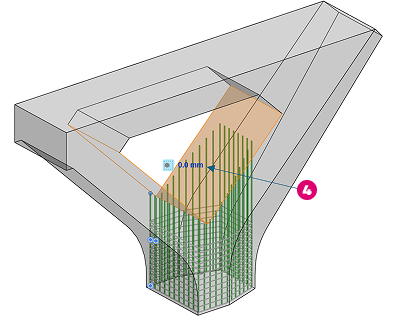
The morphed rebar distribution is automatically constrained to all concrete host faces toward which the bars are oriented. In the example below, the bar ends constrained automatically to the two faces highlighted in orange, at 0 mm cover (4).
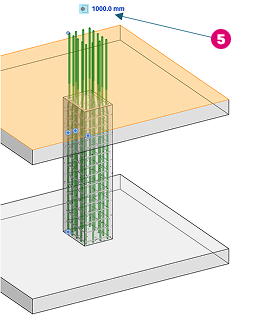
When modeling the longitudinal rebar in columns, you can select the start or end of bar handle and click the top of the slab to set it as the target. You can then input an offset (e.g., 1000 mm) (5) from that face to extend the bars outward.
When bars are spliced, the ends are controlled by the splice connection. Clicking a concrete face resets the handle and removes the splice constraint.