To control the visibility of datum elements in a scope box, you must associate each datum element with the scope box.
- Select the appropriate datum element (for example, a grid line).
- On the Properties palette, for Scope Box, select the desired scope box.
For example, for a project with 2 scope boxes named Scope Box 1 and Scope Box 2, select Scope Box 1 from the drop-down list.
- Click Apply.
The datum now displays only in views whose cutting plane intersects the selected scope box. If a view's cutting plane lies outside the scope, the associated datum does not display in the view.
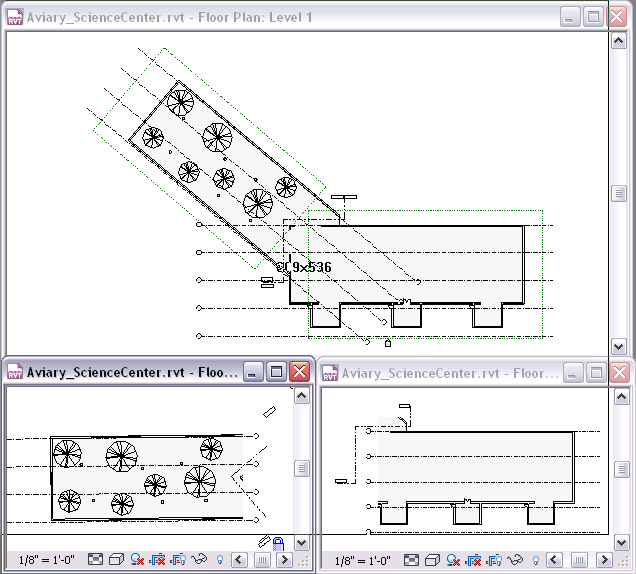
For example, in the following illustration, the top view shows scope boxes around the main building and the aviary wing. Scope Box 1 was applied to grid lines for the main building, and Scope Box 2 was applied to grid lines for the aviary wing. As a result, the dependent views (bottom) show only the grid lines that apply to each part of the building.
 Tip: If a section view's cutting plane intersects the scope box, the datums will appear in the section view.
Datums Resize with Scope Box
You can drag the extent of datums associated with scope boxes by selecting the scope box and dragging it; the associated datum moves with it.
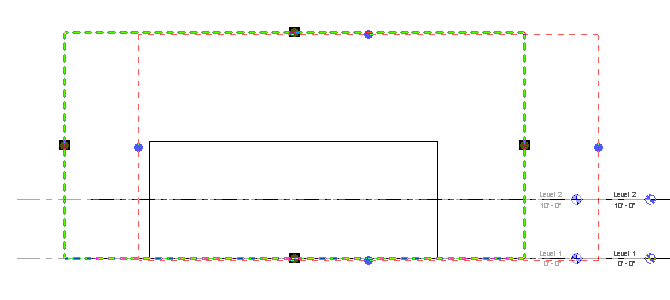
Dragged scope box moves level lines associated with it
To revert the extents of a level datum back to its default, select the level, right-click, and click Reset to 3D Extents. The model (3D) extent cannot be moved from the edge of a scope box to which it is assigned, but the 2D extent can be modified in a view. This option returns the extent to the default position: slightly offset to the outside the scope box.