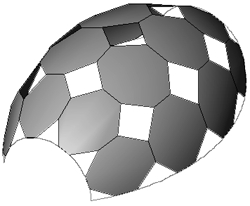
After a surface is divided, it can be patterned. Still part of the conceptual design phase of the project, this phase enables quick preview and editing of patterned surfaces. Unlike the UV Grids, the pattern lines are straight segments. A collection of patterns is available in the GUID-A764EA7A-FE26-469B-857C-F3A70812FC34.htm#WS1A9193826455F5FF219F8B8B1249CF2CB82-5A0A and can be applied onto a selected divided surface.
| Divided Surface | Applied Octagon Pattern |
|---|---|
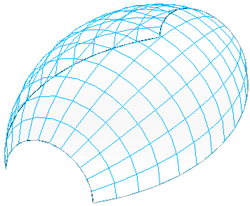 |
 |
Patterns are family-based and can be graphically previewed in the GUID-A764EA7A-FE26-469B-857C-F3A70812FC34.htm#WS1A9193826455F5FF219F8B8B1249CF2CB82-5A0A before being applied.
To pattern a surface
- Select a divided surface.
- In the GUID-A764EA7A-FE26-469B-857C-F3A70812FC34.htm#WS1A9193826455F5FF219F8B8B1249CF2CB82-5A0A, select the desired pattern.
Note that the divided surface is hidden when a pattern is applied. To display it again, click Modify | Divided Surface tab Surface Representation panel
![]() Surface and select the checkboxes for Surface, Nodes and UV Grids and Intersects.
Surface and select the checkboxes for Surface, Nodes and UV Grids and Intersects.
Patterns become part of the surface and, depending on their shape, will require a specific number of surface cells when applied. This is an important consideration when planning divisions and patterns for component design. See Pattern Component Families.
The patterns available are as follows.
| Pattern name | Required number of surface cells | Pattern layout |
|---|---|---|
|
No Pattern |
0 | Pattern is removed from the divided surface. |
|
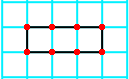
1/2 Step |
2 (1 x 2) |
 |
|
1/3 Step |
3 (1 x 3) |
 |
|
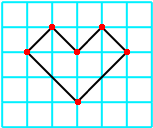
Arrows |
12 (3 x 4) |
 |
|
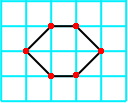
Hexagon |
6 (2 x 3) |
 |
|
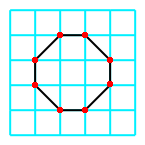
Octagon |
9 (3 x 3) |
 |
|
Octagon Rotate |
9 (3 x 3) |
|
|
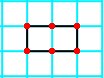
Rectangle |
1 (1 x 1) |
 |
|
Rectangle Checkerboard |
1 (1 x 1) |
|
|
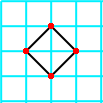
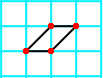
Rhomboid |
4 (2 x 2) |
 |
|
Rhomboid Checkerboard |
4 (2 x 2) |
|
|
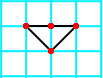
Triangle (bent) |
2 (1 x 2) |
 |
|
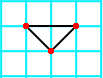
Triangle (flat) |
2 (1 x 2) |
 |
|
Triangle Checkerboard (bent) |
2 (1 x 2) |
|
|
Triangle Checkerboard (flat) |
2 (1 x 2) |
|
|
Triangle Step (bent) |
2 (1 x 2) |
|
|
Zig Zag |
2 (1 x 2) |
 |