- In the Project Browser, select the schedule name.
- On the Properties palette, for Formatting, click Edit.
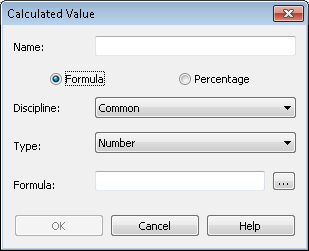
- In the Schedule Properties dialog, select a length (includes height fields), area, volume, angle, or Number field from the Fields list. Note: A Number field is a project parameter or calculated value that was created as a Number type. When you create a calculated value on the Fields tab of the Schedule Properties dialog, you see the Calculated Value dialog, where you can select the type. The following image shows this dialog with the Number type selected.
- Click Field Format.
The Format dialog opens with the Use project settings option selected by default, meaning that values display according to the units setting in the project.
- Clear the Use project settings option.
- If you selected a length, area, volume, or angle field:
- For Units, select an appropriate unit.
- For Rounding, select an appropriate value. If you select Custom, enter a value in the Rounding increment text box.
- If applicable, select a Unit symbol.
- If you selected a Number field, select one of the following formatting options:
- General. Displays values with up to 6 decimal places, and removes trailing zeros.
- Fixed. Allows you to specify rounding, and preserves trailing zeros.
- Percentage. Multiplies the value by 100, and inserts a percent sign (%) adjacent to the value.
- Click OK.