Use the Offset tool to copy or move a selected model line, detail line, wall, or beam a specified distance perpendicular to its length. You can apply the tool to single elements or to chains of elements belonging to the same family. You can specify the offset distance by dragging the selected elements or by entering a value.
The following restrictions apply to the Offset tool:
- You can offset lines in their own work planes only. For example, if you sketch a model line whose work plane is set to floor plan: level 1, you can offset that line only in the plan view plane.
- You cannot offset elements in a view perpendicular to their move plane.
To offset an element or a copy of an element
- Click Modify tab
 Modify panel
 (Offset).
 - On the Options Bar, select how you want to specify the offset distance:
If you want to… Then… drag the selected element the desired distance select Graphical. enter a value for the offset distance select Numerical. Enter a positive number in the Offset box. - If you want to create and offset copies of the selected element, select Copy on the Options Bar. (If you selected Graphical in the previous step, pressing Ctrl as you move the cursor has the same effect.)
- Select the element or chain to offset.
If you specified an offset distance using the Numerical option, a preview line displays at that distance from the highlighted elements on the side where the cursor is positioned, as shown.
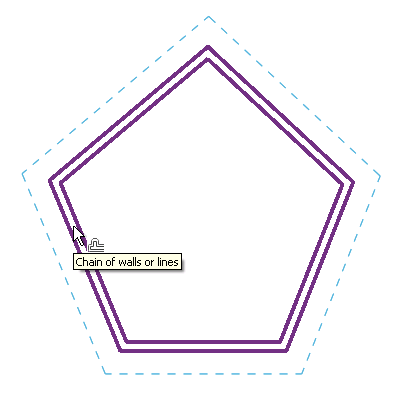
Cursor at outside face of the wall
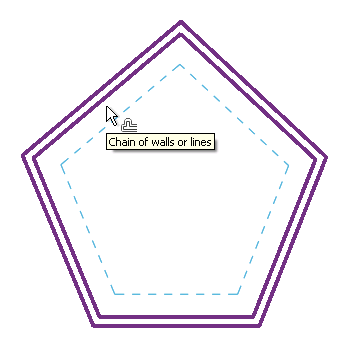
Cursor at inside face of the wall
- Move the cursor as necessary to display the preview line at the desired offset position, and then click to move the element or chain to that position or to place a copy there. Or, if you selected the Graphical option, click to select the highlighted element, and then drag it to the desired distance and click again. After you start the drag, a listening dimension displays, and you can enter a specific offset distance.