You can use conditional formatting in schedules to visually identify parameters that meet or do not meet design standards.
- In the Project Browser, select the schedule name.
- On the Properties palette, for Formatting, click Edit.
- For Field, select a field to format. Note: Ensure that you select the field to format in this dialog. If you select a new field in the Conditional Formatting dialog, you are not specifying a new condition but are adding an additional condition to the field selected in step 3.
- Click Conditional Format.
The Conditional Formatting dialog opens.
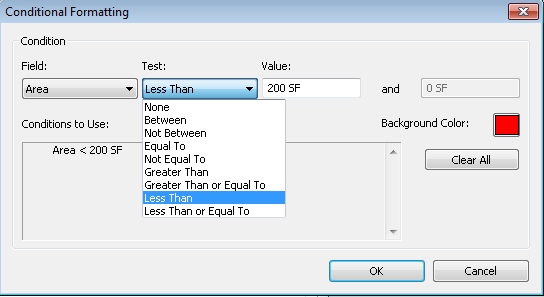
- For Field, the field that you selected in step 3 displays.
The Field drop-down contains the list of fields that are in the schedule.
- For Test, click the drop-down to select the formatting rule.
- Specify the conditional value(s).
The value fields become a single field for any condition other than Between or Not Between.
- For Background Color, click the color swatch.
The Color Selection dialog appears.
- Specify the background color for the cell and click OK.
- Optionally, to apply additional conditions to the field specified in step 3, select the Field drop-down. Then for Test, select the rule. This new condition applies to the field (row).
The Conditions to Use box displays the specified conditions. Press Clear All to delete the specified conditions if you want to start over and add new conditions.
In the Schedule, the affected cells display background color when conditions are met.
Note: For sheets, be sure to select Show conditional formatting on sheets on the Formatting tab of the Schedule Properties dialog. This applies conditional formatting to the sheets in the project and will print accordingly.