You can import Google Earth site images into your project.
To import a site image
- Under the ViewCube, click the current location value
 Set Location or click Manage tabProject Location panel
 Location.
 - If you are not already signed in, you are prompted to sign in to Autodesk Online Services. Enter the User ID and password associated with your Autodesk account.
- In the Location Weather and Site dialog, click the Location tab.
- Specify the project location.
- Use the following tools to adjust the map as needed:
- Pan. When you place the cursor over the map, the cursor changes to a hand, and you can drag the map to pan the view. You can also use these controls:
 (Pan up),
  (Pan down),
  (Pan left), and
  (Pan right).
 - Zoom. Click
 (Zoom in) or
  (Zoom out), or drag the zoom slider to adjust the zoom level.
 - Return to last result. Click
 if you have adjusted the map and want to restore the last search result.
 - Map views. Click a map view to select it:
- Map. Shows street map.
- Satellite. Shows satellite imagery.
- Terrain. Default view. Shows street map superimposed on topographical map.
- Pan. When you place the cursor over the map, the cursor changes to a hand, and you can drag the map to pan the view. You can also use these controls:
- Click Import Site Image.
In the Import Site Image dialog, the map displays in satellite mode and is zoomed to 50' scale to the center of the location.
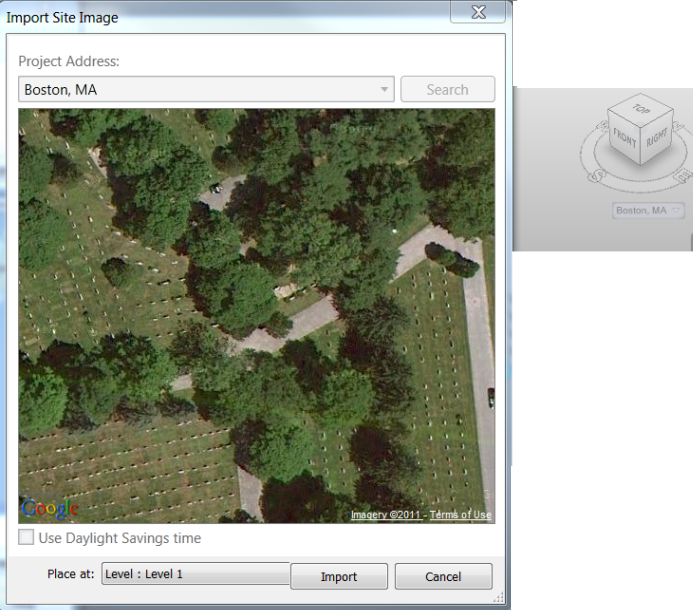
- Specify the level to import the image to.
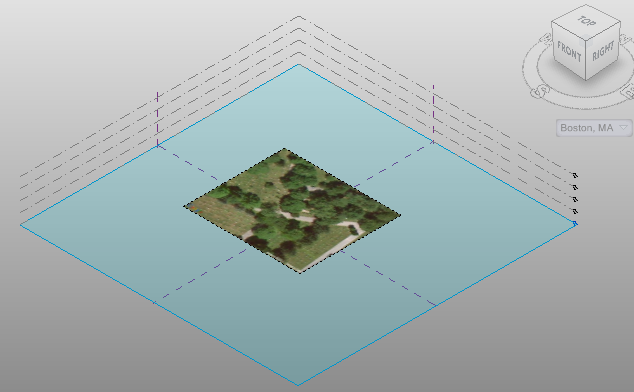
- Click Import. The image is imported to your project at the specified level and the top of the image is aligned with True North.