Note: If you need to override the visibility and graphic display for element categories, see Overriding Graphic Display of Element Categories and Specifying Element Category Visibility. You can also override the graphic display of individual elements using the Linework tool. See Changing the Line Style of Elements.
- Open the view in which you want to override the visibility or graphic display of individual elements.
- In the drawing area, right-click the element you want to override, and click Override Graphics in View
 By Element.
 The View-Specific Element Graphics dialog opens and displays the current visibility and graphic display settings for the element. You may need to expand the categories to view setting details.
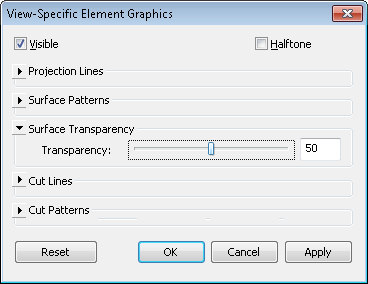
- In the View-Specific Element Graphics dialog, make your edits. Note: For annotation, import, and detail elements, only relevant override options display.
- Visible: show or hide the element in the view.
- Halftone: blend the line color of an element with the background color of the view. All line graphics (including fill patterns) and solid fills are drawn halftone when this option is selected. Halftone has no effect on material color in shaded views. See Halftone/Underlay.
- Projection Lines: edit the line weight, color, and pattern.
- Surface Patterns: edit visibility, color, and pattern.
- Surface Transparency: display only lines for the element and not surfaces. Use the Transparency slider to set the percentage of surface transparency.
- Cut Lines: edit the line weight, color, and pattern.
- Cut Patterns: edit visibility, color, and pattern.
After you edit any of the above, you can click Apply to keep the View-Specific Element Graphics dialog open and instantly see how the change affects the model.
- When finished, click OK.
Note: Individual element overrides are not stored in view templates.